
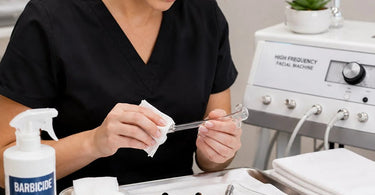
Your clients deserve this pro upgrade, and nothing says "I'm a true professional" quite like a high-frequency wand that gleams like a diamond and works like a dream. But between the glow and the glam, those hardworking glass electrodes can turn into little gunk magnets, collecting everything from skincare residue to, well, carbon—the ultimate party crasher. We're not just talking about aesthetics; a dirty electrode is the enemy of effective treatments and a red flag for hygiene, which in our world is about as welcome as a run in a fresh pair of stockings. So, grab your favorite beverage, put on your cleaning playlist, and let's dive into the best practices for sanitizing high-frequency glass electrodes, because your wand deserves the VIP treatment just as much as your clients do.
Now, we know what you're thinking: "It's just a glass tube, how much trouble can it be?" Oh, sweet summer child. The reality is that a sparkling clean electrode is the unsung hero of your facial services. It's not just about making a good impression (though that violet glow is undeniably cool); it's the key to delivering powerful, consistent results and maintaining the rigorous safety standards that keep you at the top of your game. Sure, we all love the satisfying buzz and the magical skin-clearing benefits, but without proper TLC, your beloved high-frequency machine can turn into a liability. Think of this guide as your ultimate cheat sheet—a fun, no-nonsense walkthrough to ensure every single use is as hygienic and effective as the first.
Why Your High-Frequency Wand Needs a Little TLC (And Why It's Non-Negotiable)
Let's be real: in the hustle of back-to-back appointments, cleaning your equipment can feel like that chore you keep meaning to do but somehow always forgets to get done. But ignoring the maintenance of your High Frequency Machines is like skipping your morning coffee—it's just not a good idea for anyone. The build-up that occurs isn't just an eyesore; it's a multi-headed beast that messes with your service quality, your reputation, and your wallet.
First up, effectiveness takes a nosedive. Carbon and product residue act as insulators, literally blocking the electrical current from transferring efficiently to your client's skin . That means less oxygen, less bacterial-killing action, and a treatment that's about as powerful as a gentle breeze. Secondly, it's a hygiene nightmare. A dirty electrode is a superhighway for bacteria and leftover skincare products to travel from one client to the next . In a post-pandemic world, that's a hard pass. Finally, your budget takes a hit. High-quality electrodes aren't cheap. Neglecting them drastically shortens their lifespan, leading to frequent replacements and a hit to your bottom line .
Let's face it, this isn't just about being clean—it's about being a professional. Your clients trust you, and their safety is non-negotiable. And if you're not sure where to start or what your state requires, checking with your state's Board of Cosmetology is a great first step to staying compliant and avoiding any unfortunate surprises .
Your Step-by-Step Guide to a Sanitized High-Frequency Wand
Now, let's get down to the nitty-gritty. This isn't some long, drawn-out ritual; it's a quick and efficient routine that will become second nature. And like all good habits, it's all about consistency.
The Daily Ritual: After Every. Single. Client.
This is the foundation of your Professional Cleaners & Disinfectants game. It's fast, it's easy, and it's a non-negotiable part of your service flow.
- Safety First (Always): Turn the unit off and unplug it from the wall. We want you to be the star of your salon, not a cautionary tale. This is a non-negotiable safety step .
- Detach with Care: Gently remove the glass electrode from the handle. Be mindful of the connection; a little patience goes a long way.
- The Alcohol Wipe-Down: This is your golden ticket. Take a fresh, lint-free cloth or gauze pad and saturate it with 70% isopropyl alcohol. Gently wipe the entire glass surface, especially the tip and sides where gunk loves to hide . Pro-Tip: Never, ever submerge your electrode in liquid or spray it directly. Water or cleaner can get into the seal where the glass meets the metal, causing corrosion or a short circuit .
- Air Dry Completely: Place the electrode on a clean paper towel and let it air dry. This is a crucial step—moisture is a breeding ground for bacteria and can cause electrical issues .
The Weekly Deep Clean: For When It Needs a Little Extra Love
Once a week, take a few extra minutes to give your electrodes a thorough inspection and a spa day of their own. It's like a weekly check-up to catch any issues before they become problems.
- Inspect Thoroughly: Hold the electrode up to the light and look for any tiny hairline cracks, chips, or scratches. A damaged electrode can shatter during use or create uncomfortable 'hot spots' on your client's skin . If you spot damage, it's time to find a replacement in our Bulbs & Replacement Parts section.
- The Deep Scrub: For stubborn carbon that the alcohol wipe-down can't touch, some pros use a mild paste of baking soda and water to gently polish the glass. Apply a small amount to a soft cloth and rub in a circular motion. Rinse it quickly with water, then thoroughly wipe it down with alcohol to remove any residue .
- Handle and Cable Check: Don't forget the wand handle! Wipe it down with a surface disinfectant and check the power cable for any fraying or damage. A clean, well-maintained unit looks more professional and is safer to use .
The Ultimate Clean: The Barbicide Bath (For Some Tools)
Now, for the big guns. When it comes to a hospital-grade disinfectant that's the gold standard in the industry, Barbicide is the name on everyone's lips. For over 75 years, it has been the go-to for professionals who need to kill germs and keep their tools safe .
You can safely immerse your metal and non-porous plastic implements in a properly mixed Barbicide solution for the required contact time. For a concentrate like Barbicide, the recommended mix is 0.5 ounces per gallon of water and tools should be soaked for a full 10 minutes for complete disinfection . Its anti-rust formula is a game-changer, protecting your expensive shears and clippers from damage . And let's not forget its trusty sidekick, Clippercide, a quick spray that's perfect for disinfecting and lubricating clipper blades between clients, keeping them cool and running smoothly .
Just remember, with all disinfectants, it's crucial to read and follow the label instructions. And never leave tools soaking in the solution longer than the required time, as this can potentially cause corrosion over time .
What NOT to Do: The Hall of Shame
We've covered the right way, but knowing what not to do is just as important. Here are some common pitfalls to avoid like the plague.
- Don't Use Harsh Chemicals: Bleach, ammonia-based cleaners, abrasive sprays, or nail polish remover are a hard NO. These can permanently etch or cloud the glass and release harmful fumes. Stick to isopropyl alcohol.
- Don't Soak or Dishwash: We said it before, and we'll say it again: your electrode is not a water bottle or a salad bowl. Submerging it is a one-way ticket to needing a replacement .
- Don't Clean While Plugged In: This should be common sense, but the temptation to save a second might be real. Resist it. Unplugging is your best friend. As we always say, you want to be a glowing esthetician, not a human sparkler.
Pro-Tips for a Long and Sparkly Life
Beyond the cleaning, a little bit of prevention goes a long way. Here are some final pro-tips to keep your high-frequency electrodes in tip-top shape.
- Pre-Treatment Prep is Key: The cleaner the skin you're working on, the less gunk your electrode will accumulate. Ensure your client's skin is thoroughly cleansed and completely dry before you start your high-frequency treatment. Oils and creams are just carbon fuel .
- Use a Barrier for Sensitive Work: For clients with active acne or very sensitive skin, consider placing a single layer of dry, sterile gauze over the tip of the electrode. This creates an extra hygienic barrier and still allows the current to pass through .
- Store with Care: The number one cause of electrode death isn't age, it's gravity meeting a hard floor. Always store your electrodes in a protective case to prevent them from getting knocked around or dropped .
- Know When to Retire: If an electrode is excessively scratched, consistently difficult to clean, or just doesn't have that 'oomph' anymore, it's time to move on. You can find a full selection of professional-grade replacement electrodes and accessories in our Bulbs & Replacement Parts section.
And there you have it! Keeping your high-frequency electrodes squeaky clean is a simple but mighty practice that ensures your treatments are effective, your clients are safe, and your equipment lasts for years. It's a small habit with huge payoffs. So go forth, banish that carbon build-up, and let your wand's sparkle be as legendary as your results. Now, who's ready to clean? ...Anyone? Let's make it a party! A very clean, very safe, very professional party.
