Small changes make a big difference... especially when it comes to the delicate eye area! Mastering the perfect sequence for brow lamination and hybrid tint isn't just about creating fluffy, fabulous brows—it's about keeping your clients comfortable and coming back for more. Get the order wrong, and you might have someone with red, irritated skin who swears off brow treatments forever. Get it right, and you've got a client for life who will happily refer all their friends to your magical brow powers. Let's break down the step-by-step process that keeps sensitivity at bay and results on point.
First things first: let's talk about why sequencing matters. The chemicals in lamination solutions can make the skin more vulnerable, while tint products contain pigments and developers that can cause additional irritation. When you perform these treatments back-to-back, the order of operations becomes crucial for minimizing potential reactions. It's like making a cake—you can't frost it before it's baked unless you want a hot mess (literally!).
Step 1: The All-Important Consultation
Before you even think about touching those brows, have a thorough consultation. Ask about allergies, sensitive skin, previous reactions to hair color, and any medications like retinoids that might make skin more sensitive. This is your first line of defense against sensitivity issues. A quick patch test with both the lamination solution and brow tint might feel like an extra step, but it's better than dealing with an angry client later!
Step 2: Prep the Canvas
Start with perfectly clean brows. Use an alcohol-based cleanser or brow cleanser to remove any oils, makeup, or skincare products. This ensures the lamination solution can penetrate properly. Avoid any harsh scrubbing—gentle is the name of the game. For extra sensitive clients, you might even apply a thin barrier of petroleum jelly around the brow area to protect the surrounding skin.
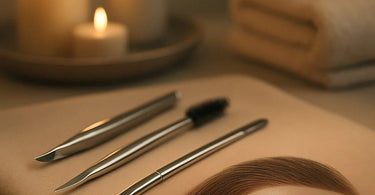
Step 3: The Lamination Process
Here's where the magic begins! Apply your step 1 lamination solution according to the manufacturer's instructions. Time it carefully—overprocessing is a fast track to irritation. After processing, thoroughly remove the solution with damp cotton pads or sponges. Then apply the neutralizing solution (step 2), again timing it perfectly. Once complete, remove thoroughly. This two-step process restructures the brow hairs but can leave the skin vulnerable, which is why we don't jump straight to tint!
Step 4: The Soothing Intermission
This is the secret weapon most technicians skip! After rinsing off the neutralizer, apply a calming serum or aloe vera gel to the brow area. Let it sit for 5-10 minutes. This cooling break allows the skin to recover slightly from the chemical processing before we introduce more products. Think of it as a little spa vacation for their brow skin before the next step.
Step 5: Hybrid Tint Application
Now that the skin has had a moment to breathe, it's time for color! Mix your hybrid tint according to instructions—remember that hybrid formulas typically combine the longevity of traditional tint with the natural look of henna. Apply carefully to the brows, avoiding the skin as much as possible. The conditioning properties in many hybrid tints can actually help soothe the area after lamination. Time the development based on desired color intensity.
Step 6: The Grand Finale: Soothing & Setting
Once you've removed the tint, finish with a nourishing brow serum or oil. Products containing ingredients like argan oil, vitamin E, or chamomile can help calm any potential redness and keep the brow hairs healthy. Finally, brush them into place and admire your work! You've just created gorgeous, fluffy brows without turning your client's skin into a red, angry mess.
Pro Tips for Extra-Sensitive Clients
For clients who are particularly sensitive or have experienced reactions in the past, consider these additional steps: Use a cooling mask for 5 minutes after the soothing intermission but before tint application. Opt for a brow henna instead of traditional tint, as it tends to be more natural and less irritating. Always keep a calming facial spray on hand during the service for an instant soothing effect.
Aftercare is Everything
Don't let your beautiful work go to waste! Educate your clients on proper aftercare. Recommend they avoid exfoliating products, excessive heat, and swimming for 24-48 hours. Suggest a good brow serum to maintain their health and shape. Happy brows mean happy clients who will rebook—especially when you've mastered the art of comfortable, stunning brow services!
Remember, every client's skin is different, so always be prepared to adjust your technique. With this sequencing approach, you'll minimize sensitivity issues while maximizing those gorgeous brow results. Now go forth and create some amazing brows—without the drama!