Pros rely on this one truth: a masterful haircut isn't just about skill, it's about wielding the right tool for the right job. You wouldn't use a chainsaw for a topiary, and you shouldn't use a trimmer for bulk cutting. In the bustling world of barbering and salon services, knowing the distinct roles of your clippers and trimmers is the bedrock of precision. But here's the kicker – even the most expensive professional-grade tools are worthless if they're dull, dirty, and crying out for maintenance. A neglected clipper doesn't just deliver a bad haircut; it can turn a loyal client's experience into a memorable nightmare (and not the good kind). This guide is your blueprint for understanding your tools and, more importantly, keeping them in championship form so every cut is crisp, every line is sharp, and your chair is always the one in demand.
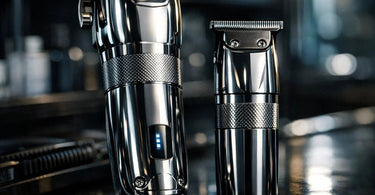
Think of your clipper as the workhorse and your trimmer as the artist. Your clipper is built for power and bulk, designed to cut longer hair and shape the foundation of a style. It's the tool you grab to tackle a full head of hair, create even bases, and work through thick, coarse textures with its high-torque motor. It comes with those handy guard combs (usually ranging from 1/16" to 1.5") that let you dial in specific lengths for a uniform cut. Your trimmer, on the other hand, is the finesse player. It's your detailing wizard, engineered for precision work closer to the skin. This is the tool you use to define hairlines, clean up necklines and sideburns, shape beards, and create those sharp, Instagram-worthy edges. Trying to use a trimmer for bulk cutting is like painting a wall with a nail polish brush – inefficient and frustrating. Trying to use a clipper for detail work is like trying to sculpt with a sledgehammer – you'll just make a mess. The professional secret? You need both in your arsenal to execute everything from a classic taper to a skin-fade masterpiece.
The Telltale Signs Your Tools Are Screaming for Help
Your tools talk to you. Well, they don't literally speak (that would be weird), but they send very clear distress signals. Ignoring these signs is a one-way ticket to Bad Haircut City, population: you and your disappointed client. Listen up for these common cries for help:
Is your clipper or trimmer struggling to get through hair, leaving behind an uneven, jagged cut instead of a clean one? That's a red flag. Are you hearing new, unpleasant noises? A loud, sharp screech or a concerning rattling sound means something is out of alignment or desperately needs lubrication. Does the power cut in and out while you're mid-fade? That's a serious sign of motor or electrical issues. Does the adjustment lever feel loose or wobbly? Are the blades themselves getting unusually hot to the touch?. The most obvious sign of all: the blades simply stop cutting hair effectively. If you're nodding along to any of these, it's time for an intervention. But a true pro doesn't wait for the breakdown; they prevent it with a solid daily routine.
Your Daily "Quick-Clean" Routine: The 3-Step Savior
This is the non-negotiable, between-every-client ritual. It takes two minutes but adds years to your tool's life. Think of it as brushing your teeth, but for your clippers.
Step 1: Brush Off the Evidence. Hair buildup is public enemy #1 for your blades. Those tiny hair fragments clog the mechanism, cause friction, and will dull your blades faster than you can say "next appointment." After every single cut, use the small brush that came with your tool or invest in a larger, more effective fade brush to thoroughly remove all hair from between the teeth of the blade. A clean toothbrush from your janitorial supplies can work in a pinch, too!
Step 2: Cool & Disinfect with Spray. Friction from cutting generates heat. Spraying your blades with a dedicated cooling spray does three brilliant things at once: it dissipates heat, disinfects the surface, and provides light lubrication. Products like Andis Cool Care Plus are classic 5-in-1 solutions. Simply turn the clipper on, hold the spray a few inches away, give it a short blast, and let the tool run for a few seconds to distribute the solution. Wipe off any excess. This is your best friend for maintaining hygiene between clients without a full teardown.
Step 3: The Magical Elixir – Oil Your Blades. This is the single most important thing you can do to prevent wear and tear. A dry clipper is a dying clipper. After brushing, apply clipper oil. Don't have the official stuff? A lightweight oil like standard vegetable oil can work as a temporary substitute, but avoid heavy oils like motor oil or grease at all costs. Use the "five-point" method: apply three small drops along the top row of the blade teeth, and one drop at each end of the blade rail. Turn the clipper on and hold it sideways for 5-10 seconds to let the oil work its way through the entire blade system. Finally, wipe off any excess oil with a clean cloth from your professional towel collection. Do this after every cleaning and before you store your tools for the day.
The Weekly "Deep Dive": A Spa Day for Your Clippers
While the quick-clean handles the surface, your tools need a deeper refresh once a week (or every two days if you're super busy). This is where you break out the heavy-duty sanitizers and give the blades a proper bath.
The Gold Standard: Barbicide. This iconic blue liquid is the industry standard for a reason. It's a hospital-grade disinfectant effective against bacteria, fungi, and viruses. For your detachable blades, mix ¼ cup of Barbicide concentrate with 4 cups of water in a dedicated disinfecting jar. Unscrew the blades from your clipper, submerge them completely, and let them soak for the manufacturer's recommended time (usually up to 10 minutes). Remove, rinse thoroughly with water, and dry them completely – and I mean BONE DRY – before reassembling. Any moisture left behind will cause rust, which is a death sentence for blades.
Effective Alternatives. Don't have Barbicide? A bowl of 70% isopropyl alcohol works wonderfully for a 3-minute soak. In a real pinch, you can even use distilled white vinegar for up to 60 seconds. The key steps are always the same: remove blades, soak, rinse, and dry completely. Never, ever submerge the main body of your cordless clipper or trimmer in liquid! And a word to the wise: using plain water to clean your blades is a surefire way to ruin them with rust.
Choosing Your Champions: What to Look For
Maintenance is easier when you start with quality tools designed for the professional grind. When building your kit, look for reputable brands known for durability and performance, like those from Wahl or Andis. Consider cordless models for ultimate freedom of movement, but ensure they have good battery life. For clippers, prioritize a powerful motor and a sturdy, adjustable blade lever. For trimmers, look for a slim, ergonomic design that allows for precise control and a blade that gets ultra-close for crisp detailing. Remember, these are investments in your craft and your business. Protecting that investment with simple, consistent care ensures they pay you back with flawless performance for years.
Mastering your tools is what separates a good stylist from a great one. It's not just about the cut you make today, but about being ready for the next client, and the one after that, with tools that perform as reliably as your own hands. By embracing the distinct roles of your clipper and trimmer and committing to their care, you're not just maintaining equipment; you're upholding a standard of excellence. You're ensuring every person who sits in your chair leaves not just looking better, but feeling the confidence that comes from a perfect, professional service. Now, go give those tools some love – your next masterpiece awaits.