Build trust with every result by mastering the art of the almond shape, because let's be real: there is nothing more frustrating than spending an hour on a gorgeous set of nails only to realize one hand looks like elegant almonds and the other looks like tiny footballs. We have all been there, staring at our work under the magnifying lights, wondering where it all went wrong. But fear you fabulous professionals, because symmetry is not some mystical gift bestowed upon a select few at birth. It is a skill, and like any skill in the professional nail care world, it can be learned, perfected, and applied to every single client that sits in your manicure station. Whether your client has fingers that are short and stout or long and lean, you can deliver a perfectly symmetrical almond shape every single time without breaking a sweat or losing your mind.
This guide is your new best friend. We are going to break down the specific anatomy of different finger types and give you the exact blueprints you need to modify your technique. By the time you finish reading, you will be able to look at a hand and know instantly how to file, shape, and perfect that almond silhouette. And because we at Pure Spa Direct love working smart, we are going to talk about the tools that make this whole process easier, faster, and way more fun. Let's dive in and get those nails looking sharp, literally and figuratively.
Why the Almond Shape is Your Secret Weapon for Happy Clients
Before we get into the nitty gritty of finger anatomy, let's take a moment to appreciate why the almond shape is such a heavy hitter in the nail industry. This shape is basically the little black dress of the nail world. It is classy, it elongates the fingers (which every single client loves), and it makes hands look slimmer and more graceful. Unlike a stiletto that can be a little too stabby for everyday life, the almond offers that perfect in-between spot of drama and wearability. It allows for so much creativity, too. You can throw on some nail art rhinestones, do a classic French, or just rock a gorgeous professional gel polish finish, and the shape just elevates everything. Plus, when done correctly, there are no sharp corners to catch on leggings or cardigans, which means fewer angry texts from clients about broken nails the next day. It is the shape that keeps on giving, and giving your clients a reason to come back to you for maintenance is the whole point of this beautiful business.
Decoding Finger Types: A Roadmap to Symmetrical Almonds
Here is the secret that separates the good nail techs from the great ones: a one-size-fits-all approach to nail shaping is a lie. If you try to shape an almond nail exactly the same way on a client with short, wide fingers as you do on a client with long, bony fingers, you are going to end up with a mess. The goal is to work with the natural anatomy of the hand, not against it. You want to create optical illusions that make the fingers look their absolute best. So, let's break down the four main finger types you will see in your chair and how to achieve that perfect, symmetrical almond on each one.
Type 1: Short Fingers with Wide Nail Beds (The Length-Challenged)
Okay, first up. We have the client who feels like their fingers are on the shorter, stubbier side. Their nail beds are probably wide and maybe a little flat. Their immediate instinct might be to ask for a super long, super pointy nail to add length, but hold on. Pump the brakes. If you go too long and too narrow right out of the gate, the nail can actually look overwhelming and disproportionate, like little wings attached to their fingertips. It will look less like an elegant almond and more like a weapon. The goal here is gradual elongation. We want to create a soft, elongated line that tricks the eye without screaming for attention. For these clients, a medium length almond is your best bet. Do not go extreme. You want the free edge to be about one and a half times the length of the nail bed to start. Then, when you file, keep the taper gentle. Instead of bringing the sides in at a harsh angle, use a smoother, more gradual curve toward the center. This creates a slimming effect without making the nail look pinched at the cuticle. Also, pay attention to your product. Using a good nail treatment to strengthen the natural nail underneath is always a plus because it gives you a healthier base to build on. And for the love of all that is holy, do not forget to use a cuticle oil during your prep. It pushes back the proximal fold and gives you a little more canvas to work with, which is crucial on those shorter nail beds.
Type 2: Long, Slender Fingers with Narrow Beds (The Lucky Ones)
Then you get the client who walks in with hands that look like a piano player's dream. They have long, slender fingers and naturally narrow nail beds. They hit the genetic lottery. However, do not just zone out and slap any old shape on there. With this finger type, you can actually go for the full, dramatic almond experience. The classic, more tapered almond shape looks absolutely stunning here because it follows the natural line of the finger and enhances that elegant aesthetic. You have a lot of room to play with length. If they want long nails, give them long nails. The symmetrical peak can be more defined and sharper because there is plenty of finger length to balance it out. The biggest risk with this finger type is actually making the nail look too skinny. If you over-file the sides, you can end up with a nail that looks fragile and unstable. Always maintain a strong C-curve. When you are building the extension with your acrylic nail supplies or gel, make sure the apex is nice and high to give structural support. You want the almond to look purposeful and chic, not like it is about to snap off in a light breeze.
Type 3: Large Hands with Prominent Knuckles and Joints
This is a client that a lot of newer techs get nervous about, but honestly, they are my favorite to work on. We are talking about clients with larger bone structure, maybe more pronounced knuckles, or even arthritis that changes the shape of the finger joints. The almond shape is actually a hero here because it draws the eye down the length of the finger and away from the width of the joints. It streamlines the whole hand. For these hands, you need to avoid shapes that are too bulky or too square, which would just emphasize the width at the joints. You also want to avoid an almond that is too short. A short almond on a large hand can look like an accident. You need a solid medium-to-long length to create the balancing effect. The filing technique should focus on a clean, strong line that tapers confidently but not aggressively. Symmetry is extra crucial here because any crookedness in the nail shape will be immediately accentuated by the strong horizontal lines of the knuckles. Take your time and check your work from multiple angles. Use a precision nail brush to make sure your polish lines are crisp. And always, always make sure your client is comfortable. Maybe offer them a heated table topper or a little extra hand massage with some massage lotion to loosen up those joints. A happy, relaxed hand is much easier to work on than a tense, stiff one.
Type 4: Tapered Fingers with Large Pads (The Cone-Heads)
Last but not least, we have the fingers that are narrow at the base but get wider at the fingertip, often with very fleshy, rounded finger pads. Sometimes these are called \"fleshy\" fingertips. If you try to apply a standard almond shape here, the nail extension often looks like it is \"floating\" above the finger pad because the pad is too wide to support the taper. You need a modified approach. I call this the \"soft almond\" or the \"almond-oval hybrid.\" Instead of pinching the sides in tightly, keep the sides slightly straighter for longer as you go down the nail, only curving them in toward the tip at the very last second. This creates a silhouette that looks almond-like but sits flush against that wider fingertip. Do not try to fight the flesh. Work with it. If you pinch too hard, the nail will look narrow while the finger bulges out underneath, which is not a cute look. By keeping the shape slightly wider, you create a seamlessness that looks like the nail is a natural extension of the finger. This technique requires a steady hand and a lot of looking at the nail from the side profile as well as the top down.
The Step-by-Step Filing Blueprint for Flawless Symmetry
Alright, now that you know what to do for each finger type, let us talk about how to do it. The actual physical technique of filing is where the magic happens. And by magic, I mean avoiding lopsided disasters. First, always start with the extension already built. Whether you are using tips, forms, or just filing natural nails, make sure the base product is even. Then, you are going to use a medium grit file, like a 180 grit. Do not use a super rough file; you want control, not demolition. Step one is to establish your center line. Take a fine-liner brush or a dotting tool and draw a faint vertical line down the center of the nail from the cuticle to the free edge. This is your north star. It will tell you if you are veering off track. Now, start filing the right side of the nail. Hold the file at a 45-degree angle and pull it from the side wall toward the center point of the tip. Do this three or four times. Then, immediately switch to the left side and do the exact same number of strokes. Check your center line. Is the tip still pointing straight ahead, or is it listing to the left like a drunk sailor? If it is crooked, correct it immediately by filing the side that has too much length. Do not try to \"balance it out\" later. Fix it now. Once the basic taper is set, you refine the tip. An almond tip should not be sharp. You should gently round off the very peak of the point. Think soft peak, not stabby stiletto. Finally, seal those edges. Use a buffer to gently run along the underside of the free edge to smooth out any rough spots that could catch on fabric. Consistency is queen here. If you do five strokes on one finger, do five on the next. Muscle memory is real, so slow down and be intentional.
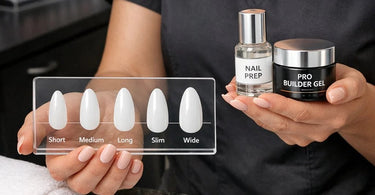
Must-Have Tools for Almond Perfection (Shop at Pure Spa Direct!)
Let us talk gear. You can have the steadiest hands in the state, but if you are using a beat-up file from 2015 or trying to see with crappy salon lighting, you are fighting a losing battle. At Pure Spa Direct, we carry the heavy artillery. First, you need a variety of high-quality nail files and buffers. Do not cheap out here. Good files file smoothly and reduce dust. Second, good lighting is non-negotiable. If you cannot see the symmetry, you cannot achieve it. Check out our selection of LED bright lamps to banish those shadows for good. Third, for those clients who need a little extra help with the strength of their natural nail before shaping, we have a killer selection of premium nail polish and treatments that act as a protective shield. And do not sleep on the value of a good hygienic table paper to keep your station clean and professional while you work. A messy station leads to a messy mind, and a messy mind leads to asymmetrical nails. You have been warned.
Avoiding the Most Common Almond-Shaping Disasters
Even the best of us make mistakes. But we learn from them, and we laugh about them later (usually over a very strong cup of coffee). Let's run down the classic blunders so you can skip the learning curve. Disaster number one: The \"Squashed Almond.\" This is when the sides are filed in so aggressively that the nail looks like it is pinched in a vice, creating a flat, wide tip instead of a tapered one. Solution: back off the pressure, slow down, and look at the silhouette. Disaster number two: The \"Hook.\" This is when the nail tip curves downward like a claw instead of extending straight out. This usually happens because the apex is placed too far forward or the form was applied poorly. If you are seeing this, you might need to revisit your acrylic application technique. Disaster number three: The \"Sidewinder.\" This is when the entire nail shape veers off to one side. This almost always happens because you are looking at the nail from a weird angle or you are holding the file crooked. Always bring the nail up to eye level and check that center line. Mirror checks are your friend. Hold the hand up and look at it in a mirror; it instantly shows you imbalances that your eye might have gotten used to.
From Shape to Shine: The Finishing Touches
You have filed, you have buffed, and you are staring at two perfectly symmetrical almond masterpieces. Do not blow it now by rushing the cleanup and polish. This is where you separate \"good\" from \"Instagram-worthy.\" After your final shaping, use a stiff brush to remove all the dust from the nail folds. Then, go in with a dehydrator and primer to make sure your color sticks. When you apply your gel polish or premium nail polish, use thin, even coats. Capping the free edge is non-negotiable on an almond tip because the point is a natural breaking point. Seal it with a top coat to lock everything in. Finally, finish with a high-quality cuticle oil. Not only does it nourish the skin and smell amazing, but it acts as the perfect finishing gloss, making the whole manicure look like a million bucks. Massage it in with a little flair, check for any stickiness, and then watch your client's face light up when they look at their hands. That feeling right there? That is why you do this job.
So there you have it, the complete, no-fluff guide to conquering the symmetrical almond shape on every single finger type that walks through your door. Remember, practice does not make perfect; perfect practice makes perfect. Use your tools, trust your eyes, and do not be afraid to step back and look at the big picture. You have the skills, you have the knowledge, and now you have the game plan. Now go out there and make those almonds so symmetrical, they will make your clients' jaws drop. And when they ask how you got so good, just smile and tell them you learned it from the best distributor in the biz. Happy shaping, you beautiful nail geniuses!