
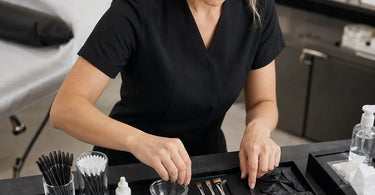
Start every project with confidence... and a perfectly arched brow, am I right? Let's be real, in our world of lash and brow enhancement services, the brow game is everything. Whether you are a seasoned esthetician or just adding tinting to your menu, walking into a treatment room without a fully-stocked kit is a recipe for disaster. You're not just making brows darker; you are sculpting faces, boosting confidence, and frankly, performing a little bit of magic. But let's be honest, nothing kills the vibe (or your profit margin) faster than realizing you've run out of a crucial supply right when a client is in the chair. So, grab your favorite cup of coffee, and let's build the ultimate brow tinting supply kit that will have your clients rebooking before the tint even sets. This guide will help you create the Brow Tinting Kit that works best for you and your clients. This kit isn't just about tools; it's about delivering a luxury experience and streamlining your workflow.
Think of a brow tinting kit like a painter's palette. You need the right colors, brushes, and, well, things you don't want to get on the canvas (or in this case, the client's skin!). We are going to break down all the essentials, from the heavy hitters to the unsung heroes, to build a kit that is both efficient and enviable. And since we are all about smart shopping here at Pure Spa Direct, we will point you to the best brands that are built for high-volume use, so you can stop wasting time and start turning clients. We will cover everything from the Professional Brow Tint itself to the tools that make the application flawless.
The Holy Grail: Picking the Perfect Brow Dye
Alright, the first and most obvious piece of the puzzle is the tint itself. This isn't a one-size-fits-all situation. Just like you wouldn't use a facial steamer on a client with broken capillaries without caution, you can't just slap any old dye on a brow. We need range and quality. For a professional kit, you have to carry a variety of shades to match different hair colors and skin tones. Brands like Refectocil Original are the industry gold standard for a reason. Their cream-based dyes are incredibly pigmented and offer superior control. They have a shade for everyone, from natural blondes to those with jet-black hair .
Don't stop at just one brand, though! Intensive Tint is another powerhouse that professionals swear by for its long-lasting formula and vibrant color payoff . For a gentle, cream-based alternative that offers high versatility, you should definitely check out Berrywell Cream Dye. And let's not forget the rising star, Le Marque Henna, if you want to offer a more natural, plant-based alternative to your clients. Having a selection from these top brands ensures you can handle any client request and even mix custom shades. This is where you can get creative and truly level up your service.
The Chemistry Set: Developers and Activators
You cannot have a brow tint without the magical potion that makes it work. The developer (or oxidant) is what kicks off the chemical reaction that allows the dye to bond to the hair. In our professional lash and brow tint for spas and salons, this step is non-negotiable. Most professional dyes require a 3% (10 volume) hydrogen peroxide cream or liquid. The 3% solution is crucial because it is the safest strength for the delicate eye area, minimizing the risk of irritation .
Here is the kicker: different brands have different mix ratios. Some are a 1:1 ratio, while others might require a specific amount of drops. Always, always, always read the instructions. Your kit should have a high-quality developer, like the ones designed to go with Refectocil and Intensive Tint, to ensure optimal performance. Using a generic developer with a specific brand can lead to uneven color, short-lasting results, or even a reaction. Trust the pros on this one. I remember once my developer was running low, and I thought I could just use a different brand. It was a disaster. The tint didn't take at all, and I looked like a rookie in front of the client. Learn from my mistakes, friends!
Tools of the Trade: Applicators and Brushes
Now for the fun stuff! You can have the best tint in the world, but if you're applying it with a toothpick, your results will be... well, interesting. Precision is the name of the game. You need a few different tools in your arsenal. First up, Professional Cotton Products and Applicators and Spatulas are the unsung heroes. Cotton swabs (Q-tips) are your best friend for cleanup and for applying barrier cream. Micro-spatulas are essential for mixing the tint and developer to a smooth, lump-free paste, and precision brushes, like angled eyeliner brushes or fine-tipped brushes, allow you to paint the tint exactly where it needs to go and nowhere else .
Don't forget spoolies! These little mascara-wand-like brushes are used to brush the tint through the hairs, ensuring every strand is coated evenly from root to tip. You also need a non-porous mixing bowl. Ceramic, glass, or plastic bowls work best because they don't absorb the tint and are easy to clean . Having a dedicated set of these tools that are only used for tinting will keep them in pristine condition and ensure your work stays hygienic.
The Shield: Protecting That Perfect Skin
This is where we save our clients from looking like they have permanent marker drawn on their faces. Protecting the skin around the brow is not optional; it's a sacred duty. The superhero of this step is plain old petroleum jelly (Vaseline) or a dedicated barrier cream . Applying a thin layer around the entire perimeter of the brow creates a barrier that prevents the tint from staining the skin. It ensures a crisp, clean line and makes cleanup a breeze.
Pro tip: A lot of pros use a small, flat brush or a clean cotton swab dipped in petroleum jelly to create that perfect outline. It's like creating a little moat around the castle! This is especially important when working with clients who have sparse brows or those who want a very defined look. The cleaner you apply it, the less cleanup you have to do later, and the happier your client will be when they look in the mirror. Speaking of happy clients, when you combine a flawless tint with a professional waxing service, you're practically giving them a new face!
The Cleanup Crew: Removers and Wipes
Once the timer goes off, the reveal is near! But before you can admire your masterpiece, you need to get that tint off the hairs without rubbing the client's skin raw. Here is where having the right removers and wipes matters. You should stock up on high-quality Cotton Rounds and Makeup Remover Wipes.
Using a clean, dry cotton round to gently wipe away the bulk of the product is the first step. Then, follow up with a damp cotton round or a gentle, oil-free cleanser to remove any remaining pigment. Some brands, like Refectocil Intense Brow[n]s, even have a specific tint remover in their kits, which is ideal for cleaning up any pigment that may have strayed onto the skin . Having a reliable cleanser and cotton products on hand ensures a clean, polished result every time. Clients notice the little things, like how gentle you are when removing the product.
The Ancillary Supplies: The Stuff You Forgot You Needed
Beyond the essentials, there are a few support players that make your life easier and your service better. Protective Gloves are a must for hygiene and to prevent your own fingers from looking like you've been handling a sharpie. Hygienic Table Paper is great for keeping your station clean and mess-free, and a quality mirror and lamp are essential for seeing exactly what you're doing.
I also recommend keeping a timer (or your phone timer) right in your kit. Consistency is key, and you don't want to be counting minutes in your head when you're chatting with a client. It's a small thing, but it drastically cuts down on errors. I once got so caught up in a conversation about a client's vacation that I left the tint on way too long. Let's just say she looked surprised for a few days. Now, my timer is always set the second that tint hits the brow.
Wrapping It Up: The Pro Package
So there you have it, your ultimate checklist for a Complete Waxing Kits style approach to brow tinting. Building a brow tinting supply kit is about so much more than just throwing a few items in a bag. It's about providing a safe, consistent, and exceptional experience for every client who sits in your chair. When you have a fully-stocked, thoughtfully organized kit, you work faster, you look more professional, and you feel more confident. And that confidence? Clients notice it. So, don't settle for a half-finished kit. Build the ultimate toolkit today and watch your brow services skyrocket.
Now, get out there and start tinting! Your clients are waiting for their perfect arches. And remember, a well-stocked kit is a happy kit, and a happy kit means a happy, very profitable you! We have everything you need to get started, from Brow Lamination Supplies to our vast range of Professional Tints, so head over to Pure Spa Direct and stock up!
