
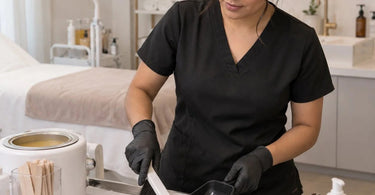
Elevate client happiness with this choice: a wax room that does not look like a crime scene by 3 PM. You know the drill. You finish a beautiful Brazilian, your client floats out the door, and you turn to face the aftermath. Tiny shards of hard wax are stuck to your table paper like glitter at a toddler birthday party. There is a mysterious purple smear on your spatula that has fossilized. And somehow, despite your best efforts, you just found a wax fragment in your hair. Again. If you are tired of spending more time scraping than waxing, this cleanup routine is for you. We are going to turn that chaotic post-wax scramble into a smooth, efficient system that protects your tools, your sanity, and your client schedule.
Let us be honest. Hard wax is a miracle product. It grips hair like a jealous ex and leaves skin smooth enough to make a dolphin jealous. But when it decides to fragment, it does not go quietly. It explodes into a million sticky shards that seem to multiply when you are not looking. The key to a better cleanup routine is not more elbow grease. It is smarter tools, better habits, and a little bit of professional-grade chemistry on your side.
Why Hard Wax Fragments Are the Enemy of a Calm Wax Room
Hard wax, also known as stripless wax, is designed to be applied thick and removed without a strip. It cools and contracts around the hair, which is why it is so effective. But that same property makes it a nightmare when it fragments. Those little pieces are not just annoying. They are a hygiene hazard. Fragments stuck to your wax warmer can contaminate a fresh pot. Bits on your wax spatulas and applicators can drag across a client's skin. And shards on the floor are basically tiny landmines for your socks.
More importantly, a messy wax station slows you down. Every minute you spend hunting for rogue wax bits is a minute you are not prepping for your next client. Your pre and post-waxing products deserve a clean home. So does your waxing station in general. Let us fix this.
Your Professional-Grade Arsenal for Wax Fragment Warfare
Before we dive into the step-by-step routine, you need the right weapons. Trying to clean hard wax with a dry paper towel is like trying to dry off a wet dog with a napkin. You need products that are designed to break down wax residue without damaging your expensive equipment.
First, invest in a professional wax solvent. These are specifically formulated to dissolve wax on contact. Look for one with a citrus base if you want your treatment room to smell like a spa instead of a chemical plant. A good solvent will lift wax from your wax warmers, your waxing accessories, and even accidental drips on the floor.
Second, grab some disposable lint-free wipes or professional cotton products. Cotton balls are great for absorbing warm wax, but for wiping down surfaces after a solvent, you want something that will not leave fuzz behind. Paper towels are fine for the bulk of the mess, but a final pass with a proper wipe ensures your tools are truly clean.
Third, consider a wax warmer liner. This is a game-changer. If you use a silicone or disposable liner in your warmer, cleanup goes from a twenty-minute ordeal to a ten-second peel. It is the difference between scrubbing a baking pan and using parchment paper.
The Step-by-Step Cleanup Routine That Will Save Your Sanity
Here is your new protocol. Commit it to memory. Print it out and tape it to your station if you have to. Future You will be grateful.
Step 1: The Warm-Not-Hot Rule
Before you touch anything, turn off your wax warmer. You do not want to work with dangerously hot wax. But you also do not want to wait until it is a cold, cement-like disc. The sweet spot is when the wax is still slightly pliable and warm to the touch. Hardened wax is brittle and shatters. Warm wax is cooperative. Use a wooden or silicone spatula to gently lift the bulk of the cooled wax out of the pot. If you are using a liner, this is the moment you simply lift the liner out and toss it.
Step 2: The Solvent Spray and Sit
Once the bulk of the wax is gone, you will still have a thin, sticky film on the interior of your warmer and on your tools. This is where your wax solvent earns its keep. Spray or wipe a small amount of solvent onto the residue. Do not attack it immediately. Let it sit for a minute or two. The solvent needs a moment to break the surface tension and dissolve the wax. You will literally see the residue start to loosen.
Step 3: The Wipe-Down
After the solvent has done its job, wipe the interior of your warmer and your tools with a clean, disposable wipe. For stubborn spots, a second application of solvent might be needed. If you are dealing with buildup around the rim or the temperature dial of your warmer, a small cleaning brush can help you get into the crevices without scratching the surface. Avoid metal scrubbers at all costs. They will scratch your equipment and create tiny grooves where bacteria and wax can hide.
Step 4: The Final Disinfect
Cleaning wax off is only half the battle. For health and safety, you need to disinfect. Use a professional-grade disinfectant on the exterior surfaces of your warmer and on your non-porous tools. Make sure the disinfectant is approved for your state board. This step is non-negotiable for a professional salon.
Preventing the Fragment Apocalypse Before It Starts
The best cleanup routine is the one you barely have to do. Here is how to prevent hard wax fragments from taking over your station in the first place.
First, manage your temperature. Hard wax that is too hot becomes thin and messy. Too cold and it snaps into shards. Use a professional wax warmer with reliable temperature control. For most hard waxes, you want to be in that low-melting-point range. Brands like ItalWax and Berodin are designed to work beautifully at lower temperatures, which means less burning and less mess.
Second, work clean. Do not double-dip your spatula. Keep a waxing accessories tray nearby with a dedicated spot for used spatulas. When you are done with a spatula, it goes into the used pile immediately. This prevents stray wax from being reintroduced to the pot and creating a contaminated, fragment-filled mess.
Third, protect your surfaces. Lay down fresh hygienic table paper for every client. It is a small cost that saves you a massive scrubbing session at the end of the day. For the floor, a simple splash mat under your warmer can catch drips before they become a permanent part of your flooring.
The Right Tools Make All the Difference
If your current waxing setup is a collection of mismatched pots and stained spatulas, it might be time for an upgrade. A cohesive system not only looks more professional, it is easier to keep clean. Consider a complete waxing kit that includes everything you need for a smooth service and an even smoother cleanup.
If you specialize in a specific type of wax, make sure your cleanup products are compatible. For example, if you are a devotee of ItalWax hard wax, their pre and post-wax products are formulated to work together. A dedicated wax remover from the same brand is often the most effective choice for their specific formula.
For high-volume salons, buying in bulk is a smart move. You can stock up on spatulas, wax strips, and cleaners with bulk wax deals. Having a fully stocked cleaning caddy means you never have to make do with a subpar tool because you ran out at the worst possible moment.
Building the Routine Into Your Daily Flow
The secret to a consistently clean wax room is not a marathon cleaning session at the end of the week. It is a series of small, consistent habits. Here is what a healthy daily flow looks like.
Between every client, do a quick reset. Wipe down your table paper, change your gloves, and do a quick surface wipe of your warmer rim. This takes thirty seconds and prevents buildup from compounding over the day.
At the end of each day, do a proper deep clean of your wax pots and tools using the solvent method above. This is when you also wipe down the exterior of your warmer, your pedicure chairs if you have a multi-service station, and any other high-touch surfaces.
Once a week, do a more thorough maintenance session. Check your warmer for any residue around the temperature dial. Inspect your tools for any cracks or damage that could harbor bacteria. Restock your pre and post-wax products so you are never caught short.
Once a month, take a step back and evaluate your setup. Is your current layout working for you or against you? Are there must-have supplies you keep forgetting to order? A little proactive planning goes a long way.
The Clean Wax Room Advantage
When your wax room is clean and organized, everything improves. Your services run faster because you are not hunting for tools. Your clients feel more confident because the space feels hygienic and professional. Your equipment lasts longer because it is not being gunked up with old wax. And you, the amazing professional behind the table, get to end your day without feeling like you just went ten rounds with a glue trap.
Hard wax fragments are a fact of life in the waxing world. But they do not have to be a fact of your daily struggle. With the right products, a consistent routine, and a little bit of professional wisdom, you can keep your station spotless and your sanity intact.
So here is to a cleaner wax room, a happier clientele, and never again finding a purple wax shard in your hair at the end of a long shift. You have got this.
)