
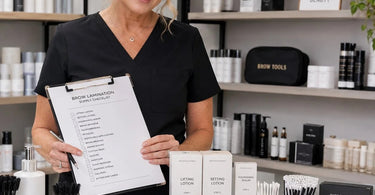
Your success is our focus, and let's be real, there is nothing quite like the magic of a good brow lamination. It is the beauty world's equivalent of giving your clients a tiny, fluffy makeover that instantly frames their face and makes them feel like a million bucks. But here is the thing, as any seasoned pro knows, a flawless lamination is not just about the technique; it is about having the right supplies at your fingertips. You need a battle plan, a checklist, a carefully curated arsenal of potions, tools, and hygiene heroes to ensure every single service is a smashing success. Without a proper checklist, you are essentially trying to bake a cake without flour, and we all know how that ends—with a hot mess and a client who is not coming back. So, whether you are a brow-obsessed newbie looking to add this in-demand service to your menu or a seasoned lash and brow artist wanting to streamline your setup, you have come to the right place.
Welcome to the ultimate guide on how to create a brow lamination supply checklist that will not only make you look like a pro but also keep your clients coming back for those perfectly feathered, brushed-up brows. This is your roadmap to brow lamination supplies success. Let us dive into the glorious, fluffy world of brow lamination and make sure you have everything you need to be the brow boss of your salon.
Step 1: The Holy Grail – Choosing Your Brow Lamination System
First things first, you need the star of the show: your actual lash & brow enhancement lamination system. This is the chemical powerhouse that does the heavy lifting, literally. Think of it as the “perm” for your clients' brow hairs. You cannot just grab any old kit; you need a professional-grade system that offers predictable, consistent results. Your choice here is the foundation of your entire service.
When you are putting together your checklist, decide on the system that speaks to your soul. There are so many fantastic professional options out there. It is a good idea to pick one system and master it, because mixing and matching different brands can lead to unpredictable results. Some of the top names in the game that we love here at Pure Spa Direct include Brow Code, which is renowned for its reliable and salon-friendly formulas , and the London Brow PRO system, which is designed for controlled and consistent results . Other fantastic brands include Refectocil Original and Intensive Tint, which are also known for their high-quality offerings. Make sure your chosen system includes the core components: a lifting lotion (Step 1), a setting or neutralizing lotion (Step 2), and a nourishing serum or oil (Step 3).
Step 2: The Prep Squad – Cleansers and Primers
Now, imagine you are trying to paint a masterpiece, but the canvas is covered in dust and grease. That is essentially what you are doing if you apply lamination products to dirty brows. Prep work is non-negotiable. Any lingering makeup, oil, or skincare residue can act as a barrier, preventing the lifting and setting lotions from penetrating the hair shaft evenly. This leads to patchy, underwhelming results that will have you reaching for the nearest cup of coffee to calm your nerves .
Your checklist must include a dedicated professional brow cleanser that is specifically formulated to break down oils and impurities without stripping the skin. A foaming cleanser is particularly excellent because it gets into all the nooks and crannies. You will also want a gentle cleansing brush to give those brows a proper deep clean. This simple step elevates your service from “okay” to “exceptional.” Think of it as the secret weapon in your brow lamination checklist. Trust me, your clients will feel the difference!
Step 3: The Application Artists – Brushes, Spoolies, and Applicators
If the lamination lotion is the star, then your tools are the supporting cast that makes the star shine. The right applicators are what separate a clean, editorial lamination from a messy, sticky situation . You do not want to be fumbling around with cotton buds and hoping for the best. You need precision, and that comes from using the proper tools.
Your checklist should be bursting with disposable tools: microbrushes, microfiber applicators, and plenty of soft spoolie brushes. Microbrushes are perfect for applying the product to the brows in thin, controlled layers. Microfiber applicators are a game-changer for cleaning up product and removing residue without disturbing the hair direction . And spoolies? You can never have enough spoolies! They are essential for brushing the hairs upwards to get that signature fluffy look and for ensuring each hair is evenly coated. These small, seemingly simple tools are the unsung heroes of your brow lamination supply checklist.
Step 4: The Timer – Your New Best Friend
Here is a tip that could save your client's brows and your reputation: time is everything. Brow lamination is a chemical process, and leaving the lifting or setting lotion on for too long can lead to over-processing, which can cause damage, frizz, and brittle brows . Leaving it on for too short a time, and you will barely see a lift. It is like the Goldilocks principle, but for brows.
That is why a digital timer is an absolute non-negotiable item on your supply checklist. Do not rely on your phone or your internal clock; get a dedicated, easy-to-use timer that you can start and stop with a tap. Different hair types require different processing times. Fine hair might need only three to five minutes, while coarse, stubborn hair might need eight to ten minutes . Having a timer lets you customize the service for every single client, ensuring optimal, safe results every time. Your clients will thank you for your precision.
Step 5: The Mapping Masters – Pencils, String, and Tweezers
While the goal of lamination is fluffy and natural brows, that does not mean you should skip the planning stage. Mapping is how you ensure symmetry and a shape that beautifully complements your client's face . You want the final look to be intentional and flawless, not accidental and wonky.
Add a brow mapping pencil, some mapping string, and a trusty pair of precision tweezers and small scissors to your supply list. The mapping pencil and string help you visualize the ideal starting point, arch, and tail for your client's brows. The tweezers and scissors are for cleaning up any stray hairs or trimming any longer ones to create a polished, refined shape after the lamination is complete. This attention to detail is what turns a good brow artist into a great one.
Step 6: The Hygienic Heroes – Cleaning and Disinfecting
Let us talk about the not-so-glamorous but absolutely essential part of any professional service: hygiene. Maintaining a clean and sanitized workspace is not just good practice; it is your professional responsibility . A clean station protects you, protects your client, and tells them that you are a true professional who cares about their well-being.
Your checklist must include a reliable disinfectant spray for your tools and surfaces. You will also want plenty of disposable items like gloves, protective masks, and applicators to prevent cross-contamination. Don't forget the cling wrap! Yes, the humble kitchen staple is crucial for brow lamination. It helps lock in heat and moisture during the processing time, boosting the effectiveness of the lotions . Keeping a roll of cling wrap on your checklist is a must for a consistent, high-quality service.
Step 7: The Nourishing Nurses – Serums and Oils for Aftercare
Here is a truth that might surprise you: the service does not end when you wipe off the setting lotion. Post-lamination care is just as important as the lamination itself because the chemical process can be drying to the brow hairs . This is your chance to not only nourish the brows but also to offer a retail opportunity to your client.
Your checklist must include a high-quality nourishing oil or serum. This is your finishing touch, and it makes a world of difference. Applying a nourishing serum immediately after the service helps restore moisture, adds a gorgeous shine, and keeps the hairs flexible and healthy. This is also the perfect moment to educate your client on aftercare and offer them a retail product to take home. Recommending a daily nourishing oil like castor oil or a keratin-infused serum helps them maintain the look and protects their investment. This simple step elevates the client experience and builds loyalty . It is a win-win.
Your Brow Lamination Checklist: The Final Inventory
Alright, let us put it all together. You have all the pieces of the puzzle, but a checklist is only as good as the final review. Here is a quick recap of everything you need to be ready for your next brow lamination appointment. Pin this to your wall, stick it in your phone, or frame it and put it in your treatment room. It is your ticket to brow perfection!
The Core System:
- Professional Brow Lamination Kit (Lifting Lotion, Setting Lotion, Nourishing Serum)
The Prep:
- Professional Foaming Brow Cleanser
- Cleansing Brush
- Cotton Pads
The Application & Tools:
- Microbrushes & Microfiber Applicators
- Soft Silicone Spoolies
- Brow Styling Brush
- Digital Timer
- Cling Wrap
The Shaping & Finishing:
- Brow Mapping Pencil & String
- Precision Tweezers
- Small Scissors
The Hygiene:
- Disinfectant Spray
- Protective Gloves & Masks
The Aftercare & Retail:
- Nourishing Brow Oil or Serum
And there you have it, the definitive guide on how to create a brow lamination supply checklist. With this checklist in hand, you will be ready to create those stunning, feathery brows that your clients dream about. At Pure Spa Direct, we have thousands of products to help you build this checklist and so much more. From facial steamers to ItalWax and everything in between, we have got your back. Now go forth, laminate those brows, and watch your client list grow! You have got this.
