
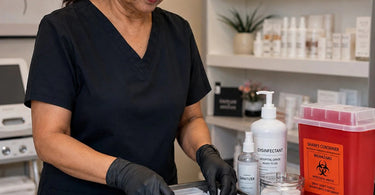
Simplify operations with this smart choice that turns your treatment room into a fortress of safety and glowing skin—without the drama or the oops moments! Let's be real, offering dermaplaning is like handing your clients a magic eraser for their face, instantly smoothing out texture and banishing that peach fuzz. But before you channel your inner surgeon and wield that blade like a pro, let’s talk about setting up your dermaplaning station so safely that even the most nervous client will feel like they're in the hands of a skincare ninja. We've all been there: you're mid-treatment, reaching for a fresh blade and you knock over a bottle of cleanser, or worse, you're trying to remember if you properly disinfected that surface. Fear not, because we're about to turn your station into a model of efficiency and safety, making you the hero of the spa. And the best part? You can find everything you need right here at Pure Spa Direct, your one-stop shop for all things Dermaplaning and beyond. So grab your favorite beverage, get comfy, and let's dive into how to create a setup that’s as safe as it is satisfying.
The Dermaplaning Lowdown: Why Your Setup Matters
Let’s face it, the heart of a flawless Dermaplaning treatment isn't just about a steady hand and a killer technique. It's about having a setup so organized and so safe that you can focus entirely on giving your client that glass-skin glow. In a world where clients are more hygiene-conscious than ever, flaunting a clean, professional station is your secret power move. It builds trust, and let's be honest, it makes you feel like the boss you are. A well-organized setup means you're not wasting precious time hunting for supplies during a treatment; you're in the zone, delivering an experience that's so smooth, your clients will forget they're even on a table.
Think of it like this: you wouldn't try to bake a masterpiece without measuring your ingredients, right? The same logic applies here. Every element of your dermaplaning setup plays a role in the final result. From the blade you choose to the way you dispose of it, each step is a building block for a safe and successful service. And if you're looking to level up your entire spa game, pairing dermaplaning with other top-tier services like Hydrodermabrasion or a soothing facial with Premium Skincare Products will have clients rebooking before they've even left the room. This is where your knowledge and your setup come together to create a truly unforgettable experience.
Step 1: The Tools of the Trade - More Than Just a Blade
Let's start with the MVP: the blade itself. Using the correct, surgical-grade tools is non-negotiable. We're talking about a proper Dermaplaning Handle and a sterile, single-use blade. The most common and beloved choices in the professional world are the #10 and #10R blades, often from trusted manufacturers like Swann-Morton. The #10 has a slightly pointed tip for precision, while the #10R features a rounded tip, making it a fantastic, gentle option for beginners or for working around delicate areas. You wouldn't use a butter knife to perform surgery, so don't use a dull or inappropriate blade for dermaplaning. A sharp, sterile blade is your best friend; it glides effortlessly, reduces the risk of tugging or irritation, and leaves skin baby-smooth.
But the blade isn't the only player on your team. You'll need a reliable Dermaplaning Handle, like the #3 or #3L for a bit more reach, to give you maximum control. And let's not forget the unsung heroes of the station: your prep products. A high-quality Professional Cotton, Sponges, and Wipes and a gentle cleanser are your first line of defense, preparing the canvas for the blade. Think of them as the primer before the masterpiece. For an extra touch of luxury, consider using a Towel Steamer to provide a warm, soothing compress to open pores and soften the skin before you even pick up the blade. It's these little details that turn a service into an experience.
Step 2: Setting the Stage - The Sanitization Station
Alright, team, it's time to talk cleanliness. This isn't just about wiping down a table; it's about creating a sterile field that screams "professional." Your workspace should be a no-fly zone for bacteria. Start with a thorough cleanse of your treatment area. Wipe down your Magnifying Lights, your treatment bed, your stool, and any surfaces with a hospital-grade disinfectant. We're not just removing dust; we're eliminating potential pathogens. And don't forget about yourself! Your hands should be washed with antimicrobial soap, and donning a fresh pair of gloves is the first step to showing your client you mean business. For the truly meticulous esthetician, wearing a mask is also a great way to ensure you're not breathing any bacteria onto your freshly cleansed client.
Creating a sterile field is like prepping for a high-stakes cooking show—you need all your Professional Cleaners & Disinfectants at the ready. All sterile packaging should be intact and in-date. This is your moment to shine, showing your clients the behind-the-scenes magic that makes you a true pro. Good prep isn't just about safety; it's about signaling to your client that they are in the best possible hands. This is where the trust is built, and trust, my friends, is what leads to loyal clients and glowing reviews.
Step 3: The Star of the Show - Perfecting Your Technique
With your station prepped and your tools at the ready, it's showtime! The golden rule of dermaplaning technique is the 45-degree angle. Hold the skin taut with your non-dominant hand, and with your blade hand, use short, feather-light strokes in the direction of hair growth. Imagine you're gently scraping a layer of frosting off a cake without disturbing the sponge underneath. That's the energy we want. This isn't a race; it's a meditation. Work in small sections—forehead, cheeks, chin, and that tricky upper lip (pro-tip: have your client make a fish face to stretch the skin!).
A common mistake is pressing too hard. If you're seeing redness or the skin is blanching (turning white), you're overdoing it. You want to hear a faint, satisfying 'squeak' as the blade glides over perfectly prepped skin, not a scraping sound. The pressure should be so light that a baby would feel comfortable. Your technique will improve with practice, but a good setup ensures that you're not distracted by a messy station or a dull blade. A great station setup allows you to channel your inner artist. You can even add a little humor during the treatment—like warning them the fish face is essential for science. This eases any nerves and makes the experience fun and memorable.
Step 4: The Safe Goodbye - Proper Disposal and Aftercare
So, you've created a flawless glow. The treatment is over, and your client is in cloud nine. But hold on! The job isn't done yet. Safe disposal of used blades is the unsung hero of a professional setup. This is where we part ways with the used blade, and we do it responsibly. This step is just as crucial as the treatment itself for your safety, your team's safety, and the environment. Don't even think about tossing that used blade in the regular trash! You need a proper Sharps Container.
A Sharps Container is a small, puncture-resistant box that's a badge of honor for a pro who takes safety seriously. It protects you from accidental needle sticks, protects your housekeeping staff from injury, and ensures safe disposal. It's a small investment that screams 'I am a professional who takes biohazards seriously.' If you're looking for a more discreet option, a Blade Removal Box, like those from Swann-Morton, is a great alternative for a smaller treatment room. Just remember, once it's full, it gets disposed of in your larger, biohazard-approved container. Think of it as the final, responsible step in your service—the cherry on top of a perfectly clean treatment.
Step 5: Post-Treatment Pampering - The Grand Finale
Now that the blade work is done and safely disposed of, it's time for the fun part: the post-treatment glow-up! The products you apply after dermaplaning are just as important as the treatment itself. Your client's skin is a blank canvas, ready to drink up serums like a thirsty plant. Apply a soothing serum with hyaluronic acid and a generous layer of Sunscreen (yes, even if it's cloudy!). Sunscreen is the new best friend of their freshly exfoliated skin. You can even bundle these into a take-home kit using our selection of Bottles & Jars to create a custom retail offering.
Don't be shy about recommending a full post-care routine. A high-quality Massage Oil, Lotion, or Cream can be a great addition to their home care regime, or even a gentle Sugar Scrub for body care, but remind them to steer clear of harsh exfoliants on the face for a few days. And be sure to give them the talk: No, their peach fuzz will not grow back thicker and darker (a myth we need to collectively retire, like low-rise jeans). When they're informed, they're calm, and when they're calm, they're relaxed, and when they're relaxed, they book their next session. It's a beautiful cycle! And finally, for a truly elevated service, nothing beats a Facial Steamer to soften skin before the treatment, setting the stage for an even more effective dermaplaning session.
Ready to Level Up Your Spa Game?
So there you have it—your complete roadmap to creating a safer, more efficient, and utterly professional dermaplaning setup. From selecting the perfect blade and handle to mastering the art of sanitization and the zen of proper disposal, you are now equipped to offer a service that's not just safe, but also irresistible. It's about giving your clients the confidence that they are in the best hands, and giving yourself the peace of mind to focus on what you do best: making people feel incredible. And remember, we've got all the must-have supplies you'll ever need, right here at Pure Spa Direct. From top-tier Spa Essentials to every Waxing Supplies for Professionals and Professional Nail Care Collections, we've got your back. Check out our huge range of Top-Quality Equipment & Furniture for Spas & Salons and see how easy it is to transform your practice. So, go forth, exfoliate with confidence, and give those clients the glow they've been dreaming of!
)