
Take control of your success and your sanity during those gloriously busy back-to-back lash appointments. There's nothing quite like the rhythm of a fully booked day, the hum of the lash extension supplies at your fingertips, and the satisfaction of sending a client out the door with a stunning set. Then, it happens. You reach for your trusty adhesive, ready for the next masterpiece, and... nothing. The nozzle is clogged, hardened, and has formed a tiny, stubborn rebellion against your productivity. Before you consider using a pair of scissors on that precious little tip (we see you, and we're here to help), take a deep breath. We know that the struggle is real, and a blocked nozzle is one of the most common productivity killers and frustrations for even the most seasoned lash artists. But don't you worry; with a few simple, professional tricks and the right approach, you can say goodbye to adhesive anxiety and keep your workflow smoother than a freshly applied set of classics. Let's dive into exactly how to keep your lash adhesive nozzles flowing freely, even when your schedule is packed tighter than a jar of professional waxing supplies.
A clogged nozzle isn't just an annoyance; it's a thief of time and product. That expensive bottle of adhesive that was supposed to last you through the week? It's now a paperweight with a bad attitude, and you're left fumbling with pins, paperclips, or worse, drastically cutting the tip and ruining the precision of your application. The chaos is real, but it's also entirely preventable. Most clogging is caused by a few avoidable habits and environmental factors. When adhesive is exposed to air, it begins to cure. Every time you leave the cap off for a few extra seconds or fail to clean the nozzle properly, you are essentially inviting the adhesive to dry and seal itself shut . The secret to a free-flowing nozzle lies in mastering your adhesive storage, application routine, and the crucial art of the post-use clean-up. It’s about making these small steps non-negotiable parts of your lash service ritual, so they become as automatic as isolating a lash.
But before we get into the nitty-gritty, let's talk about the elephant in the room: the cap. Is it on correctly? When it comes to lash adhesive, the cap is your best friend and, if not handled properly, your worst enemy. Most bottles are designed with a specialized cap that creates an airtight seal. This is to prevent moisture and air from getting in and causing the glue to thicken or degrade. However, if the nozzle itself is caked with old, cured glue, the cap won't seal properly. It's like trying to put a lid on a jar with a piece of dried food stuck on the rim—it won't work. This imperfect seal allows the good, usable glue inside to be exposed to moisture, which accelerates degradation. That's why a simple cleaning routine is non-negotiable for keeping your adhesive fresh and the nozzle unclogged. We're talking about taking 10 seconds after every single use to wipe the tip clean. Not just a quick swipe, but a deliberate, thorough wipe that removes every trace of adhesive from the nozzle and the threads where the cap screws on. This simple act of kindness towards your bottle will extend its life and your sanity.
Mastering the Pre-Use Ritual: Preparation is Key
Your success in preventing a clogged lash adhesive nozzle starts before you even remove the cap. The way you prepare and shake your adhesive has a direct impact on its consistency and how easily it dispenses. One of the most common mistakes is not shaking the bottle properly. Adhesives, especially those with carbon black for that intense, rich color, need to be thoroughly mixed to ensure an even consistency . When you don't shake it enough, the ingredients can separate, leading to a thicker, stringier product that is more prone to clogging. Experts recommend shaking the bottle vigorously for about 60 seconds before each use to ensure the polymers and carbon black are fully integrated . But here's a pro tip: shake it side-to-side, not up and down. Shaking up and down can introduce air bubbles into the adhesive, and those tiny bubbles can cause sputtering when you squeeze the bottle, pushing glue into the nozzle cap area and creating a sticky mess that will dry and create blockages . The goal is a smooth, consistent drop of glue, ready for flawless application.
The Crucial Clean-Up: The 'Wipe & Burp' Method
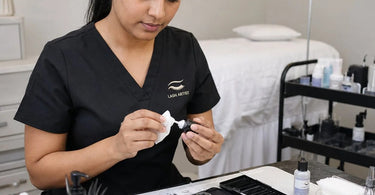
You've just placed the last extension for a gorgeous full set, and it's perfect. The client is happy, you're happy, and you're already thinking about the next appointment. Hold that thought. Your adhesive bottle needs immediate attention. After you've finished dispensing your drop of glue, the first thing you must do is wipe the nozzle. Use a lint-free wipe—never cotton pads or cotton buds, as the fibers can cause an exothermic reaction with the glue, generating heat and smoke and potentially melting the plastic nozzle over time . Gently but firmly wipe away any adhesive residue from the tip and the threading area. Next up is the 'burping' process. This is a critical step that many lash artists overlook . Before you screw the cap back on, gently squeeze the bottle to expel a tiny amount of air and any excess glue that might be lingering in the neck of the bottle. This 'burp' pushes out the old adhesive and prevents a plug from forming inside the nozzle as it cures . Once you have a clean nozzle and you've burped the bottle, it's time to seal the deal. Check the inside of the cap too! If there's any old, dried glue in the cap, it can contaminate the clean nozzle the next time you close it. Wipe the inside of the cap clean, then tighten it securely to create a perfect seal.
Environmental Control: The Unsung Hero of Lash Adhesive
Your adhesive is a delicate creature, incredibly sensitive to its environment. The two biggest factors that will affect its performance and longevity are temperature and humidity. Most lash adhesives are formulated to perform best at a specific range, which is generally around 70-75°F (21-24°C) and 40-70% relative humidity . If your lash room is too humid, the adhesive will cure too quickly, leading to a clogged nozzle and brittle bonds. If it's too dry, the adhesive won't cure properly, leading to poor retention and the possibility of it thickening and clogging. Investing in a digital hygrometer and a dehumidifier or humidifier is essential for any professional lash artist . When you have control of your environment, you have control of your adhesive. This is why you'll also want to store your adhesive correctly. Many lash artists swear by storing their adhesive in an airtight container filled with rice or desiccant packs to absorb moisture and maintain a consistent environment . This extra step can significantly extend the life of your adhesive and prevent nozzle clogs caused by ambient humidity.
Advanced Troubleshooting: Dealing with Stubborn Clogs
Even with the best habits, you might occasionally encounter a little blockage. Before you panic and throw out a half-full bottle of pricey adhesive, there are a few safe ways to try and clear the nozzle. Some companies provide a small, thin pin or 'glue pin' specifically designed for this purpose . You can use this to gently remove a small piece of dried glue from the very tip of the nozzle. However, the most important rule of clog removal is: never push a pin or any object down into the neck of the bottle. This will only push the dried adhesive back into the bottle, contaminating the fresh glue and causing blockages further down the line, which ultimately ruins the entire bottle . Think of it like trying to clear a drain; you want to clear the obstruction at the top, not push it deeper into the pipes. If you have a particularly stubborn blockage, you might carefully use a specialized nozzle remover tool to swap the dirty nozzle out for a new one, a trick professionals use to extend the life of their glue bottles. Once you've successfully removed a small clog, you can 'burp' the bottle to get the flow started again.
Know When to Say Goodbye: The 30-Day Rule
Lastly, and perhaps most importantly for preventing clogs and ensuring client safety, you must respect the lifespan of your adhesive. No matter how perfectly you store it or how diligently you wipe the nozzle, the performance of an opened bottle of lash glue degrades over time. As the product is exposed to air and moisture, it begins to oxidize and thicken . A thickened adhesive is much more prone to clogging and won't cure correctly, leading to poor retention and client dissatisfaction. As a general rule of thumb, most lash adhesives are only good for 30 days after they have been opened . Mark the date you open a new bottle on the side with a marker so you know exactly when it needs to be replaced. Fresh adhesive is a joy to work with; it dispenses perfectly, creates strong bonds, and keeps your business reputation top-notch. Plus, it’s the best way to ensure your premium lash extensions and supplies deliver the results your clients rave about.
So, there you have it! Keeping your lash adhesive nozzle from clogging doesn't have to be a daily battle. By adopting these simple, professional habits into your routine, you can ensure that your adhesive is always ready to perform, even on the busiest days. For an artist who is just getting started or a seasoned pro looking to refine their skills, you'll find that mastering these details sets you apart. The confidence of having the right tools and techniques is priceless, and that's why finding a reliable source for your supplies is crucial. For all of your lash and brow service supplies, and professional-grade adhesives, look no further than Pure Spa Direct. We've got everything you need to keep the focus where it belongs—on creating beautiful, lasting lashes that keep clients coming back for more. Remember, a clean nozzle is a happy nozzle, and a happy nozzle makes for a happy lash artist!
