
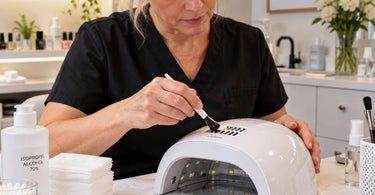
Solutions that make a difference... sometimes start with the tiniest openings in your nail salon equipment! If you have ever looked closely at your UV LED Nail Lamp and discovered a miniature collection of filing dust around its vents, seams, and hand opening, you are definitely not alone. Nail lamps spend their days surrounded by glitter, gel, acrylic powder, and enough fine filing dust to make a housekeeper question her career choices. Keeping those openings clean is not just about making your manicure station look beautiful; it is also about supporting proper equipment ventilation, maintaining a professional workspace, and preventing loose debris from becoming a permanent resident of your favorite curing lamp.
The good news? You do not need an elaborate cleaning ritual or a collection of mysterious gadgets to keep nail lamp openings from becoming dust traps. A smarter workstation layout, a few gentle cleaning techniques, and a consistent maintenance routine can make a noticeable difference. Here is how nail professionals can tackle the problem without adding another complicated task to an already packed appointment schedule.
Why Do Nail Lamp Openings Collect So Much Dust?
A professional nail station is a busy environment. Filing, buffing, shaping, and removing nail enhancements can release fine particles into the surrounding workspace. Even when technicians use dust collection equipment, some airborne particles may settle on nearby surfaces.
Nail lamps have several areas where this debris can accumulate. Depending on the design, these include ventilation openings, seams around control panels, the large opening where clients place their hands, removable base plates, and small gaps around the housing.
Ventilation openings deserve particular attention because they are designed to allow airflow through or around the equipment. Dust collecting on these openings can interfere with that airflow, potentially contributing to overheating or reduced equipment performance.
Other factors can make buildup worse, including:
- Positioning the nail lamp directly beside an active filing area.
- Using electric nail files without effective dust collection.
- Leaving lamps uncovered during dusty procedures.
- Allowing acrylic powder or glitter to accumulate around the workstation.
- Wiping dust toward vents rather than away from them.
- Skipping cleaning around the underside and removable base.
One filing session may leave only a light dusting. Multiply that by several appointments a day, five or six days a week, and suddenly your lamp has its own tiny archaeological excavation site.
Start With Better Nail Lamp Placement
One of the easiest ways to prevent dust buildup is to reconsider where the lamp sits during different stages of a manicure.
If your workstation layout allows it, position your curing lamp away from the area where the greatest amount of filing and shaping occurs. This reduces the chance of particles settling directly onto the lamp while they are being generated.
A well-organized Nail Table or Manicure Station can help create separate zones for filing, product application, and curing. Even a modest amount of separation may help when combined with effective dust extraction.
For technicians working at compact stations, consider moving the lamp temporarily away from the active filing area when practical. Keep cords organized, avoid creating tripping hazards, and always place the lamp on a stable, dry surface with adequate clearance around its ventilation openings.
The goal is not to turn your manicure station into a complicated obstacle course. It is simply to keep the dustiest activities from happening directly beside equipment that needs to remain clean.
Use Nail Dust Collection Before Debris Reaches the Lamp
Prevention is often easier than removing dust after it has worked its way into every available crevice.
A properly selected Nail Dust Collector can help capture filing particles close to where they are produced. This is especially useful during acrylic maintenance, hard gel filing, and electric nail file services.
For better results, follow these workstation practices:
- Position the dust collection intake close to the filing area according to the equipment instructions.
- Keep extraction filters clean and replace them according to manufacturer recommendations.
- Check that the collection system is operating effectively before beginning dusty services.
- Avoid directing filing debris toward the nail lamp or technician breathing zone.
- Clean surrounding surfaces after filing before proceeding to product application.
Remember that a tabletop dust collector is not automatically a substitute for appropriate room ventilation or other necessary exposure controls. Nail products can generate different types of dust and vapors, so salons should use equipment and workplace controls suited to their services.
A good dust collection setup helps protect more than your curing lamp. It also keeps surrounding bottles, brushes, tables, and work surfaces cleaner. Your entire nail station gets to participate in the makeover!
How to Safely Clean Nail Lamp Ventilation Openings
Cleaning a nail lamp requires a gentle approach. After all, this is electrical equipment containing sensitive components, not a kitchen countertop that can tolerate enthusiastic scrubbing.
Before cleaning, consult the specific lamp manufacturer's care instructions. Different models may have different requirements for approved cleaning products, removable components, and ventilation maintenance.
Step 1: Turn off and unplug the lamp.
Disconnect the power supply before performing routine cleaning. If the lamp has recently been operating, allow it to cool completely before handling or cleaning.
Step 2: Remove loose surface dust.
Use a clean, dry, soft, lint-free cloth to gently remove dust from accessible exterior surfaces. Work from cleaner areas toward dustier areas so particles are not continually redistributed.
Step 3: Address dust around ventilation openings.
If the manufacturer permits it, use a very soft, clean brush to loosen debris sitting on the outer edges of ventilation openings. Brush gently outward instead of pushing particles farther inside. Never insert implements through ventilation slots or attempt to reach internal electrical components.
Step 4: Clean the exterior housing appropriately.
Where the manufacturer's instructions permit, wipe the housing with a lightly dampened, lint-free cloth and an approved cleaner. Apply any permitted cleaner to the cloth rather than spraying liquid directly onto the equipment. Keep moisture away from vents, electrical connections, LEDs, sensors, and control openings.
Step 5: Inspect and allow everything to dry.
Before reconnecting power, confirm that all accessible surfaces are dry, removable parts are correctly installed, and ventilation openings remain unobstructed.
Avoid blasting debris into the lamp with compressed air unless the manufacturer specifically instructs you to use that method. It can drive particles deeper into the housing or disturb sensitive components.
Likewise, do not open the electrical housing, remove protective ventilation grilles, or attempt internal repairs unless the manufacturer expressly provides a user-serviceable procedure.
Do Not Use Aggressive Cleaning Chemicals on Your Nail Lamp
Nail professionals work with powerful liquids every day, but that does not mean every bottle on the manicure table belongs in an equipment-cleaning routine.
Acetone, solvents, concentrated cleaning chemicals, and certain disinfectants can damage plastics, finishes, reflective surfaces, LEDs, or electrical components, depending on the lamp's construction.
Even alcohol-based products that may be suitable for one manufacturer's housing can be inappropriate for another model or for specific internal components.
Always check the lamp manufacturer's instructions for compatible cleaning agents. If a product is not approved for the equipment, do not improvise.
For routine surface cleaning and salon hygiene, browse Professional Cleaners & Disinfectants for Salons and Spas, while remembering that a cleaner or disinfectant must also be compatible with the actual surface being treated.
Cleaning removes visible soil and debris. Disinfection is a separate process that requires an appropriate product, correct application, and the specified contact time. A quick wipe with an unapproved solution is not a substitute for proper sanitation procedures.
Clean the Hand Opening and Removable Base Regularly
Ventilation slots are not the only places where nail dust likes to settle.
The large hand opening at the front of a nail lamp can collect product residue, filing particles, and debris transferred from clients' hands. Dust may also accumulate underneath the lamp or around the edges of a removable base plate.
Make these accessible areas part of your regular cleaning routine.
For lamps with a manufacturer-approved removable base, detach it only as directed and clean it using the specified method. Pay attention to corners, edges, and attachment points where dust can collect.
Never assume a removable base is dishwasher-safe, waterproof, or suitable for immersion unless the manufacturer explicitly states that it is.
While cleaning, inspect the inner surfaces for cured gel residue and other contamination. Use only cleaning methods approved for those materials.
Also check whether dust has gathered around the lamp's feet or underneath its resting position. A quick wipe of the tabletop beneath the lamp can prevent the same particles from being picked up and redistributed later.
Build a Simple Between-Client Cleaning Routine
The most effective maintenance systems are the ones technicians can realistically follow during a busy day.
A five-page cleaning checklist might look impressive in a training binder, but a practical routine that everyone actually performs is much more useful.
Between clients, when the lamp is not in use and it is safe to handle:
- Check accessible lamp surfaces for visible product residue and loose filing dust.
- Remove debris using the manufacturer's recommended method.
- Clean and disinfect applicable client-contact surfaces as required by salon procedures, product labeling, and local regulations.
- Inspect the front hand opening for buildup.
- Make sure the lamp's ventilation openings have not become blocked.
- Clean the immediate surrounding tabletop before the next service.
Keep suitable Professional Cotton, Sponges, and Wipes within convenient reach so staff are not searching through supply drawers between appointments.
Make sure cleaning materials themselves are appropriate for the equipment. A wipe that leaves fibers behind can create another dust problem, which is not exactly the plot twist anyone requested.
Create a Weekly Nail Lamp Maintenance Checklist
Daily cleaning manages routine debris, but a more detailed weekly inspection helps identify developing problems before they become disruptive.
Choose a predictable time, such as the end of the final appointment on a quieter day, and review each lamp at the workstation.
Your weekly checklist can include:
- Inspecting ventilation openings for visible dust accumulation.
- Cleaning accessible exterior surfaces according to manufacturer instructions.
- Checking the removable base and its attachment points, if applicable.
- Looking for buildup around controls, seams, and sensors without probing inside them.
- Checking power cords, plugs, and adapters for visible damage.
- Confirming that the lamp stands securely and has appropriate ventilation clearance.
- Noting unusual sounds, heat, odors, or operating behavior.
- Recording equipment issues that require professional evaluation.
If the lamp repeatedly overheats, shuts down unexpectedly, develops a burning smell, or has damaged electrical components, discontinue use and follow the manufacturer's service instructions. Do not continue operating it simply because the next client is already choosing between three nearly identical shades of pink.
A simple maintenance log can also help salon managers identify which stations experience the most dust accumulation and whether changes in positioning or extraction are necessary.
Should You Cover Your Nail Lamp Between Appointments?
Protective storage can reduce settled dust when a lamp is not being used, but covering electrical equipment requires care.
If the manufacturer permits covered storage, use a clean, dry, suitable cover only after the lamp has been switched off, unplugged, and allowed to cool completely.
Never place a cover over an operating lamp or obstruct ventilation openings while the unit is powered.
A closed cabinet or designated clean storage area may be helpful for lamps that are not needed throughout the day, provided storage conditions follow the manufacturer's requirements.
Avoid tossing used towels or dusty cloths over the lamp. Fabrics can shed fibers, transfer product residue, and introduce the very debris you are trying to prevent.
Think of the lamp as a hardworking professional appliance, not a decorative shelf for the miscellaneous items that have nowhere else to live.
Organize Nail Products to Reduce Dust Around Equipment
Workstation organization plays a surprisingly important role in keeping nail lamps clean.
When bottles, tools, files, and containers crowd the curing area, technicians have less room to clean surfaces and may accidentally brush filing residue against the lamp.
Create designated spaces for your most frequently used supplies.
Store Nail Files & Buffers separately from the curing zone. Keep containers of Acrylic Nail Supplies securely closed when not being used, and organize Professional Gel Polish so bottles are not repeatedly moved across dusty work surfaces.
Use appropriately sized trays or organizers to contain small accessories without blocking airflow around electrical equipment.
For salons offering detailed nail art, keep Nail Art Rhinestones, loose decorative materials, and glitter products in securely closed containers when not actively needed.
That way, your workstation can still sparkle beautifully without sharing its sparkle with the ventilation slots.
How to Tell Whether Nail Lamp Dust Buildup Is Becoming a Problem
A small amount of removable exterior dust is usually a routine housekeeping issue. Heavy or recurring accumulation around ventilation openings deserves more attention.
Watch for signs such as:
- Visible dust obstructing ventilation slots.
- Dust returning quickly after cleaning.
- Unusually high external housing temperatures compared with the lamp's normal operation.
- Repeated shutdowns or unexpected changes in performance.
- Unusual noises or odors.
- Debris that appears to have accumulated inside inaccessible areas.
These signs do not establish that dust is the cause of a malfunction. Electrical faults, component wear, and other equipment issues may produce similar symptoms.
If the lamp behaves abnormally, stop using it and consult the manufacturer or an authorized service provider. Do not attempt to resolve the issue by forcing cleaning tools through openings or disassembling the unit without authorization.
It is also important to remember that a clean lamp does not automatically guarantee proper curing. Correct curing depends on factors such as the lamp's condition, compatible gel products, hand placement, and manufacturer-specified curing procedures.
When Is It Time to Replace a Professional Nail Lamp?
Sometimes a lamp has reached the point where cleaning alone is no longer the answer.
If ventilation openings remain obstructed despite approved maintenance, internal contamination cannot be safely addressed, or the equipment experiences persistent operational problems, contact the manufacturer about inspection, repair, or replacement.
Other reasons to review a lamp's suitability include damaged housings, unreliable timers, malfunctioning sensors, deteriorating power connections, and an inability to maintain the device according to required sanitation practices.
When evaluating replacement options, consider accessible cleaning surfaces, removable base designs, ventilation layout, electrical safety information, manufacturer support, and compatibility with the professional nail systems your salon uses.
You can explore Professional Nail Lamps alongside other Professional Nail Care Collections to compare equipment features and workstation needs.
The most expensive or most powerful-looking lamp is not automatically the best choice. A practical design that supports reliable curing, proper maintenance, and your actual service menu can offer greater day-to-day value.
Train the Entire Nail Team to Follow the Same Routine
Consistency is essential in a salon with multiple technicians sharing workstations or equipment.
One technician may carefully clean the lamp after every appointment, while another considers a quick glance in its general direction to be a complete maintenance program.
Standardized procedures help eliminate that difference.
Train team members to recognize ventilation openings, identify manufacturer-approved cleaning techniques, and understand which maintenance tasks they should never attempt.
Keep equipment manuals accessible and document the salon's procedures for cleaning, inspection, and reporting problems.
When introducing a new lamp model, review its instructions before assuming the cleaning methods used for an older model still apply.
For managers purchasing multiple lamps, choosing equipment with manageable cleaning requirements can make team training easier and reduce unnecessary maintenance variation across stations.
Keep the Lamp Clean Without Overcomplicating Your Day
Keeping nail lamp openings free of dust is really about combining three practical habits: capture filing debris close to its source, prevent unnecessary dust from reaching the lamp, and clean accessible surfaces safely and consistently.
Start with the workstation layout. Make sure your dust collection equipment is functioning correctly and that the curing lamp has adequate space around its ventilation openings. Follow the manufacturer's instructions for cleaning, take a moment to inspect the lamp between services, and schedule a more detailed equipment check each week.
Pair those habits with organized Manicure Essentials, suitable cleaning supplies, and reliable salon maintenance procedures.
Pure Spa Direct offers professional nail supplies, salon equipment, and cleaning essentials for beauty businesses looking to maintain efficient, organized service environments. Whether you are updating an individual manicure station or coordinating supplies for an entire nail salon, choosing practical equipment and developing consistent care routines can make daily operations easier.
And perhaps the best part? The next time you look closely at your nail lamp openings, you can admire a clean, well-maintained piece of equipment instead of discovering another secret neighborhood of acrylic dust. Your clients deserve a polished manicure experience, and your hardworking equipment deserves a little polishing of its own!
