
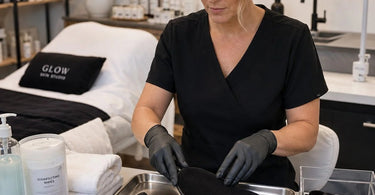
Your time matters - make it count... especially when you're chasing that perfect, streak-free sunless tan for your clients. You know the drill: you've prepped the skin, mixed the Professional Sunless Tanning solution to perfection, and guided your client into the spray tent with the grace of a bronze goddess. But wait, what's that? A grimy, stiff tanning mitt? A blending brush that looks like it's seen better (and cleaner) days? Oh, honey, no. A dirty tool is the fastest way to ruin a flawless application and send your client's trust (and their next appointment) straight down the drain. This is the ultimate, no-nonsense guide to keeping your tanning mitts and blending tools more sanitary than a surgeon's scalpel, ensuring your glow game stays strong and your clients keep coming back for that airbrushed magic.
Let's be real for a second. We've all been there after a busy Saturday, staring at a pile of used mitts and brushes, wondering if we can just, you know, let them soak in some magical unicorn tears and call it a day. But the reality of a professional spa or salon is that hygiene isn't just a suggestion; it's the law of the land. A dirty Tanning Mitt is a breeding ground for bacteria. When DHA (the active ingredient in sunless tanner) mixes with dead skin cells, oils, and sweat, it creates a sticky, grimy film that traps bacteria and can lead to breakouts, folliculitis, or even a nasty skin reaction for your client . Not exactly the vibe you're going for, right?
Why Sanitary Tools Are Non-Negotiable in Your Sunless Tanning Services
Imagine this: A client walks out of your spray tan session looking like a sun-kissed goddess, only to return a couple of days later complaining about a back breakout or a weird, patchy fade. The culprit? It might just be the tools you used. Reusing a tanning mitt or blending brush without proper cleaning transfers bacteria and product buildup right back onto your client's skin . It's a direct line to cross-contamination. Plus, a stiff, crusty mitt is incapable of distributing product evenly. It drags, pulls, and deposits tanner in unsightly globs, leading to streaks, dark patches, and a finish that screams 'DIY disaster' rather than 'professional artistry'.
Keeping your tools clean is also about respecting your craft and your clients. It shows you care about their well-being and the quality of your work. It builds trust, elevates your brand, and frankly, makes your life easier. No one likes scrubbing a crusty mitt at 10 PM. But with a solid routine, it's a breeze.
The Step-by-Step Guide to Cleaning Tanning Mitts Like a Pro
Your tanning mitt is your best friend in the quest for a flawless sunless tan. It's the guardian between your skin and that dreaded 'orange hand' look. But like any close friend, you need to treat it right. Here’s the definitive guide to keeping your Spray Tan Mitts in tip-top shape .
1. The Golden Rule: Rinse Immediately After Every Single Use
This is non-negotiable. As soon as you finish blending that last touch of bronzer, do not toss the mitt in the sink for later. Take it directly to the sink and rinse it under warm (not hot!) running water. Doing this right away prevents the DHA and bronzers from drying and setting into the fabric fibers. It's much easier to wash out fresh product than it is to scrub away a dried, sticky mess . Squeeze the mitt gently under the water until most of the visible residue is gone.
2. The Gentle Hand Wash: Your Mitt's Favorite Spa Treatment
Now for the main event. Place a small, pea-sized drop of a gentle liquid soap into the damp mitt. Baby shampoo is the absolute gold standard here because it's designed for delicate surfaces and rinses clean without leaving a residue . You can also use a mild, fragrance-free hand soap or a gentle dish soap . Work the soap into the fabric using soft, circular motions. Think of it as massaging the mitt, not scrubbing it like a dirty dish towel. Be especially gentle around the edges. Focus on lifting the product out of the fibers, not grinding it in.
3. Rinse, Rinse, and Rinse Again
This step is crucial. Rinse the mitt under warm running water until the water runs completely clear. Squeeze and massage the fabric while rinsing to ensure all the soap is out. Any soap residue left behind will act as a barrier the next time you use it, causing the tanning solution to bead up and apply unevenly . A clean rinse is the secret to a streak-free finish.
4. Squeeze Gently and Reshape
Do not twist, wring, or pull the mitt harshly to get the water out. This can distort the shape and damage the delicate fibers. Instead, gently squeeze the mitt to press out the excess water. Then, carefully reshape the mitt back to its original form while it's still damp.
5. Air Dry: Patience is a Virtue
Never, ever put your tanning mitt in the clothes dryer. The heat will cause the fibers to shrink and warp, making it useless for blending . The same goes for direct sunlight. Instead, hang it up to air dry in a well-ventilated area or lay it flat on a clean, dry towel. Ensure it is completely bone-dry before storing it away, as any moisture can lead to mildew or bacterial growth.
Can You Machine Wash Your Tanning Mitt?
While some manufacturers claim their mitts are machine washable, it's a risky gambit and hand washing is always the safer, more reliable choice . If you choose to risk it, place the mitt in a mesh lingerie bag, use a cold or 30-degree gentle cycle, and use a very small amount of mild detergent. Never use fabric softener or bleach . But our official stance at Pure Spa Direct is: just hand wash it. It takes two minutes and guarantees your mitt will live a long, productive life.
How to Keep Your Sunless Tanning Blending Brushes Pristine
Just like your mitts, your Blending Brushes need some TLC. These tools are essential for contouring and buffing tricky areas like hands, feet, and around the face, making them just as important (and just as dirty) as the mitt .
1. The Initial Rinse
Immediately after use, run the bristles of the brush under warm water. Hold the brush with the bristles pointing downwards to prevent water from seeping into the handle and loosening the glue. Gently massage the bristles with your fingers to dislodge the bulk of the product.
2. The Soapy Wash
Add a small drop of the same gentle soap (baby shampoo is great here too) to the palm of your hand. Swirl the damp brush bristles in the soap in your palm, working the soap into a lather and up through the bristles. You'll see the tanning product and oils being lifted out. Be careful not to be too rough or scrub the bristles back and forth, as this can damage their shape.
3. The Final Rinse
Rinse the bristles thoroughly under warm water, again pointing downwards, until the water runs clear and there is no soapy residue left.
4. Reshape and Dry
Gently squeeze out excess water with a clean towel. Reshape the bristles to their original form and lay the brush flat on a towel to dry. Do not stand the brush upright while wet, as water can drip down into the ferrule and loosen the bristles over time. Allow it to air dry completely before using it again .
Sanitizing vs. Cleaning: Taking It to the Next Level
Cleaning with soap and water removes dirt and grime, but it doesn't necessarily kill all the bacteria. In a professional setting, you need to sanitize or disinfect your tools between clients to meet health and safety standards .
Once your tanning mitt or blending brush is completely clean and dry, you can use a spray disinfectant specifically formulated for salon tools. Many professionals swear by a quick spritz of a high-level disinfectant, like an EPA-approved spray or wipe that is safe for the materials (check to ensure it won't degrade the fabric or bristles) . Always follow the manufacturer's instructions for contact time—the amount of time the surface needs to stay wet to effectively kill germs. This extra step provides a layer of security that your clients will appreciate (and your state board will expect).
At Pure Spa Direct, we carry a range of Professional Cleaners & Disinfectants for Salons and Spas that are perfect for your equipment. From hospital-grade disinfectant sprays to eco-friendly wipes, we have the solutions to keep your practice safe and sanitary.
When to Retire Your Trusty Tools
Even with the best care, tanning mitts and blending brushes aren't meant to last forever. A good rule of thumb is to replace your tanning mitt every three to six months, depending on how heavily you use it . However, here are some signs that it's time to toss it in the bin immediately:
- Stiffness: If the fabric feels hard, crunchy, or stiff even after a thorough wash, it's no longer going to blend effectively.
- Peeling Interior: If the lining or the exterior velvet material is peeling or flaking, it's time for a new one.
- Persistent Stains: While some staining is normal, if the mitt is heavily discolored and just looks grungy, it's a hygiene hazard.
- Loss of Texture: If the fabric feels smooth or worn down, it's lost its ability to grip the skin and blend product properly.
For blending brushes, check for loose, shedding, or splayed bristles. If they are losing their shape or not picking up product evenly, it's time for a replacement.
The Bottom Line: Clean Tools = Happy Clients = A Thriving Business
Mastering how to keep tanning mitts and blending tools sanitary is not just a chore; it's an investment in your business. It ensures your clients leave with a flawless, safe, and long-lasting glow, and it protects your reputation as a true professional. A commitment to hygiene shows your clients you care about their well-being and that you are dedicated to delivering the highest standard of service. So, next time you finish a spray tan session, take those two minutes to wash your tools. Your clients (and your future self) will thank you.
