Pros trust this for consistent quality, but even the best product in your hands can turn into a spicy disaster if you don’t respect the chemistry. If you have ever watched a client’s face turn a shade of pink that closely resembles a strawberry milkshake and wondered if you should just grab the nearest bottle of water and hope for the best, this guide is for you. At Pure Spa Direct, we know that you take your craft seriously, but we also know that a little humor helps when you are up to your elbows in professional skincare products. Today, we are demystifying the art of neutralizing glycolic acid peels. It is not just about stopping the burn; it is about ensuring that your client leaves looking like a radiant goddess, not a blotchy tomato.
Let’s be real for a second. Glycolic acid is the overachiever of the hydroxy acid family. Derived from sugar cane, this tiny molecule digs deep into the skin to break up all that stubborn glue holding dead skin cells hostage . It smooths fine lines, kicks hyperpigmentation to the curb, and generally makes skin look like it just had a five-star vacation. But here is the catch: that acid doesn’t know when to stop. It doesn’t have a conscience. If you don’t step in like a superhero with a spray bottle, it will keep exfoliating until your client’s face feels like sandpaper. That is where we come in.
Why Your Client’s Face Isn’t a Science Experiment: The Basics of Neutralization
In the world of advanced facial treatments, timing is everything. Professional grade peels, particularly those with a pH low enough to make a lemon jealous, do not self-neutralize. Unlike some over-the-counter products that fizzle out on their own, these peels will keep working until the pH of the skin is raised back to its normal level of around 5.5 . If you skip the neutralization step, you are essentially leaving a chemical reaction running wild on someone’s face. That leads to prolonged redness, potential chemical burns, and a client who will definitely not be leaving you a five-star Yelp review.
Neutralization is the process of applying an alkaline solution to stop the acid in its tracks. Think of it as the “off” switch for a very aggressive light bulb. Most professional protocols involve a specific neutralizing spray or solution, though sometimes a simple cool water rinse is the first step . However, relying on water alone is like trying to put out a grease fire with a squirt gun—it often isn’t enough. You need a proper base to counteract the acid.
When You Absolutely, Positively Must Neutralize (And Fast)
Not every peel requires a full neutralizing ceremony, but professional grade glycolic peels usually do. You will know it is time to neutralize when you see even erythema (that uniform pinkness), or if the client reports a burning sensation that has crossed the line from “tingly” to “is my face melting off?” . Some protocols call for a specific dwell time (usually 2 to 5 minutes), but you should always monitor the skin in real-time. Aestheticians call this “tracking the peel.” If the skin is frosting (turning white) or showing extreme irritation, neutralize immediately .
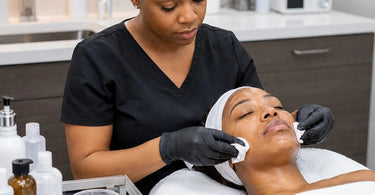
To execute this safely, you will need your tools ready. I love having a bowl of cool distilled water, gauze pads, and a professional grade neutralizer within arm’s reach. Speaking of tools, while you are waiting for that peel to activate, why not make your client super comfortable? A warm blanket and a Towel Steamer for their neck wrap can turn a scary chemical process into a luxurious spa day.
The Step-by-Step: How To Neutralize Like a Boss
Let’s walk through the protocol. First, you apply your peel. Let’s say you are using a 20% or 30% glycolic solution. You have applied it evenly (avoiding the eyes, lips, and those pesky nose hairs), and the timer is ticking. Once the time is up or the erythema appears, you move to neutralization.
Step 1: The Application
Using a clean cotton pad or gauze, apply the neutralizer generously. Do not be shy. You want to flood the area. If you are using a spray, ensure the client closes their eyes and holds their breath (kidding... mostly). You will notice a slight fizzing or bubbling reaction. That is the acid-base reaction happening in real-time, and it is music to a trained aesthetician’s ears .
Step 2: The Wait
Let the neutralizer sit for about 1 to 2 minutes. This ensures the pH is truly balanced. If you rinse too early, you might leave active acid behind, and we don’t do half-jobs here at Pure Spa Direct.
Step 3: Rinse and Reveal
Rinse the area thoroughly with cool water. Pat the skin dry—do not rub! The skin is in a fragile state. You have just removed several layers of dead cells; rubbing it would be like scrubbing a baby with a brillo pad.
The DIY Neutralizer Myth (Please Don’t Do It)
I know you saw that TikTok where someone mixed baking soda and water and called it a neutralizer. And yes, technically, baking soda (sodium bicarbonate) has a high pH and can neutralize acid. However, in a professional spa environment, using baking soda is risky. Why? Because it is too alkaline. Baking soda has a pH of around 8.3 to 9, which can shock the skin and strip the barrier, leading to dehydration and irritation . Furthermore, tap water contains minerals and chlorine that can react unpredictably with freshly peeled skin .
Stick to professional solutions. They are buffered to be effective yet gentle. Your clients are paying for professional results, not a kitchen chemistry set. If you are in a pinch and a client is screaming, cool water is your safest emergency exit . But for the love of all that is holy, buy the actual Post Peel Neutralizer from our site. Your liability insurance will thank you.
Post-Peel Care: The Follow-Up is Just as Crucial
Once you have neutralized and rinsed, the service isn’t over. In fact, the recovery phase is where you prove your worth. Apply a soothing serum or a physical barrier like a calming mask. We love ingredients like hyaluronic acid, ceramides, and aloe vera. Avoid occlusive ointments like Vaseline immediately after a superficial peel, as they can trap heat.
Then, send them home with a lecture. Okay, not a lecture, but strict instructions. They must wear SPF 30 or higher religiously. Their new baby skin is highly susceptible to UV damage. They should avoid retinols, harsh scrubs, and hot yoga for at least 48 hours. Sweating on a freshly peeled face is a recipe for a rash called miliaria, and nobody wants that.
Equipment That Makes You Look Like a Pro
While your hands are your greatest tool, having the right gear makes neutralization effortless. You need good lighting to see the erythema. Check out our Magnifying Lights to get a zoomed-in view of the skin’s reaction. You also need a comfortable setup for the client. If they are lying on a rickety old table, they will tense up, and tense skin reacts worse to acids. Invest in our Portable Massage Tables for stability, or upgrade to a plush Luxury Spa Furniture setup.
Don’t forget the hygiene factor. You need lots of clean gauze, sponges, and Protective Gloves & Masks. Acids can burn your fingers too, folks! We don’t want the aesthetician leaving with peeling hands; that’s just unprofessional (and painful).
Brands That Play Well With Glycolic
At Pure Spa Direct, we carry a massive range of professional lines. When you are shopping for peels and neutralizers, you want consistency. Brands like Murad offer clinical strength protocols. For the Lash & Brow girls who are expanding into Dermaplaning and peels, look at Amber Products for reliable basics. If you are a high-volume waxing center adding chemical peels to the menu (busy ladies!), you need speed and safety. ItalWax isn’t just for hair removal; they understand skin chemistry for their Pre/Post products that can complement a peel regimen.
Troubleshooting: When Things Go Sideways
Let’s talk about the “Oops” moments. What if you neutralize, rinse, and the client is still beet red? First, stay calm. Panicking makes the client panic. Apply a cool compress. Use a fan. Spray with cool water again. If there is frosting (white patches) or blistering, that is a sign of an acid burn. In this case, do not apply oils. Keep cooling the area and refer them to a medical professional if necessary. Remember, you are a Professional, not a dermatologist. Know your limits.
Also, be aware of contraindications. If a client is on Accutane or has used topical retinoids recently, their skin barrier is compromised. Performing a glycolic peel on them is like putting jet fuel on a matchstick. Always do a thorough consultation.
Here at Pure Spa Direct, we are your wholesale partners in crime. We don’t make the stuff, but we make sure you get the best spa retail products and professional tools to perform miracles. Whether you need Waxing Supplies, Pedicure Chairs, or just a massive box of Compressed Sponges to wipe off that neutralizer, we’ve got your back.
Now go forth and neutralize with confidence. And remember, if the client asks why their face is tingling, just smile and say, “That’s the sound of dead skin cells crying for mercy.” They’ll love you for it.
Ready to stock your treatment room? Check out these essential collections for your peel protocols:
Advanced Facial Treatment Products
Professional Cotton & Sponges
High-Quality Towels
Facial Steamers for Pre-Peel Prep
Premium Skincare
)