
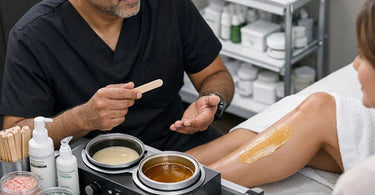
Build better results with smarter tools... and let's be real, a disorganized wax cart is basically a tiny, wheeled disaster waiting to happen. You know the scene: you're mid-service, reaching for your Professional Wax Spatulas and Applicators for Salons & Spas, and instead you knock over a bottle of post-wax oil, your client jumps, and you're left apologizing while fishing a rogue stick out of your shoe. We've all been there, and it's not a good look. But fear not, my fellow hair-removal hero! Transforming your wax cart from a chaotic mess into a lean, mean, waxing machine is not only possible, it's actually pretty simple. And the payoff? Faster services, happier clients, and a massive drop in your daily stress levels. Let's turn that cart into the MVP of your treatment room.
A well-organized Professional Wax Cart is the secret weapon of every top esthetician. It's not just about looking pretty (though that's a nice bonus for your Instagram stories). It's about creating a seamless flow of movement, keeping everything hygienic, and ensuring you never have to excuse yourself to grab a forgotten item. When your tools and products are exactly where you need them, you can focus 100% on your client's comfort and results. That translates directly to glowing reviews, repeat bookings, and a healthier bottom line for your spa or salon business. So, grab a trash bag, put on your favorite playlist, and let's declutter like a boss.
Step 1: The Great Wax Cart Purge (Say Goodbye to the Junk)
First things first: empty that cart completely. I mean every single drawer, every side pocket, and that mysterious sticky spot in the corner. As you pull everything out, create three piles: 'Essential', 'Sometimes', and 'Why Is This Here?'. The 'Essential' pile is for items you use on every single client, like your Professional Wax Warmers for Salons & Spas, primary wax, spatulas, and strips. The 'Sometimes' pile is for things like specific post-wax creams for sensitive skin or that special Ingrown Hair Products you use only on request. The 'Why Is This Here?' pile is for ancient candy wrappers, that broken pair of tweezers you swore you'd fix, and three almost-empty bottles of the same oil. Be ruthless. Your future self will thank you.
Step 2: Zone Your Cart for a Killer Workflow
Now for the fun part: designing your cart's layout. Think of your cart like a tiny kitchen: you want your 'clean' zone, 'service' zone, and 'waste' zone. Start from the top. The top surface is prime real estate. This is where your ItalWax - Wax warmer lives, along with your clean sticks and a small dish for your pre-wax cleanser. Keep it minimal. The middle shelf or drawer is for your application tools. This is where you store your Quality Wax Strips & Rolls for Effective Hair Removal and your box of clean spatulas. One side of the cart should have a caddy for your Pre & Post-Waxing Products – think pre-wax oil, post-wax lotion, and soothing gel. The other side? That's for waste. Hang a small, lined trash can or a disposable bag holder. Making waste disposal instant and touch-free is a game-changer for hygiene and speed.
Step 3: Stocking Your 'Essential' Arsenal
Let's talk specifics about what goes into those zones. For your top-level 'service zone', you need the reliable workhorses. Start with a high-quality warmer from ItalWax or Starpil – these brands are known for consistent, even heat. Next to it, keep a clean, dry container for your Professional Wax Spatulas and Applicators for Salons & Spas. I love using a small, wide-mouth jar or a Spa Essentials organizer. Having them right there, stick-side up, means you're not fumbling around when your hands are gloved and sticky. And don't forget your Hygienic Table Paper for Waxing, Spa & Massage Tables nearby – a clean surface for every client is non-negotiable. We also love keeping a small bottle of Cuticle Oil on the side for those brow waxes – it's a tiny luxury that makes a big difference.
Step 4: Mastering the Drawers and Shelves
Drawers can become black holes of lost supplies if you're not careful. The solution? Compartmentalize! Use small bins or drawer dividers (even inexpensive ones from an office supply store work wonders). Dedicate one drawer entirely to your Waxing Accessories & Removers for Professional Use. This is where you keep your post-wax remover wipes, extra roller heads for your Efficient Roll-On Wax Cartridges for Quick Waxing, and small spatulas for spot treatments. Another drawer should be for your 'sometimes' items: those specialty Soft Strip Wax for Effective Salon Hair Removal for large areas, or your Bulk Wax Deals refill bags. Label everything! A $10 label maker is the best investment you'll ever make for your cart's sanity. Remember, if you can't see it, you'll forget you have it, and you'll end up over-ordering.
Step 5: The Power of 'Prep and Post' Caddies
Speed in waxing comes from anticipation. Before you even call your client back, your cart should be in 'ready mode'. Create a small, portable caddy or tray that holds everything for your 30-second prep: your pre-wax cleanser, a few cotton rounds from our Professional Cotton, Sponges, and Wipes for Salons & Spas, and a bottle of pre-wax oil. You can grab this whole caddy, prep your client's skin in one go, and then slide it back to its spot. Do the same for post-wax. A separate caddy with your post-wax cooling gel, Ingrown Hair Products, and a soothing lotion from Lycon or Satin Smooth makes the finishing touches feel seamless and luxurious. This 'caddy within a cart' system is pure gold for efficiency.
Step 6: Sanitation Station – Non-Negotiable and Easy
Your organized cart must have a dedicated sanitation hub. This isn't just for show; it's for your license and your clients' safety. On the bottom shelf or a side hook, keep a pump bottle of hospital-grade disinfectant spray and a roll of paper towels. Every single time you finish a service, you should be able to reach down, spritz your top surface, wipe it clean, and dispose of your waste without moving from your spot. Also, have a small, lidded container for 'dirty' metal tools like tweezers. At the end of the day, that container goes straight to your UV Sterilizers for true, chemical-free disinfection. Integrating sanitation into your cart's design makes compliance automatic, not an afterthought.
Step 7: Stocking Up Without Cluttering Up
One of the biggest mistakes is using your wax cart as storage. It's not a warehouse; it's a workstation. Your cart should only hold enough supplies for one day (or even half a day) of services. Keep your bulk inventory – those Bulk Wax Deals and cases of Compressed Sponges – in a back cabinet or closet. Every morning, take five minutes to 'reload' your cart from your main storage. This daily ritual forces you to check your levels, wipe everything down, and start each day fresh. It also prevents the dreaded 'junk drawer' effect where things get pushed to the back and forgotten for months. Trust me, your back room will thank you too.
Real-World Product Picks for Your Dream Cart
Okay, so we've talked systems, but let's name some actual heroes that should be riding on your newly organized cart. For your wax warmer, you can't beat the reliability of the Professional Wax Warmers for Salons & Spas from brands like ItalWax. They heat evenly and are built to last through thousands of services. For your wax itself, keep a pot of Professional Stripless Hard Wax from Cirepil or Waxness for sensitive areas, and a Soft Strip Wax for Effective Salon Hair Removal from Gigi for legs and arms. Need a super gentle option? Lycon has some amazing formulas that are like a hug for your clients' skin. And for your post-wax care, the Pre & Post-Waxing Products from Satin Smooth are industry staples for a reason. Keep those on your top shelf.
Bonus Tips for the Waxing Warrior
Here are a few final secrets from the pros. First, invest in a small, rechargeable LED Bright Lamps that clips onto your cart. Being able to tilt a bright, true-color light exactly where you need it (goodbye, missed fine hairs!) is a total game-changer. Second, use magnetic strips! You can glue a small magnetic knife strip to the side of your cart to hold metal spatulas, tweezers, and even your small scissors. It keeps them accessible, clean, and off your work surface. Finally, personalize your cart. Add a little hook for your Professional Spa Apparel smock, or a small cup for your favorite pens for charting. When your cart reflects your workflow, it stops feeling like a piece of equipment and starts feeling like a trusted partner.
So there you have it, queen of clean skin and smooth results! Organizing your Professional Wax Cart isn't just a chore; it's an act of self-care for your business. It reduces friction (in your process, not your wax), elevates your professionalism, and lets your talent shine without the distraction of a chaotic workspace. Now go forth, purge that junk drawer, and create a cart that makes you feel as smooth as your clients' legs. Your sanity – and your bottom line – will thank you. Now get back to making the world a less hairy, more beautiful place, one perfectly organized cart at a time.
)