Be prepared for whatever comes next... because let's be real, ladies, nothing kills the vibe of a luxurious, lifting microcurrent facial faster than handing your client a dirty probe. It's like serving a five-star meal on a dirty plate. Yikes, right? We've all been there, rushing between appointments, thinking a quick wipe with a damp towel is enough. But if you want to keep those jaws sculpted, those brows lifted, and your client's skin (and trust) perfectly intact, you need the real deal on sanitation. Today, we are diving into the sudsy, slightly scientific, and surprisingly satisfying world of deep-cleaning your most expensive (and favorite) facial tool.
Let’s be honest, your professional microcurrent device is the little black dress of your treatment room. It makes everyone look better. But unlike that dress, you can't just toss it in the wash. This machine touches skin, serum, and sometimes even a little bit of that post-wax glow. Proper cleaning isn't just about looking professional for the health inspector; it's about ensuring the device actually works. Residue buildup can block the current, making your lifts less effective. So grab your gloves, put on your favorite pump-up jam, and let's get this machine sparkling clean.
Why Your Microcurrent Device is Begging for a Bath
Before we get to the elbow grease, let's talk about the gross stuff. Every time you glide those wands or probes over a face, you are picking up dead skin cells, natural oils, leftover serum, and yes, bacteria. If you don't clean it properly, you are essentially painting yesterday's face onto today's client. Professional cleaners are your best friend here. A dirty device can also lead to conductivity issues. You might find yourself cranking up the intensity to get the same lift, which means longer service times and potentially uncomfortable clients. A clean device is an efficient device. Plus, let’s be honest, pulling out a pristine, gleaming tool makes you look like the absolute goddess of hygiene that you are.
The Golden Rule: Read the Manual (Yes, Really)
I know, I know. Reading a manual sounds about as fun as watching a hair bleach dry. But trust your favorite distributor on this one. Different manufacturers, like the fancy brands we carry such as Spa Masters or Prosana, have specific needs. Some probes are waterproof; some are merely water-resistant. Some hate certain chemicals. The manual is your roadmap to not voiding that expensive warranty. Take five minutes to find it, bookmark the cleaning page, and save yourself a headache later.
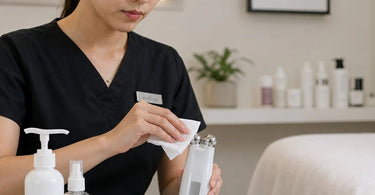
Step 1: The Pre-Clean (Because We Don't Like Chunks)
This step is non-negotiable. After your service, while your client is sipping water and feeling lifted, unplug your device. Using a dry, lint-free towel or a disposable wipe, gently wipe away any visible product or residue from the probes and the handpiece. This is the 'pre-game' wipe. You are just removing the bulk of the gunk. Think of it as taking your plates to the sink before you scrub them. Don't use anything abrasive here, please. We aren't scrubbing a grill; we are caring for a precision instrument. This quick step prevents the build-up of hard-to-remove gunk later.
Step 2: Choose Your Liquid Warrior (The Spray Down)
Now it's time for the heavy hitter. You need a disinfectant that is registered to kill bacteria and viruses but is safe for the metal and plastic components of your machine. Avoid anything with high concentrations of alcohol, bleach (NEVER bleach!), or harsh acetone. These will eat the finish off your probes faster than a sugar scrub exfoliates dry skin. Look for a spray disinfectant specifically designed for non-porous salon tools. Spray the solution onto a clean, soft cloth – never directly onto the device unless the manual gives you the green light. You want the cloth damp, not dripping like a wet dog.
Step 3: The Gentle Wipe Down (TLC Time)
Using your damp cloth, thoroughly wipe down every surface of the handpiece, the cord (if attached), and the probes. Pay special attention to the crevices where the probe meets the handle. That little crack is a hotbed for bacteria. Use a soft-bristled brush or a cotton swab dipped in your cleaner to get into those tiny grooves. Be gentle but thorough. You are not trying to rip the finish off. You are giving it a luxurious, sanitizing spa body treatment for machines. Make sure the cloth isn't soaking wet, as moisture getting into the electrical components is the fastest way to send your device to an early grave.
Step 4: Sanitizing vs. Disinfecting (Know the Difference)
Here is where we get fancy. Cleaning removes dirt and oil. Sanitizing lowers the number of germs. Disinfecting kills them. For a professional microcurrent machine, you need to disinfect between every single client. Look for a 'hospital-grade' disinfectant or a 'tuberculocidal' agent. These are the heavy-duty germ killers. You might need to leave the wet solution on the surface for a specific 'dwell time' – usually 2 to 10 minutes. Read the back of your bottle! Leaving it wet for that time ensures the chemical actually does its job. You can't rush science, honey.
Step 5: Drying (Patience is a Virtue)
Do not put a wet device away. Do not plug in a wet device. Moisture + Electricity = Sad Kelly and a fried machine. After the dwell time, use a fresh, dry towel to dry the device completely. Let it air dry for a few extra minutes for good measure. This is the time to organize your nail table or sweep the floor. Once the device is bone dry, you can place it back on its charger or store it safely in a drawer.
What About the Sponges and Applicators?
If you are using conductive sponges or gloves with your microcurrent device, these are often single-use. If they are reusable, they need to be washed in hot, soapy water or with a specialized surgical instrument cleaner (yes, that exists) and then disinfected. Never reuse a sponge that looks grimy or smells funky. When in doubt, throw it out. Your clients are paying for the best; don't cheap out on the tools touching their faces. Stock up on compressed sponges for a fresh, sanitary option every single time.
Weekly Deep Clean: The Spa Day for Your Machine
In addition to the daily wipe-down, your device needs a weekly deep clean. This involves removing the probes (if detachable) and soaking them in an approved enzymatic cleaner or an ultrasonic jewelry cleaner (again, check your manual!). An ultrasonic cleaner uses sound waves to blast off microscopic debris. It's like a hot tub party for your probes. It gets into the nooks and crannies that a cloth can't reach. Run the ultrasonic cycle, rinse with distilled water, and dry thoroughly. Your machine will feel brand new, and the conductivity will be off the charts.
Storage: The Final Frontier
Where you keep your device matters. Don't leave it sitting in direct sunlight or under a UV sterilizer that might degrade the plastic. Don't toss it loosely in a drawer full of nail art rhinestones or loose nail files. Keep it in a clean, dry, padded case or on a dedicated, covered stand. Dust is the enemy. Keep it covered, keep it charged according to the manufacturer's guidelines (don't overcharge it!), and it will serve you loyally for years.
Products We Love for the Job
Here at Pure Spa Direct, we don't just sell the machines; we sell the sanity. Look for high-quality disinfectant sprays and wipes from trusted brands like Amber Products or Dukal. Pick up some lint-free wipes and a soft body brush specifically for your tools. Investing an extra five minutes in cleaning saves you thousands in replacement costs and reputation management. A sparkling clean tool is a sign of a true professional.
The 'Oops, I Broke It' No-Nos
Let's do a quick reality check. Do NOT submerge the main control unit in water. Do NOT use steel wool, scrubby pads, or gritty sugar scrubs on the probes (they will scratch). Do NOT use rubbing alcohol unless the manufacturer specifically says so (it dries out seals and rubber components). Do NOT use your device on a client if it smells burnt or feels sticky. And for the love of all that is holy, do NOT put the metal probes in the microwave to 'sterilize' them. Yes, someone tried that once. It did not end well.
Keeping Your Clients in the Loop
Want to build major trust? Clean your device in front of your client or talk to them about your sanitation process. 'I'm just disinfecting my microcurrent machine for you, honey. We use a hospital-grade spray to make sure you get a safe, clean, and effective lift.' That kind of transparency is gold. It tells them you care about their health as much as their jawline. Pair that with a clean massage table and fresh bedding, and you are a five-star operation.
Wrapping It Up (With a Clean Cloth)
So there you have it, babe. The not-so-glamorous but absolutely essential guide to keeping your professional microcurrent device in tip-top, sanitized, lift-giving shape. It takes discipline, but so does building a successful spa business. A clean machine is a happy machine, and a happy machine makes for glowing, returning clients who swear by your magical touch. Now go forth, sanitize, and give someone a face lift that doesn't require a scalpel. You've got this.