
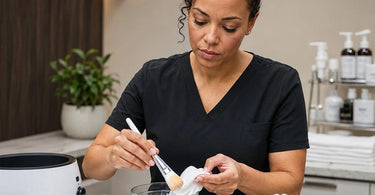
Upgrade client experiences now by ensuring every tool you use is as pristine as the results you deliver. Let us talk about a little hero in the spa world that often gets overlooked in the hustle and bustle of a busy day: the humble paraffin brush. If you have ever found yourself staring at a crusty, wax-caked brush and contemplated a dramatic game of tug-of-war with it, you are in the right place. We are diving deep into the art and science of how to properly clean a professional paraffin brush, so you can keep your services smooth, your clients happy, and your sanity intact.
Let us be honest, that little brush works hard. It is the unsung hero of those gloriously hydrating paraffin treatment services that leave your clients' hands and feet feeling like butter. But after a long day of dipping and painting, that brush can look less like a precision instrument and more like a modern art project gone wrong. Do not worry; we have all been there. The good news is that cleaning it is not a Herculean task; it just requires a little know-how and the right technique.
Why Bother? The Sticky Situation with Dirty Brushes
You might think a little dried wax on the bristles is no big deal, right? Wrong! It is not just about aesthetics; it is about hygiene and performance. First off, professional licensing boards and health regulations are pretty clear about sanitation. For instance, guidelines for esthetics services mandate that all multi-use implements must be thoroughly cleaned and disinfected before each client to prevent the spread of pathogens . A brush caked with old wax is a breeding ground for bacteria and a surefire way to compromise your infection-control system .
Think about it: you are dipping that brush into a warm, moist environment, which is basically a five-star hotel for germs. If you are using it on multiple clients without proper cleaning, you are essentially transferring yesterday's potential cooties to today's unsuspecting client. That is not the kind of souvenir we want to give anyone. Plus, a clean brush simply applies the paraffin more evenly. A stiff, clogged brush will leave streaks and lumps, making your service look less-than-professional. We are in the business of pampering, not streaking!
The Step-by-Step Guide to a Squeaky-Clean Brush
Alright, let us get down to business. Cleaning your paraffin brush is easier than convincing a client to book a return appointment. Here is the lowdown on how to get that brush sparkling clean. The process generally involves a few key steps: removing the bulk of the wax, giving it a good wash, and ensuring it is properly disinfected.
Step 1: The Big Scrape - Removing the Bulk of the Wax
First things first, you need to get the majority of that hardened wax off. Do not go at it with a metal scraper or you will ruin the bristles. Instead, use a paper towel or a Professional Wax Spatulas and Applicators for Salons & Spas to gently wipe away the excess wax while the brush is still slightly warm. If the wax has turned into a solid brick, you might need to soften it by dipping the bristles in the warm paraffin bath for a few seconds. Just be careful not to burn yourself!
Step 2: The Wax Cleaner Soak - The Magic Bullet
Now for the secret weapon: a dedicated wax cleaner. This is a specialized solution designed to dissolve paraffin wax without damaging the bristles. Pour a small amount of wax cleaner into a bowl and soak the brush for a few minutes . You will see the wax start to melt away like magic. It is incredibly satisfying. You can also use a little mineral or baby oil in a pinch, but the professional stuff works faster and more effectively. Remember to do this in a container, not over your sink, to avoid clogging your drain!
Step 3: Wash and Rinse - The Soapy Finale
Once the wax is dissolved, it is time for a good old-fashioned wash. Fill a bowl with warm (not hot) water and add a mild dish soap or a Professional Cleaners & Disinfectants for Salons and Spas that is safe for brushes. Swish the brush around in the soapy water to remove any lingering residue . Rinse it thoroughly under running water until the water runs clear. Be careful not to get water in the brush handle, as this can loosen the glue over time.
Step 4: Disinfect and Dry - The Final Frontier
Sanitizing is not just about cleaning; it is about killing the invisible nasties. After washing, it is crucial to disinfect your brush. You can spray it with a disinfectant spray like Prevention or Lucas-Cide, following the manufacturer's instructions for contact time to ensure it is bactericidal, virucidal, and fungicidal . Alternatively, you can soak it in a proper disinfection solution. Once disinfected, rinse it again, gently squeeze out the excess water, and lay it flat on a clean towel to dry. Never store a wet brush, as this can lead to mold and mildew growth.
Essential Products for the Job
You do not need a PhD in chemistry to keep your tools clean, but having the right products makes all the difference. Here are a few essentials you should have on hand.
- Professional Cleaners & Disinfectants for Salons and Spas: A broad category that includes both your wax removers and your final-step disinfectants. Look for EPA-registered options to ensure they are killing the right stuff.
- Wax Remover: Specifically formulated to break down the paraffin. It is a lifesaver.
- Applicators & Spatulas: While you are cleaning your brush, make sure you have a fresh supply of spatulas for your waxing services. Never double-dip a waxing stick!
- Protective Gloves & Masks for Salon and Spa Professionals: Always protect yourself when handling chemicals and disinfectants. Gloves are your best friend.
Pro Tips for a Long-Lasting Brush
You have invested in a quality tool; now treat it right! Here are a few extra nuggets of wisdom to keep your paraffin brush in tip-top shape for years to come.
- Clean Immediately: The best time to clean your brush is right after you finish the service, while the wax is still soft. This saves you the elbow grease of scraping off hardened wax later.
- Don't Submerge the Handle: If you are soaking your brush, make sure you only soak the bristles. Submerging the ferrule (the metal part) can loosen the glue and cause the bristles to fall out.
- Air Dry: Always let your brush air dry completely before storing it. Hanging it upside down to dry is even better, as it allows water to drain away from the handle.
- Have a Backup: Every busy professional needs a backup brush. Buy a few extras so you can rotate them through your cleaning routine.
Keep the Rest of Your Gear Clean Too!
Remember, sanitation is a holistic game. While you are on a cleaning spree, do not neglect the rest of your station. Your Professional Wax Warmers for Salons & Spas need regular cleaning to prevent that dreaded ring of hard wax . Your Towel Steamers should be drained and wiped down. And do not even get us started on those Hygienic Table Paper rolls — make sure you are changing those between every client!
Even your Professional Shears, Clippers, & Trimmers for Barbers and other tools need TLC. A clean workspace is a happy workspace. For a full range of supplies to keep your business sparkling, check out our Must-Have Supplies for Salon & Spa Business Success. And for all your paraffin needs, from warmers to wax, you can explore our dedicated Paraffin collection.
Cleaning a paraffin brush might not be the most glamorous part of your job, but it is one of the most important. By following these simple steps and using the right products, you will ensure your tools are always ready to deliver a five-star, hygienic experience. Your clients will thank you (even if they do not know why), and your brush will have a long, productive life. Now go forth and conquer that wax!
