Stay ready for anything... especially a surprise health inspection. If there’s one piece of equipment that can make an esthetician break out in a cold sweat at the thought of a swab test, it’s the microdermabrasion handpiece. This mighty little wand works miracles on skin texture, but its intricate nooks and powerful suction also make it a magnet for skin cells, oils, and microbes. Let’s be real: skipping from client to client with a quick wipe of a compressed sponge and a hopeful prayer isn’t a protocol—it’s a liability. Your clients trust you with their skin, and nothing erodes that trust faster than the nagging thought that the tool on their face was just on someone else’s. This isn’t just about cleanliness; it’s about professional integrity, client safety, and protecting your hard-earned reputation. A proper disinfection routine is non-negotiable, and thankfully, it’s not rocket science. By following a clear, consistent process, you can ensure every treatment is as safe as it is effective, giving you peace of mind and your clients that glorious post-treatment glow without any hidden worries.
Think of this guide as your new best friend for handpiece hygiene. We’re going to break down the why, the how, and the “don’t you dare” of disinfecting your microdermabrasion tools, turning a potentially confusing chore into a simple, foolproof routine.
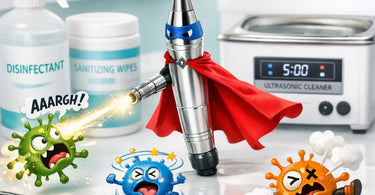
Why a “Quick Wipe” is a Career-Limiting Move
First, let’s get our terms straight, because in the world of spa sanitation, words have weight. Cleaning is the physical removal of gunk—dead skin, product residue, and other visible debris. Disinfecting is the chemical process of killing pathogens on a surface. Sterilizing is the gold standard, eliminating all microbial life. For tools that break the skin barrier, like needles, sterilization is mandatory. For microdermabrasion, which exfoliates the outermost layer, high-level disinfection is the benchmark.
The scary truth is that the internal channels of a handpiece can become contaminated during use. A surface wipe with a low-level disinfectant does absolutely nothing to address what’s lurking inside. Furthermore, many common cleaning mistakes—like using overly saturated wipes or submerging non-submersible parts—can actually damage the O-rings and internal bearings of your expensive equipment. This leads to costly repairs and downtime. The goal is twofold: protect your client from cross-contamination and protect your investment from premature failure.
The Step-by-Step Disinfection Protocol (Your New Sacred Ritual)
This protocol combines best practices from equipment manufacturers and industry standards. Always defer to your specific machine’s manual first, but this framework will serve you well for most diamond microdermabrasion systems.
Step 1: Immediate Post-Treatment Breakdown & Pre-Cleaning
The clock starts ticking the second you finish a treatment. Don’t let biological matter dry and harden inside the handpiece.
- Power Down & Disconnect: Turn off the machine and unplug the handpiece from the main unit.
- Disassemble: Remove the diamond tip or any other disposable component (like a filter) and discard it in a lined biohazard bin. If your tips are reusable, they move to the cleaning track with the handpiece.
- The Initial Rinse/Scrub: This is the crucial cleaning phase. Using a small, soft brush (an old toothbrush dedicated to this purpose works) and warm, soapy water, thoroughly scrub the exterior of the handpiece, paying special attention to the crevices where the tip attaches. For the internal suction channel, some manufacturers recommend flushing with warm water. The key is to remove all physical debris. Rinse completely.
Step 2: The Disinfection Process
Now that the handpiece is clean, it’s time to disinfect. Remember: disinfectants need adequate contact time to work—often up to 10 minutes. Rushing this step renders it useless.
- Choose Your Weapon (Wisely): Use an EPA-approved, hospital-grade disinfectant that is compatible with your equipment. For many surfaces, a 70% isopropyl alcohol solution is effective and evaporates quickly, reducing the risk of liquid damage. Alternatively, a commercial disinfectant wipe or spray designed for medical equipment is ideal. Never use bleach or other corrosive chemicals unless explicitly approved by your machine’s manufacturer, as they can degrade plastics and seals.
- Apply & Wait: Thoroughly wet all surfaces of the handpiece with your disinfectant. If using a wipe, ensure the surface remains visibly wet for the full contact time listed on the product label. This is not a wipe-and-go situation! Set a timer if you have to.
- The UV Sterilizer Finale (Highly Recommended): For diamond microdermabrasion tips, the US importer of a popular brand recommends a two-step process: cleaning with alcohol and a brush, followed by sterilizing in a UV sterilizer for 30 minutes. A UV sterilizer cabinet is an excellent investment for any treatment room, providing an extra layer of pathogen-killing assurance for small tools and implements.
Step 3: Drying & Storage
Moisture is the enemy. It breeds bacteria and can damage electronics.
- Dry Thoroughly: Use a lint-free, disposable paper towel to pat the handpiece dry. For internal channels, use a blast of compressed air if your machine has it, or allow to air-dry completely in a clean, dust-free area.
- Store Properly: Once completely dry, store the handpiece in a clean, closed cabinet or drawer. Never leave it sitting out on the counter. Consider a dedicated, labeled case for each of your key tools.
What NOT to Do: Common Sanitation Sins
- Don’t Submerge Non-Submersible Handpieces: Unless the manual says it’s okay, don’t dunk the entire handpiece in water or solution.
- Don’t Use Abrasive Tools or Scrubs: They can scratch the surface, creating microscopic hiding places for bacteria.
- Don’t Skip Steps or Cut Contact Time: This is the most common error. If the disinfectant doesn’t sit wet for 5-10 minutes, you haven’t disinfected.
- Don’t Forget the Rest of the Machine: Wipe down the entire unit, cords, and the magnifying lamp with appropriate disinfectant wipes.
Building a Culture of Clean: Beyond the Handpiece
A sterile handpiece means little if it’s placed on a dirty surface. Your entire treatment room must be part of the protocol.
- The 30-Minute Room Turnover: Allow adequate time between clients. This includes removing all used linens (folded inward to contain particles), disinfecting the bed, portable massage table, stool, doorknobs, and any product bottles touched.
- Upgrade Your Linens: Use high-quality, bleach-safe towels and spa bedding that can withstand hot washes.
- Stock the Right Supplies: Keep a dedicated “cleaning caddy” stocked with professional cleaners and disinfectants, nitrile gloves, compressed sponges, and plenty of disposable cotton and wipes.
- Document Everything: Keep a simple log. Date, client name (or initial), and a checkmark for handpiece disinfection and room turnover. This is your proof of due diligence.
Your Handpiece’S Longevity: Maintenance is Self-Care for Your Tools
A well-cared-for handpiece is a reliable, high-performing handpiece. Follow the manufacturer’s guidelines for lubrication and servicing. Listen to your equipment—a change in sound or a drop in suction is its way of crying for help. Schedule annual check-ups with your supplier. And remember, even the best-maintained tips wear out. Diamond tips should typically be replaced every 6-12 months with regular use. Using a dull tip is ineffective and can irritate the skin.
Mastering this protocol does more than just check a compliance box. It builds unwavering client trust. It transforms your treatment room into a sanctuary of safety. And it allows you to perform one of the most satisfying treatments in aesthetics with complete confidence. Now go forth, disinfect diligently, and create those flawless, safe, and stunning results your clients deserve.