Your best results start here... with a therapy that looks like it was invented by a very enthusiastic octopus. Cupping therapy might leave those telltale circular marks that make clients look like they lost a fight with a vacuum cleaner, but trust us—this ancient technique is a game-changer for pain relief, circulation, and even glowing skin. Whether you're a massage therapist, esthetician, or wellness pro, mastering a cupping therapy set can elevate your services from "meh" to "magical." Let's dive in (just not as hard as the cups suction to the skin—safety first!).
First things first: cupping isn't new. Like, at all. It's been around since ancient Egyptian times, and if it's survived this long without TikTok trends, you know it works. The principle is simple: suction cups are placed on the skin to create a vacuum, which boosts blood flow, loosens tight muscles, and helps the body flush out toxins. It's like giving your client's tissues a much-needed hug from the inside out.
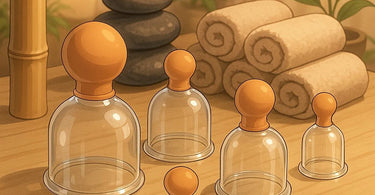
Step 1: Choose Your Cups (No, Not the Stanley Kind)
Not all cups are created equal. You've got options like silicone, glass, or plastic—each with its own perks. Silicone cups are great for beginners because they're squeezable and don't require heat. Glass cups (used with fire—yes, really) offer deeper suction but come with a learning curve. Pro tip: Start with a versatile cupping set that includes multiple sizes for different body areas. Tiny cups for faces, bigger ones for backs, and maybe a medium one for that existential dread we all carry in our shoulders.
Step 2: Prep Like a Pro
Before you go suction-happy, prep the skin with a light oil (massage oil works wonders) to help the cups glide smoothly. Dry cupping? Skip the oil. Also, avoid bony areas or broken skin—unless you want your client to sound like a deflating balloon when you remove the cups.
Step 3: The Art of the Suction
For silicone cups, squeeze, place on the skin, and release. For glass cups, briefly heat the inside with a flame (don't set the spa on fire, please), then press onto the skin as it cools. The suction should feel firm but not "I regret my life choices" intense. Move the cups in slow, gliding motions along muscle fibers or leave them stationary for deeper tension release. Facial cupping? Gentle is the name of the game—think "barely there" suction to avoid looking like you got into a wrestling match with a jellyfish.
Step 4: Timing Is Everything
Leave cups on for 5–15 minutes, depending on the client's comfort and goals. Any longer, and you risk those iconic circular marks lasting longer than their last relationship. For facial cupping, 1–3 minutes max—this isn't a "no pain, no gain" situation.
Step 5: Aftercare Matters
Hydration is key! Recommend clients drink water to flush out toxins (and maybe avoid explaining those marks to their coworkers). Pair cupping with other treatments like aromatherapy or a warm compress for next-level relaxation.
Why Your Spa Needs Cupping
Clients love it, Instagram loves it, and your revenue will love it. Plus, it pairs perfectly with other services like massage or facials. Ready to get cupping? Check out our cupping collection and start turning those skeptical eyebrows into "wow, that actually worked" smiles.