Boost revenue with this staple... the EMS facial device is the secret weapon your spa needs for clients begging for tighter, lifted skin without going under the knife. Imagine offering a treatment that makes clients gasp at their reflection—no Photoshop, no filters, just science doing its magic on their face. This isn’t your grandma’s facial; it’s a high-tech workout for the face, and when done right, it delivers results that’ll have clients booking their next session before they even leave the chair. Let’s break down exactly how to use this game-changing tool to maximize results (and your profits).
First things first: EMS stands for Electrical Muscle Stimulation, and yes, it’s exactly what it sounds like—tiny electrical pulses that make facial muscles contract, just like they would during a workout. But instead of squats, your client’s cheekbones are getting the burn. The result? Firmer, more sculpted skin that looks like it’s been hitting the gym (if faces could do that). Pair this with a luxury facial serum, and you’ve got a treatment that feels like a spa day but works like a personal trainer for the face.
Step 1: Prep the Skin Like a Pro
Before you even think about turning on the device, prep is key. Start with a gentle exfoliation to remove dead skin cells and ensure maximum conductivity. Follow up with a hydrating mist or a conductive gel—this isn’t just for slip; it helps the currents penetrate evenly. Skipping this step is like trying to run a marathon in flip-flops: possible, but why make it harder than it needs to be?
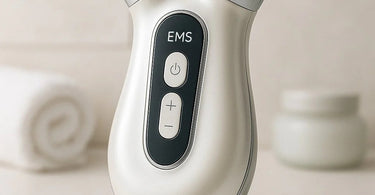
Step 2: Master the Settings (No, "High" Isn’t Always Better)
Here’s where many go wrong: cranking the intensity to "face-lift mode" right out of the gate. Start low and slow—level one or two—especially for new clients. The goal is a gentle tingling sensation, not a "I think my face is twerking" situation. Gradually increase as the client tolerates it, but remember: discomfort doesn’t equal results. If they’re wincing, dial it back. Pro tip: Use the device’s LED light therapy function (if it has one) during the treatment for an extra glow boost.
Step 3: The Art of the "Muscle Sweep"
Glide the device in upward, outward motions—think of it as teaching gravity who’s boss. Focus on key areas like the jawline, cheeks, and forehead, holding for a few seconds on areas that need extra love (looking at you, brow lift enthusiasts). Avoid the delicate eye area unless your device has a specific setting for it. And please, for the love of glowing skin, don’t go over the same spot endlessly. Three to five passes per area is plenty—more isn’t better, it’s just overkill.
Step 4: Lock in the Results
Finish with a soothing mask or hydrating serum to calm the skin and amplify the effects. This is also the perfect time to upsell a lymphatic drainage massage to reduce any puffiness. Hand your client a mirror and watch their reaction—this is the moment they’ll start planning their next visit.
Pro Tips for Spa Success
- Bundle it: Offer the EMS treatment as an add-on to dermaplaning or paraffin wax treatments for a full facial rejuvenation package.
- Retail opportunity: Recommend an at-home facial roller or device-safe cleanser to maintain results.
- Track progress: Take before-and-after photos (with consent) to showcase real results—clients love seeing the transformation.
There you have it—the ultimate guide to turning flabby into fabulous with an EMS facial device. Now go forth and make wrinkles tremble in fear.
%20Facial%20Device%20for%20Youthful,%20Sculpted%20Skin%20in%20Your%20Spa)