Work smarter, achieve faster... especially when it comes to mastering the art of eyebrow tinting. If you've ever watched a client leave your salon with brows so perfect they could rival a Instagram filter, you know the power of a good tint. But let's be real—getting those results isn't just about slapping on some dye and hoping for the best. It's about technique, timing, and a little bit of magic (okay, mostly technique). Whether you're a seasoned pro or just adding brow tinting to your menu, this guide will walk you through every step to ensure your clients leave with brows that are bold, beautiful, and totally frame-worthy.
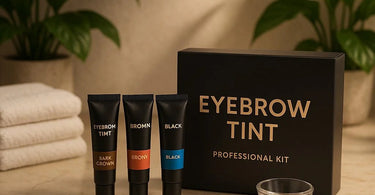
First things first: not all eyebrow tinting kits are created equal. Some are like that one friend who always shows up late—unreliable and patchy. Others? Pure gold. At Pure Spa Direct, we stock top-tier brands like Refectocil and Intensive Tint, so you're already starting strong. But even the best products need the right application. Let's dive in.
Step 1: Prep Like a Pro
Before you even think about tint, prep is key. Start by cleansing the brows with a gentle, oil-free cleanser to remove makeup, dirt, or skincare residue. Pro tip: Use a compressed sponge dipped in micellar water for precision. Next, map out the brow shape with a spoolie and trim any unruly hairs. If you're also offering brow waxing, do it now—tinting over freshly waxed skin is a no-go (ouch!).
Step 2: Mix the Tint Like a Chemist (But Way Cooler)
Most kits come with a dye cream and developer. Follow the instructions, but here's a cheat code: for natural-looking brows, mix a 1:1 ratio. For bolder results, go heavier on the dye. Use a micro spatula to blend until smooth—no clumps allowed! If you're using Berrywell Cream Dye, you're in for a creamy, easy-to-work-with formula.
Step 3: Apply with Surgical Precision
Channel your inner artist and use an angled brush to apply the tint, following the natural hair growth. Avoid the skin as much as possible—stained skin screams "amateur hour." For sparse brows, feathering techniques work wonders. Set a timer for 5-10 minutes (check the kit's instructions). Pro tip: Cover brows with cotton pads soaked in water to prevent drying.
Step 4: The Grand Reveal (And Cleanup)
Wipe off the tint with a damp towel, then admire your handiwork. If the color's too intense, a dab of oil-based cleanser can lighten it. Finish with a nourishing brow serum to keep hairs healthy.
Pro Tips for Next-Level Brows
- Patch test new clients 24 hours prior (allergies aren't trendy).
- Combine tinting with brow lamination for mega impact.
- Stock up on brow tint refills—clients will rebook once they see the magic!
There you have it: brow tinting so good, your clients will forget filters exist. Ready to elevate your brow game? Shop our Lash & Brow Collection and tint like a boss!