Let your work shine with the right tools... and by "shine," we mean literally, because nothing says "fabulous" like a perfectly cured set of gel nails that won't smudge if your client accidentally high-fives a wall. If you've ever wondered how to use a Gel UV/LED Nail Lamp without turning your workstation into a sci-fi experiment gone wrong, you're in the right place. Whether you're a seasoned nail tech or a newbie who just realized UV doesn't stand for "Unicorn Vibes," this guide will help you cure nails like a boss—without any crispy surprises.
First things first: not all nail lamps are created equal. Some are faster than a caffeine-fueled barista during brunch rush, while others take their sweet time like a sloth on vacation. Understanding your lamp's settings, wattage, and whether it's UV, LED, or a hybrid is key to avoiding under-cured polish (sticky disaster) or over-cured nails (brittle sadness). And don't even get us started on positioning—no one wants a "tan line" on their pinky.
Step 1: Prep Like a Perfectionist (Because Sticky Nails Are a Crime)
Before you even think about curing, make sure the nails are prepped like a Michelin-star meal. File, buff, dehydrate, and apply that gel polish like you're painting the Mona Lisa's fingertips. Pro tip: thin layers are your BFF. Thick globs might feel satisfying in the moment, but they'll cure unevenly and leave your client with lumpy nails—aka the beauty equivalent of a bad haircut.
Step 2: Choose Your Lamp Wisely (Or Risk a Nail Meltdown)
Not all lamps play nice with all polishes. Check the brand's instructions—some gels are divas and only cure properly under specific wavelengths. If you're using a LED lamp, rejoice: they're usually faster (we're talking 30 seconds vs. 2 minutes) and don't emit as much heat. UV lamps, on the other hand, are the old-school workhorses but require a bit more patience. Hybrid lamps? They're the overachievers of the nail world.
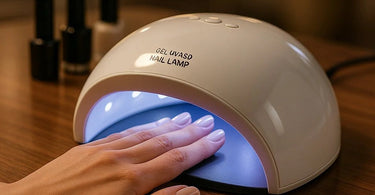
Step 3: The Art of Not Burning Your Client's Fingers Off
Position the hand like it's about to receive a tiny, glowing crown—centered and not too close to the bulbs. Most lamps have a sensor or timer, but if yours doesn't, set a stopwatch (no, guessing doesn't count). Over-curing can make nails brittle, and under-curing means sticky residue that'll attract lint like a magnet. Neither is a good look.
Step 4: Cleanup & Celebrate (You're Basically a Nail Scientist Now)
After curing, wipe off the sticky inhibition layer with alcohol or cleanser. Then marvel at your work—you've just created nails that'll survive everything from dishwashing to dramatic Instagram poses. For extra flair, add rhinestones or nail art before the final cure. Boom. Masterpiece.
Pro Tips to Avoid Nail-pocalypses
- Lamp maintenance: Dust off bulbs regularly—dirty lamps cure like a sleepy sloth.
- Client comfort: If the heat feels like a tiny sun, lower the wattage or use a cuticle oil barrier.
- Battery-powered lamps: Great for mobile stylists, but check the charge before starting—nothing worse than a mid-manicure blackout.
Now go forth and cure with confidence! And if all else fails, remember: even the best nail techs occasionally create a "textured" nail. Call it "avant-garde" and charge extra.
)