Why every pro needs this now... If you've ever had a client panic because their nail tips popped off before they even made it to their car, you know the struggle is real. Enter the unsung hero of the nail world: the nail glue dryer. This little gadget is like the fairy godmother of nail adhesives—turning that frustrating 60-second hold-your-breath-and-pray moment into a "heck yes, these aren't going anywhere" victory. And let's be honest, in a world where clients treat their nails like they're defusing a bomb (RIP to every set lost to a seatbelt buckle), this tool is a game-changer.
Whether you're applying acrylics, securing rhinestones, or rescuing a lifted gel polish corner, a nail glue dryer is your backstage pass to flawless, durable results. No more awkward fanning with a nail file or risking glued-together fingers (we've all been there). Just speedy, professional-grade adhesion that keeps clients coming back. So, let's break down how to use this magic wand of nail tech tools—because life's too short for mid-manicure mishaps.
Step 1: Prep Like a Pro (Because Even Superheroes Need a Clean Cape)
Before you even think about glue, start with a clean slate. Gently buff the natural nail with a buffer to remove shine, then swipe with cuticle oil and dehydrator. This isn't just busywork—it's like giving glue a VIP parking spot for maximum stickiness. Pro tip: Keep cotton pads and applicators nearby for quick cleanups. Because nothing ruins a "relaxing" manicure like glue globs in unexpected places.
Step 2: Apply Glue Like You're Michelangelo (But with Less Pressure)
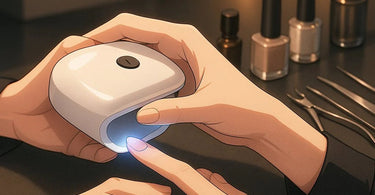
Here's where most techs go wrong: drowning the nail in glue like it's a pancake at a syrup festival. For tips or repairs, use a tiny bead—think "grain of rice" not "gummy bear." Press firmly for 5 seconds (cue the dryer!), then hover the nozzle 2-3 inches away. The gentle airflow accelerates curing without blowing your hard work into next week. For nail art emergencies? A drop of glue + 3 seconds under the dryer turns fragile embellishments into Fort Knox-worthy masterpieces.
Step 3: Master the Dryer Dance (It's Not as Silly as It Sounds)
Modern dryers offer adjustable settings—use them! Low speed for delicate lash gems, high for stubborn acrylic patches. Angle the nozzle like you're painting a masterpiece (because you are). And here's a pro secret: alternate between 5-second blasts and cool-down pauses to prevent "cooking" the adhesive. Your clients will marvel at how their nail polish stays put through yoga, texting, and that obsessive hand-sanitizing habit we all developed in 2020.
Bonus Level: Troubleshooting for Glue-Gone-Wrong Moments
Even wizards face the occasional misfire. For glue strings (aka the "nail tech cobwebs"), zap them with a quick dryer burst before trimming. Accidentally bonded a client's finger to your manicure table? (It happens!) Use the dryer on low heat while gently twisting—it softens glue enough for separation without the drama. And always keep adhesive remover in your arsenal for those "oops, I blinked" moments.
So there you have it—the nail glue dryer isn't just another gadget cluttering your nail station. It's the difference between "meh" and "OMG HOW?" retention. Now go forth and bond with confidence (pun absolutely intended). Your five-star reviews—and your clients' Instagram feeds—will thank you.