Boost sales with this pro essential... the Nail Rhinestone Applicator is the unsung hero of every nail artist's toolkit. If you've ever struggled with tweezers that launch rhinestones into orbit or a dotting tool that just won't cooperate, this little gadget is about to become your new BFF. Let's dive into how to use it like a pro, because nobody has time for flying gems or frustrated clients.
Whether you're a seasoned nail tech or just starting out, mastering the rhinestone applicator will save you time, sanity, and maybe even a few rhinestones from ending up on the floor (or in your coffee). Plus, your clients will be obsessed with the precision and ease you bring to their blinged-out manicures. Ready to shine? Let's get started!
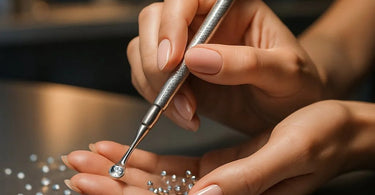
What Is a Nail Rhinestone Applicator?
Think of it as the magic wand of nail art. This handy tool is designed to pick up and place tiny rhinestones with surgical precision, so you can say goodbye to fumbling with tweezers or sticky brushes. Most applicators have a soft, silicone tip that gently grips the rhinestone, allowing you to position it perfectly on the nail without smudging your design.
It's a must-have for any salon offering nail art services, especially if you're working with intricate designs or super-small gems. And let's be real—anything that makes your job easier while making your clients gasp in awe is worth its weight in gold (or glitter).
Step-by-Step: How to Use Your Rhinestone Applicator Like a Pro
Now, let's break down the process so you can apply rhinestones like a boss. Follow these steps, and you'll have clients leaving your salon feeling like royalty.
Step 1: Prep the Nail
Before you even think about rhinestones, make sure the nail is prepped and ready. Apply your base color (whether it's gel polish, longwear polish, or acrylic) and let it dry completely. If you're using gel, cure it properly—no one wants a rogue rhinestone ruining a perfect finish.
Step 2: Choose Your Rhinestones
Not all rhinestones are created equal. Some are flat-backed, some are pointed, and some are so tiny you'll question your life choices. For beginners, start with medium-sized flat-backed stones—they're easier to handle. You can find a gorgeous selection in our Nail Art Rhinestones collection.
Step 3: Dip the Applicator
Lightly press the silicone tip of your applicator onto the rhinestone. The gentle stickiness should pick it up without needing glue (yet). If it's not gripping, try barely dampening the tip with water or a tiny bit of cuticle oil—just don't go overboard.
Step 4: Apply Glue (If Needed)
If you're working with gel polish, you can often place the rhinestone directly onto the sticky inhibition layer before curing. For regular polish or extra security, use a tiny dab of nail glue or clear top coat where you want the stone to go.
Step 5: Place the Rhinestone
Gently press the rhinestone onto the nail using the applicator. Hold it for a second to ensure it sticks, then carefully lift the applicator away. If the stone shifts, nudge it back into place with the tip—no panic required.
Step 6: Seal the Deal
Once all your rhinestones are in place, seal them with a thick layer of top coat. For gel users, cure again. This step is crucial—otherwise, those little sparklers will bail on your client at the worst possible moment (like during a date or an important meeting).
Pro Tips for Flawless Rhinestone Application
Now that you've got the basics down, here are some insider secrets to take your rhinestone game to the next level:
- Work in Sections: Apply rhinestones to one nail at a time before moving to the next. This prevents smudging and keeps your design crisp.
- Use a Magnifying Lamp: If you're working with micro-stones, a magnifying lamp can be a lifesaver for precision.
- Keep a Clean Workspace: Spilled rhinestones are like glitter—they get everywhere. Use a small dish to corral your gems.
- Practice Makes Perfect: Try out designs on a practice nail or a silicone mat before committing to a client's manicure.
Common Rhinestone Mistakes (And How to Avoid Them)
Even pros make mistakes—but here's how to dodge the most common pitfalls:
- Too Much Glue: A little goes a long way. Excess glue can cloud the rhinestone or seep out around the edges.
- Rushing the Cure: If you're using gel, make sure the top coat fully encapsulates the stone before curing. Half-cured bling is a sad sight.
- Overcrowding: Less is often more. A few strategically placed stones look chic; a rhinestone avalanche looks... chaotic.
Final Thoughts: Sparkle On!
Mastering the Nail Rhinestone Applicator is a game-changer for any nail tech. It speeds up your service, reduces frustration, and delivers stunning results that keep clients coming back for more. Plus, let's be honest—there's something deeply satisfying about placing a perfect row of tiny, sparkly gems.
Ready to stock up? Check out our full range of nail art supplies and professional nail care essentials to keep your salon at the top of its game. Now go forth and bedazzle!