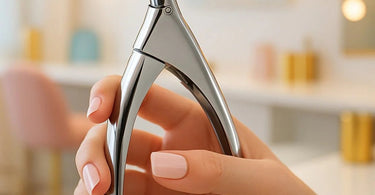
Upgrade treatments with this little powerhouse tool—the nail tip cutter. If you’ve ever struggled with uneven tips, awkward angles, or just want to speed up your nail service, this is your new best friend. Think of it as the secret weapon in your nail care arsenal, saving you time and delivering salon-perfect results every single time. Whether you’re a seasoned nail tech or just starting out, mastering this tool will take your manicures from "meh" to "wow!"
Nail tip cutters are designed to trim artificial nail tips quickly and precisely, but they’re also great for natural nails if you’re going for a specific shape. Unlike regular nail clippers, these bad boys give you control over the angle and length, so you can create that perfect tapered look without the jagged edges. And let’s be real—no one wants a client walking out with a wonky nail. That’s a one-way ticket to bad reviews.
Why a Nail Tip Cutter Beats Regular Clippers
Regular clippers are like using a butter knife to perform surgery—sure, it might work, but why risk it? A professional nail tip cutter is designed with a curved blade that follows the natural shape of the nail, giving you a clean, even cut every time. No more uneven edges, no more accidental splits—just smooth, salon-ready tips in seconds. Plus, they’re way faster when you’re doing full sets, which means happier clients and more time for intricate nail art.
Step-by-Step: How to Use a Nail Tip Cutter Like a Pro
Step 1: Prep the Nail Tip – Before cutting, make sure the tip is properly sized and adhered to the natural nail. If you’re using acrylic or gel extensions, ensure the tip is secure and free of excess glue.
Step 2: Find Your Angle – Hold the cutter at a slight downward angle (about 45 degrees) to follow the natural curve of the nail. This prevents flat, blunt cuts that can look unnatural.
Step 3: Snip with Confidence – One smooth, firm squeeze is all it takes. Don’t hesitate—wobbly hands lead to uneven edges. If you’re nervous, practice on a training manikin first.
Step 4: Refine the Shape – After cutting, use a nail file or buffer to smooth any minor imperfections and blend the tip seamlessly into the natural nail.
Pro Tips for Perfect Tips
- Less Is More: It’s easier to trim a little more than to fix an over-cut nail. Start conservative and adjust as needed.
- Keep It Sharp: A dull cutter will crush the tip instead of cutting cleanly. Replace or sharpen your tool regularly.
- Sanitize!: Always disinfect your cutter between clients—salon hygiene is non-negotiable.
What to Do If You Mess Up
Oops—cut too short? Don’t panic. If you’re working with dip powder or acrylic, you can often blend and reshape. For natural nails, a little cuticle oil and a fresh coat of polish can distract from minor mishaps. (And maybe throw in a free sugar scrub treatment—clients forgive a lot when you pamper them.)
Final Thoughts
A nail tip cutter is one of those tools that seems simple but makes a huge difference in your workflow. Once you get the hang of it, you’ll wonder how you ever worked without it. And your clients? They’ll be too busy admiring their flawless nails to notice how fast you did them. Now go forth and snip with confidence!