Your next hit starts here... and by hit, we mean that sparkling-clean, germ-free confidence your clients crave! In the world of spas and salons, cleanliness isn’t just next to godliness—it’s the law (and the difference between a one-time visitor and a loyal client). Enter the UV Sterilizer Cabinet, the unsung hero of your sanitation routine. This magical box zaps germs, bacteria, and even the lingering ghost of last week’s nail appointments. But how do you use it like a pro? Buckle up, because we’re diving deep into the art of UV sterilization.
Whether you’re a waxing warrior, a lash legend, or a nail ninja, keeping your tools pristine is non-negotiable. A UV sterilizer cabinet is like giving your implements a spa day—except instead of cucumber water, they get a powerful dose of ultraviolet light that annihilates 99.9% of microbes. No chemicals, no fuss, just pure, clean peace of mind. Let’s break down how to make the most of this must-have gadget.
Step 1: Know What You Can (and Can’t) Sterilize
Not everything belongs in the UV party. Metal tools like tweezers, nail clippers, and waxing spatulas are VIP guests—they love the UV treatment. Glass and silicone items? Also welcome. But porous materials like wooden nail files or certain nail brushes should sit this one out; they can harbor bacteria in places UV light can’t reach. When in doubt, check the manufacturer’s guidelines or stick to sterilizing non-porous tools.
Step 2: Clean Before You Zap
UV sterilization isn’t a substitute for cleaning—it’s the encore. Always start by scrubbing your tools with soap and water or a professional-grade disinfectant like clinic-approved cleaners. Remove all debris, product residue, and that stubborn glitter from last month’s disco-ball manicure. Dry thoroughly (water droplets can block UV rays), then place your tools inside the cabinet, ensuring they’re not piled on top of each other. Think of it like arranging cookies on a baking sheet—no overlapping for even “cooking.”
Step 3: Set the Timer and Let the Light Work Its Magic
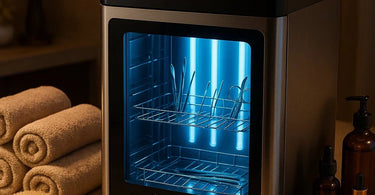
Most UV sterilizers have preset timers (usually 5-10 minutes), but if yours is manual, 10 minutes is the sweet spot. Hit start, and let the UV-C light—the same tech hospitals use’go to town on those microbes. Pro tip: If your cabinet has a mirror or reflective interior, rejoice! It bounces the light around for better coverage. Avoid opening the door mid-cycle unless you want to give those germs a fighting chance (and honestly, who roots for germs?).
Step 4: Store Like a Sanitation Superhero
Once sterilized, keep your tools in a clean, dry place—like a sterile pouch or a covered container’until their next use. Bonus points for labeling them with the sterilization date. Clients love seeing that extra mile of care (and your health inspector will too).
Extra Credit: When to Sterilize
Between every client, obviously. But also after accidental drops, if tools have been stored awhile, or if your gut says “ew.” For high-traffic tools like barber clippers or lash tweezers, consider a quick UV session mid-day. Your future self (and clients) will thank you.
UV Sterilizer Pro Tips
- Rotate tools during the cycle if your cabinet doesn’t have a turntable.
- Replace UV bulbs annually (they lose potency over time).
- Pair with disposable barriers for double protection.
- Use it for non-tool items like nail charms or sponges (check compatibility first).
There you have it—the foolproof guide to UV sterilization that keeps your salon safer than a bubble-wrapped kitten. Now go forth and sterilize like the hygiene hero you are!