Transform treatments with this wax warmer pot, the unsung hero of every smooth, hair-free finish. Whether you're a seasoned esthetician or a waxing newbie, mastering this little gadget is the difference between "ouch, that hurt!" and "wow, that was painless!" Let's dive into the art of wax warming—because nobody has time for cold wax disasters (or rogue leg hairs).
First things first: not all wax warmers are created equal. Some are basic, some are fancy, and some look like they belong in a sci-fi movie. But fear not! The principles of wax warmer mastery remain the same. Ready to become a wax-warmer whisperer? Let’s get started.
Step 1: Choose the Right Wax Warmer for Your Needs
Before you even think about melting wax, make sure you’ve got the right tool for the job. A professional wax warmer should be durable, easy to clean, and—most importantly—consistent in temperature. Nobody wants a wax that’s too hot (hello, burns) or too cold (hello, ineffective hair removal).
Pro tip: If you’re using hard wax, opt for a warmer with a deep pot to prevent spillage. For soft wax, a wider opening makes application a breeze.
Step 2: Prep Your Wax Like a Pro
Not all waxes melt the same way. Some are divas that need a slow, gentle warm-up, while others are ready to party in minutes. Check the manufacturer’s instructions—yes, actually read them—to avoid a wax-pocalypse.
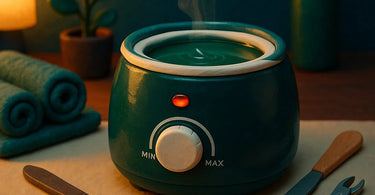
Here’s a general rule of thumb: fill your wax warmer pot about halfway. Overfilling leads to messy spills (and wasted product), while underfilling means you’ll be refilling more often than a caffeine-deprived barista.
Step 3: Set the Perfect Temperature
This is where the magic happens. Too hot, and you’ll have clients jumping off the table. Too cold, and the wax won’t adhere properly, leaving stray hairs behind like unwanted party guests.
Most waxes melt best between 125°F and 140°F (51°C–60°C). Start low and gradually increase the heat until the wax has a smooth, honey-like consistency. If it’s bubbling like a witch’s cauldron, turn it down—stat!
Step 4: Stir, Stir, Stir!
Wax isn’t a "set it and forget it" situation. Give it a gentle stir every few minutes to ensure even heating. A wax spatula is your best friend here—just avoid using metal tools if your warmer has a non-stick coating.
Step 5: Test Before Applying
Before slathering wax on your client (or yourself—no judgment), do a patch test on your wrist. The wax should feel warm but not scalding. If it’s comfortable, you’re good to go. If it feels like lava, let it cool for a few more minutes.
Step 6: Apply Like a Boss
Now for the fun part! Use your spatula to apply the wax in the direction of hair growth. For hard wax, let it cool slightly before removing (it should feel like soft rubber). For soft wax, press on a wax strip and pull quickly in the opposite direction of hair growth.
Pro tip: If you’re waxing eyebrows, always have post-wax soothing gel on hand to calm the skin.
Step 7: Clean Up Like a Pro
Wax warmers can get sticky fast, so clean yours after every use. Once the wax has cooled slightly (but not hardened), wipe it out with a paper towel. For stubborn residue, a little wax cleaner works wonders.
Bonus Tips for Wax Warmer Mastery
- Double up: If you’re busy, consider using two warmers—one for hard wax and one for soft wax.
- Label it: If you use different waxes, label your warmer to avoid mix-ups.
- Store smart: Keep your warmer unplugged and covered when not in use to keep dust and debris out.
And there you have it—the ultimate guide to using a wax warmer pot like a pro. Now go forth and wax with confidence! (And maybe stock up on bulk wax while you’re at it.)