Pros trust this product to deliver that deep, glossy, show-stopping black that clients crave. But anyone who has ever worked with a high-pigment black gel polish knows it has a mind of its own. You paint it on, pop it under the lamp, and cross your fingers, hoping it doesn't come out wrinkled, dull, or, the ultimate betrayal, not fully cured. Getting that perfect, mirror-like shine and long-lasting wear isn't just about the polish itself; it's about mastering the science of the cure. As a professional, your reputation rests on the durability of your work, and with Pure Spa Direct's extensive range of professional products, you have everything you need to become a curing connoisseur.
Let's be honest, a poorly cured dark gel polish is a recipe for disaster. You might be tempted to think, 'It looks dry, so it must be good to go,' but the reality is far more sinister. Undercured gel is a ticking time bomb for peeling, chipping, and that dreaded wrinkling that can ruin a perfect manicure. But more importantly, for your clients, undercured gel polishes, especially high-pigment blacks, are a top culprit for contact dermatitis and allergic reactions. Those uncured monomers are the enemy of healthy nails. So, how do we banish these mishaps for good? It starts with understanding your equipment and the unique challenges that come with darker shades.
The Dark Side of Pigment: Why Black is a Beautiful Beast
High-pigment black Gel Polish is not just any color; it is a powerful formulation that demands respect. The deep, rich pigments that give it that stunning opacity are often heavier and more dense than lighter shades. This density means the UV or LED light has to work harder to penetrate the layer and reach the photoinitiators at the bottom, ensuring a complete cure from the base coat to the top coat.
Think of it like this: a light-colored sheer is like a white t-shirt on a sunny day—the light passes right through. High-pigment black is like a heavy, black leather jacket—the light struggles to get through. Using the exact same cure time for a sheer pink and an opaque black is a gamble you will likely lose. As the information from leading brands like Komilfo suggests, highly pigmented gels require special consideration; a standard UV lamp needs at least 36W and an LED lamp at least 9W to even begin the process correctly . You need to ensure your Professional Nail Care equipment is up to the task!
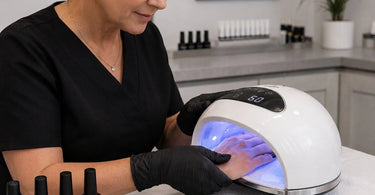
The Great Lamp Debate: UV vs. LED Cure Times
One of the biggest points of confusion in the nail world is the difference between UV and LED lamps. A standard UV lamp generally takes about 2 minutes to cure a layer of gel polish. In contrast, a modern LED lamp is significantly faster, typically curing a layer in 30 seconds. This is a huge time-saver in a busy salon, but only if you adjust your times correctly. As a general rule of thumb, you should always follow the manufacturer's recommendations for your specific CND, Gelish, or OPI polishes, but a high-pigment black almost always calls for a longer time in the lamp. Many brands advise adding an extra 30 to 60 seconds beyond the standard time to combat the pigment density . It's a small price to pay for the peace of mind knowing you won't have a client back in a week with a peeling disaster.
Mastering the Application: Thin Coats are Your Best Friend
Before you even think about the cure time, we need to talk about application. When I say 'thin,' I mean translucent. You should be able to almost see the nail line through the first coat. The temptation to slap on a thick layer to get the 'perfect' black in one swoop is overwhelming, I know. Resist it! Thick layers of any gel polish, but especially a black one, are a one-way ticket to curing hell. The light literally cannot reach the bottom of the pool of polish, leaving a sticky, uncooked layer right next to the nail plate. This leads to poor adhesion and lifting. The golden rule? Two thin coats, always, with a full cure in between. This method ensures the pigment is fully saturated and that each layer has polymerized completely, resulting in a durable and stunning finish. You can even layer a high-pigment black over a black Acrylic Nail or Dipping Powder for ultimate depth.
Your Step-by-Step Curing Guide for Flawless Black Gel
Alright, let's get down to the nitty-gritty. Here is your foolproof routine to ensure your high-pigment black gel polish cures perfectly every single time, leaving you with a glossy, chip-free manicure that will have your clients singing your praises.
1. Prep is Paramount
Before you even reach for the bottle of black, your client's nails need to be pristine. This means a thorough dry manicure, pushing back the cuticles with a quality tool, and lightly buffing the surface to remove the natural shine. Cleanse the nail plate thoroughly with a Nail Treatment or cleanser to remove all dust and oils. This is non-negotiable. A clean, oil-free surface is essential for the gel to adhere and cure correctly.
2. The Foundation: Base Coat
Apply a thin, even layer of your preferred base coat. Cap the free edge to prevent chipping. Cure this under your UV lamp for 2 minutes or your LED lamp for a full 60 seconds. Yes, even if your lamp usually cures base coats faster, giving it that extra 30 seconds provides a solid foundation to prevent the black pigment from staining the natural nail later.
3. The First Coat of Black
Apply the thinnest layer of your high-pigment black gel polish you can possibly manage. It should look slightly streaky and patchy. That is completely normal. Cap the free edge again. Now, for the curing, this is where you need to be firm. If you are using a UV lamp, cure for a solid 2.5 to 3 minutes. If using an LED lamp, cure for a minimum of 60 seconds, though a full 90 seconds is often safer for a dense black .
4. The Second Coat of Black
Apply your second and final thin coat of black gel. This layer will fill in all the patches and give you that stunningly opaque, jet-black finish. Cap the free edge one last time. Cure the second layer for the same time as the first—2.5 to 3 minutes in UV or 60-90 seconds in LED. Some professional brands like Essie also suggest this two-coat method for their gel polishes. The second, longer cure is often what solidifies the pigment, preventing 'dimples' from forming on the surface .
5. Seal the Deal: Top Coat
Apply your chosen top coat. This is your armor. Some top coats require a cleanse after curing, while others are 'no-wipe.' For high-pigment colors, a no-wipe top coat can be a lifesaver, as it prevents any uncured pigment from rubbing off and staining your tools. Cure the top coat for 2 minutes in a UV lamp or a full 90-120 seconds in an LED lamp. Many professional systems recommend curing for a longer time as a final step to ensure the entire structure is totally hardened .
Know Your Brands: General Cure Time Guidelines
While the instructions above are a great starting point, always remember that every brand of Professional Gel Polish can have slightly different specifications. Here is a quick guide based on what we know from the pros:
- DND DC Gel Polish: Recommends curing high-opacity shades like 'Black Ocean' for 30-60 seconds in an LED lamp, noting that an extra 30 seconds is often beneficial for these dense colors .
- Shield Gel Polish: Suggest an LED/UV LED cure of 30 seconds, but a UV cure of 90 seconds for colors that are highly pigmented .
- Fuzion Fortify Gel Polish: Specifics a 'Black 02' in its 'Construct formula' that requires 60 seconds of LED/120 seconds of UV curing .
- DARK Gel Polish: Their highly pigmented professional gel requires a solid 60 seconds of curing in an original lamp, demonstrating the need for that extra time .
Always check the product page on Pure Spa Direct or the packaging for the brand's specific recommendations. But as a rule, when in doubt, a little extra time in the lamp never hurts and often saves you a call back from a frustrated client!
Lighten Up Your Salon Workflow
Choosing the right cure time for your high-pigment black gel polish is one of the most crucial steps to ensuring a perfect, long-lasting manicure. Your clients come to you for professional results, and mastering the cure is a fundamental part of your craft. It's the difference between a manicure that lasts two weeks and one that looks fresh for a month. At Pure Spa Direct, we understand the importance of precision in the Professional Nail Care industry.
We are your one-stop wholesale source for all the salon supplies you could ever need. Whether you are looking for the latest Nail Art Supplies to impress your clients, need a new Nail Table to upgrade your station, or are stocking up on essential Manicure Essentials like files and buffers, Pure Spa Direct has you covered. With over 85,000 top-quality products from leading brands you know and trust, it's easy to consolidate your orders and streamline your business. We offer everything from top-tier Cleaners and Disinfectants to cutting-edge Advanced Spa Equipment, making us the ultimate partner in your success.
Remember, ordering all of your supplies from a single vendor like Pure Spa Direct doesn't just save you money on shipping; it saves you the most precious commodity of all: time. And time is something every busy professional never has enough of! So, the next time you're working with that beautiful, deep black gel, take a deep breath, remember these tips, and let the magic of a perfect cure do the rest.