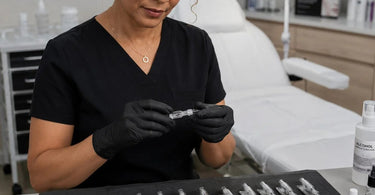
Elevate services with this essential guide to selecting the right needle gauge for permanent makeup procedures. Let's be real, choosing the right needle for permanent makeup can feel a bit like dating. You have to try a few before you find the one that just gets you, that understands your flow, and doesn't cause a bunch of drama (or in this case, trauma to your client's skin). You've got your machines, your pigments, and your vision, but if you're not using the right needle gauge, all that prep work is just a prelude to a bad performance. We're talking brows that look like they were drawn on by a shaky hand, lips that heal patchy, and eyeliner that's more raccoon than chic. But fear not, beauty boss, because today we're going to demystify the world of PMU needles, turning you from a confused novice into a confident needle whisperer who knows exactly what to use for every single face that graces your chair.
Welcome to the ultimate cheat sheet for selecting the right needle gauge for permanent makeup procedures. If you've ever stood in front of your supply cabinet, staring at boxes of cartridges with labels that look like a secret code (1203RLST? What does that even mean?), then this blog is for you. We're going to break down the jargon, explain the science, and give you the practical, funny, and completely unfiltered guide to needle selection that your PMU training probably forgot to mention. By the time you're done reading, you'll be ready to tackle any PMU treatment with the confidence of a master artist, and a lot less trial-and-error.
The Needle Know-How: More Than Just a Sharp Point
Before we dive into the nitty-gritty of gauges and configurations, let's get one thing straight: a PMU needle is not just a needle. It's a precision instrument that dictates pigment flow, skin trauma, and the final healed result. Think of it like your favorite makeup brush. You wouldn't use a foundation brush for a tiny winged liner, would you? Same principle applies here, just with more permanent consequences . Each needle is designed with specific attributes, and understanding these attributes is the secret to unlocking consistent, gorgeous work. We're talking about the difference between a subtle, natural-looking eyebrow and a blocky, saturated disaster that even a lash lift and tint can't fix .
There are four key components to any PMU needle: Diameter (Gauge), Needle Count, Type (Configuration), and Taper . Think of this as the PMU artist's equivalent of learning your ABCs. Once you know these, you can read any needle cartridge label like a pro. And yes, there will be a test later (just kidding... mostly). When you look at a cartridge, you'll typically see something like "1RL0.25" or "5RS#8." Let's crack that code.
Decoding the Diameter: The Gauge Game
The diameter, or gauge, is the thickness of each individual needle. This is measured in millimeters and is a crucial factor in how much pigment flows and how much trauma you inflict . In the PMU world, because we're working on the delicate skin of the face, we generally stick with smaller gauges. These are often called "bugpin" needles, which are 0.30mm and smaller .
Here’s the breakdown in simple terms:
- 0.20mm (#6): The tiny dancer. Ultra-fine, incredibly precise, and perfect for creating those wispy, delicate hair strokes or adding fine details. Pigment flow is very controlled, so you won't get a massive ink dump all at once. Ideal for clients wanting a soft, natural look.
- 0.25mm (#8): The goldilocks of the PMU world. It's fine enough for detail but deposits pigment a little faster. This is a versatile workhorse for brows, lips, and eyeliner . If you're only going to buy one size, this might be it. It's often the go-to for powder brows and shading .
- 0.30mm (#10): Still considered a bugpin needle, this size is where you start to get a bit more pigment flow. Great for filling in areas and for clients with normal skin types. It’s a good balance between precision and efficiency.
- 0.35mm (#12) and up: These are the big guns. They're used for heavier saturation and bolder work. You might use these for color packing in lip blush or for thicker eyeliner styles. However, using a larger gauge on delicate skin can cause unnecessary trauma, so be careful!
Remember, smaller needle diameter = smaller puncture and more controlled pigment flow, while larger diameter = more pigment flow and bolder results . Choosing the right gauge is the first step to happy clients and less crying into your professional cotton products over patchy results.
Configuration: Liner, Shader, or Magnum?
This refers to how the needles are grouped together. The configuration determines what the needle is best used for .
- Round Liner (RL): These needles are clustered tightly in a circular group, forming a sharp point . They are the go-to for precision and crisp lines. Perfect for creating fine, detailed hair strokes in brows, outlining the eyeliner shape, or defining the lip border before shading. A single needle (1RL) is the ultimate tool for ultra-fine details and pixel-like strokes .
- Round Shader (RS): Similar to a liner, but the needles are spread out slightly more in the circle . This allows for better pigment flow and a softer, more diffused effect. Round shaders are excellent for creating soft shading, pixelated effects, and filling in areas like the body of the brow or the lip . Think of it as the difference between a fine-tip pen and a marker.
- Magnum (M): These have multiple needles arranged in a flat or curved row . They are designed to cover large areas quickly and are often used in traditional tattooing. In PMU, they can be used for color packing in lip blush or for creating a more saturated look. A curved magnum is designed to follow the natural curve of the face, making it great for brows and lips .
So, when you're selecting a needle, ask yourself: Do I need to draw a line (Round Liner), create a soft shade (Round Shader), or pack in some serious color (Magnum)? This simple question will save you a ton of guesswork.
The Taper Talk: Long vs. Short and Why It Matters
If you've ever struggled to get pigment into a specific skin type, the taper could be your culprit. The taper is the length of the needle's point—the part that goes from the thickest part of the needle down to the sharp tip .
- Short Taper (ST): A short taper means the needle comes to a point quickly. It creates a larger hole in the skin and allows for a faster, more efficient pigment deposit . This can be great for clients with thicker, more resilient skin where you need to ensure the pigment goes in. However, because it makes a larger hole, it can cause more trauma on sensitive skin.
- Medium (MT) and Long Taper (LT): These have a longer, more gradual slope to the point. They create a smaller hole and deposit pigment more slowly and precisely . This is why they are the most common in PMU. They are perfect for clients with thin, mature, or sensitive skin, as they cause less trauma and allow for a more controlled, delicate buildup of color. As one expert notes, if you're struggling to get pigment in without causing trauma, switching to a medium taper can be a game-changer .
A golden rule: If you're working on sensitive skin and the client is bleeding or swelling too much, try a needle with a longer taper. It's gentler and will give you much better healed results .
Choosing the Right Needle for Each Procedure
Now for the fun part—applying this knowledge to real-life PMU treatments. Here’s a breakdown of which needles to grab for your most common services.
Brows: From Hair Strokes to Powder
- For Microblading-style Hairstrokes: You'll want a single needle (1RL) with a small diameter (0.20mm or 0.25mm) and a medium to long taper . This gives you the ultimate precision to create those thin, natural-looking lines without causing too much trauma or making the strokes too thick.
- For Combo Brows or Nano Brows: Similar to hairstrokes, a 1RL or 3RL is ideal. The 3RL will give a slightly thicker, more impactful line that is perfect for adding depth or creating a bolder look.
- For Powder Brows: A Round Shader (1RS or 3RS) is your best friend here. It allows you to create a soft, pixelated, airbrushed effect. Use a small diameter (0.25mm) for a delicate, soft-fill or a larger diameter (0.30mm+) for quicker saturation .
- For Ombre Brows: Start with a 1RS or 1RL to create your outline and build the density, then switch to a 3RS or 5RS with a short taper to pack in more color at the tail end for that perfect gradient effect.
Lips: Lip Blush and Full Color
- For Lining and Defining: Use a 1RL to create a crisp, clean outline of the lips. This is your roadmap for the rest of the procedure .
- For Blush and Shading: A Round Shader (3RS or 5RS) is perfect for building up that soft, kissable color. For a more diffused look, use a smaller gauge; for faster, bolder color, use a Magnum configuration .
- For Packing Color: If you're doing a full lip color correction or intense saturation, a curved magnum is your tool of choice. It covers a lot of ground quickly and evenly .
Eyeliner: Classic to Cat Eye
- For a Natural, Tight-Line Look: A 1RL is ideal for getting right into the lash line and creating that subtle definition. A 3RL with a small diameter can also be used for a slightly bolder result .
- For a Classic, Bold Line: A 3RL or 5RL is your go-to. It will give you that solid, even line with one pass, saving you time and reducing the need for multiple passes that can traumatize the delicate eyelid skin.
- For a Smoky or Shaded Eyeliner: Start with a 5RL for the base line, then use a 5RS to softly blend and shade out the wing or along the lash line for a softer, sultry effect.
Stocking Your PMU Arsenal
As you build your career, you'll develop your own preferences for Prosana or other top brands. But to start, a solid collection should include a variety of gauges and configurations to handle different skin types and techniques. Don't forget the importance of quality needle cartridges that have a membrane to prevent cross-contamination . Safety is never boring—it's the foundation of a trustworthy business.
And remember, the best needle in the world won't fix a poor understanding of skin anatomy. Always consider your client's age, skin type, and lifestyle when planning your PMU procedure. That way, you're not just an artist—you're a true professional.