Quality transforms treatments with the perfect sparkle, but let me tell you—there is nothing quite like the slow-motion horror of watching a perfectly placed rhinestone roll off your client's nail and disappear into the carpet void. You know the moment. You've spent ten minutes crafting a stunning Nail Art Rhinestones pattern, your client is already mentally picking out her Instagram caption, and then—plink. The little gem makes a break for it. Today we are solving that tragedy forever by talking about the unsung hero of the glittery world: glue viscosity. Whether you run a busy Nail Salon, a high-end Spa, or you are the queen of Lash & Brow Enhancement Services who also slays nail art on the side, understanding adhesive thickness is your secret weapon.
Let me paint you a picture. Last Tuesday, I watched a technician use what can only be described as "string cheese glue" on a set of summer party nails. The rhinestones were swimming. They looked like tiny, confused turtles trying to escape a syrup trap. On the flip side, I have seen pros use glue so thick it created little mountains under each gem, making the nail feel like a tiny bed of rocks. Neither is a good look. So grab your favorite Nail Tables and Manicure Stations, get comfortable, and let us talk about how to make those crystals stick like they mean it.
Why Glue Consistency Actually Matters (Spoiler: It's Everything)
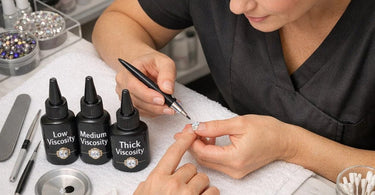
Viscosity is just a fancy science word for "how easily this stuff pours." Think of water versus honey versus cold molasses in January. When we talk about Rhinestone Adhesive, we are usually dealing with three main consistencies: thin (runny), medium (the Goldilocks zone), and thick (barely moves). The right choice depends entirely on what you are sticking, where you are sticking it, and how long you need it to last. Using the wrong viscosity is like using a sledgehammer to hang a picture frame—technically it might work, but you are going to have a mess on your hands.
For example, if you are working with tiny Nail Art Supplies like 1mm micro-rhinestones on a natural nail, a thin or medium viscosity glue is your best friend. It flows into the tiny spaces under the gem without creating a visible bump. But if you are gluing chunky 5mm crystals onto a Acrylic Nail Supplies enhancement that sees a lot of hand washing, you need a thicker, more muscular adhesive that says, "I am not leaving."
The Great Glue Escape: Why Runny Adhesives Are Both Hero and Villain
Let us start with the rebels of the adhesive world: low-viscosity or thin glues. These are your water-like formulas that move fast and wick into tiny spaces beautifully. The benefit? They create an invisible bond. When you place a Premium Nail Polish coated nail next to a thin-glued rhinestone, it looks like the gem grew there naturally. No blobs. No weird shadows. Just pure sparkle. Thin glues are also amazing for Nail Art Rhinestones that are completely flat-backed because there is no gap to fill.
However—and this is a big however—thin glues are impatient. They run. They drip. They have a personal vendetta against your steady hands. If you apply even half a drop too much, that glue will race across the nail plate like it is training for a marathon. It will glue your tweezers to your thumb, your thumb to the client's finger, and somehow also reach the bottle of Cuticle Oil across the table just out of spite. Thin glues also require absolute perfection in fit. If your rhinestone has even a tiny curve or gap, the thin glue will just pool there instead of bridging it. For Professional Nail Care Collections work, thin glue is best left to advanced techs who have Jedi-level control.
Thick And In Charge: When Heavy-Duty Adhesive Saves The Day
On the opposite end of the spectrum, we have high-viscosity or thick glues. These are your no-nonsense, committed relationship adhesives. You squeeze the bottle and a little dome of glue sits there waiting for you. It does not run. It does not drip. It says, "I am here to work." Thick glues are absolute champions for large crystals, metal charms, or any Nail Art Supplies that has a concave back or an uneven surface. They fill gaps like caulk on a bathtub, creating a full-contact bond that water, lotion, and aggressive hand sanitizers cannot break.
But here is the funny part about thick glue—it lies. It tells you it is strong, which it is, but it also creates a noticeable bump under each gem. That bump can trap soap, water, and last Tuesday's hand cream, leading to something we call "the greenies" (which is a bacterial situation nobody wants). Thick glue also takes longer to cure under a LED Bright Lamps or UV light because the light has to penetrate through all that extra product. And if you are impatient like me and try to flash-cure too fast, the outside hardens while the inside stays soupy. Then your client leaves, bumps the nail on a car door, and the whole rhinestone tilts sideways like the Leaning Tower of Pisa. Not a great look.
The Sweet Spot: Why Medium Viscosity Is The Reigning Queen
Now let us talk about the Beyoncé of adhesives: medium viscosity. This is what most Professional Nail Care Collections technicians reach for 80% of the time. Medium viscosity glue is thick enough to stay where you put it but thin enough to self-level under a rhinestone. It bridges small gaps without creating a mountain range. It cures evenly without trapping uncooked glue pockets. It is forgiving if you sneeze or the client twitches. Medium viscosity glue is the friend who shows up with tacos and helps you move the couch—reliable, helpful, and always welcome.
For everyday use in a busy Salon, medium viscosity is your workhorse. It works beautifully with Dipping Powder Systems for Salons nails, Professional Gel Polish, and even natural nail services. It gives you enough working time to adjust a wayward stone without the glue setting up like concrete two seconds after placement. The key is learning the exact amount—usually a tiny dot about the size of a pinhead for a 3mm stone. Practice on a Training Manikins & Mannequins hand until you can eyeball the perfect droplet every time.
Temperature Tantrums: How Weather Wrecks Your Glue Game
Here is something they do not teach you in beauty school: glue viscosity changes with temperature. Leave your Rhinestone Adhesive in a hot car during a Florida summer, and that medium glue will turn into thin, angry water that drips everywhere. Leave it in a cold back room overnight, and it will become so thick you need to wrestle the bottle like a bear fighting a salmon. I am serious—I once watched a technician squeeze so hard that the bottle flew out of her hand and landed in a client's purse. Try explaining that one.
Store your adhesives at room temperature. If your glue is too thick and you are mid-service with a client waiting, do not panic. Roll the bottle between your palms to warm it up gently. Do not microwave it. I should not have to say that, but somewhere out there, someone is reading this and thinking, "Thirty seconds on high?" No. Just no. Similarly, if your glue is too runny, you can pop it in the fridge for ten minutes to thicken it up, but do not store it there long-term or it will separate. Treat your adhesives like the moody artists they are—stable environment, gentle handling, and lots of quiet encouragement.
Rhinestone Size Matters: Matching Viscosity To Stone Diameter
Let us get practical. For SS3 to SS5 rhinestones (the tiny ones that look like glitter had a baby with a diamond), you want thin to medium viscosity. A thick glue would overwhelm these little guys and create a visible bump that ruins the flat, smooth look. For SS6 to SS12 (your standard fun-sized gems), medium viscosity is perfection. For anything SS16 and above—the big show-stopping crystals—you need medium-thick or thick adhesive. Large stones have weight, and that weight creates leverage. Thin glue will eventually fatigue and pop loose, leaving your client to find a rhinestone in her popcorn at the movies three weeks later.
Also consider the base material. Sticking rhinestones onto a Professional Gel Polish surface? Medium viscosity bonds beautifully to cured gel. Sticking onto a natural nail or Nail Treatments for Healthy Nails coating? You might want a slightly thicker formula to account for the natural flexibility of the nail plate. The nail bends; a thick glue bridge bends with it. A thin glue bridge cracks like a dry riverbed. Science!
Application Techniques That Will Make You Look Like A Wizard
Alright, let us talk technique because even the perfect viscosity glue fails if your application is sloppy. First, prep is everything. The nail surface must be clean, dry, and buffed. Any Cuticle Oil residue or dust will act like Teflon, and your glue will slide right off. Use a Nail Brushes & Tools dusting brush or a lint-free wipe with alcohol to degrease the area. Second, use the right applicator. Needle-nose bottles are great for thin and medium glues because they give you precision. Squeeze bottles with wider tips work better for thick glue because the glue needs more room to exit without making you look like you are trying to strangle the bottle.
Third—and this is where the humor comes in—do not glue your tools to the table. I have done it. You have done it. We have all created a permanent Professional Wax Spatulas and Applicators situation with our own tweezers. Place your rhinestone, apply gentle pressure, and then slide your tool out sideways rather than lifting it straight up. Lifting straight up creates a glue spiderweb that attaches to your tweezers and then stretches across three other nails like a sticky monster. Cure under an LED Bright Lamps for the manufacturer's recommended time. And for the love of all that is sparkly, cap the glue bottle immediately after each use. Uncapped glue exposed to air thickens over time, and nothing is sadder than finding your favorite adhesive has turned into a solid rubber plug.
The Unexpected Crossover: Why Waxing Pros Also Need This Knowledge
Now you might be thinking, "Harper, I run a Waxing Supplies for Professionals business. I do not do nails. Why do I care about rhinestone glue?" First, never say never. Body art is huge right now, and I have seen ItalWax - Wax technicians adding temporary crystal accents to post-waxing body glitter designs. Second, the same viscosity principles apply to lash adhesives for Lash & Brow Service Supplies. Thin lash glue bonds quickly but can run into eyes (nightmare fuel). Thick lash glue stays put but creates clumps. Medium viscosity lash adhesive? You guessed it—the sweet spot. Understanding viscosity makes you better at everything adhesive-related, from Brow Lamination Supplies for Perfect Brows to Premium Lash Extensions & Supplies for Pros. It is all connected, my friends.
Troubleshooting: When Good Glue Goes Bad
Let us solve some real problems. If your rhinestones keep sliding around after placement, your glue is too thin or you used too much. Remove the stone, wipe away the excess, and try again with a smaller dot of medium or thick glue. If your rhinestones look like they are sitting on little pedestals, your glue is too thick or you used too much. Switch to a thinner formula or use significantly less product. If your rhinestones pop off within a day or two, either your glue was too thin for the stone size, you did not cure it long enough, or the nail surface was contaminated. If the glue itself is stringy when you pull the applicator away, it is either old, exposed to air too long, or the temperature is too cold. Throw it away and open a fresh bottle. Life is too short to fight with stringy glue.
Also, check your expiration dates. Yes, adhesives expire. Old glue loses its viscosity consistency and curing ability. Using expired Rhinestone Adhesive is like using sour milk in your coffee—technically you can do it, but why would you want to? Pure Spa Direct rotates our Must-Have Supplies for Salon & Spa Business Success inventory frequently, so you are always getting fresh product. Check the batch dates when you receive your order, and write the opening date on the bottle with a marker. Most adhesives are good for about three to six months after opening.
Stocking Your Adhesive Arsenal For Every Situation
Here is my professional recommendation for a well-rounded Professional Nail Care Collections adhesive kit. Keep one thin viscosity glue for micro-rhinestones and flat-back crystals on natural nails. Keep one medium viscosity glue for 90% of your daily work—this is your workhorse. Keep one thick viscosity glue for massive statement gems, metal charms, and 3D nail art that requires structural support. Label them clearly because nothing is funnier than accidentally grabbing the thick glue for SS3 rhinestones and creating a collection of tiny, sparkly speed bumps. Store them upright in a cool, dry drawer away from sunlight. And for the sake of your sanity, buy the no-drip, no-clog caps. Your future self will thank you when you are not picking dried glue out of a nozzle with a pin for fifteen minutes while a client watches.
Remember, the goal is sparkling, secure rhinestones that survive hand washing, typing, and the chaos of daily life. The right viscosity makes that happen. The wrong viscosity makes you question your career choices. Choose wisely, stock smartly, and may your gems stay exactly where you put them. Now go forth and make things sparkle, you beautiful glue genius. And if you accidentally glue your fingers together, coconut oil works better than panic—trust me on that one.