Pros know this delivers every time... Setting up a lash studio is like creating a sanctuary where beauty meets precision. Whether you're a seasoned lash artist or just starting out, having a dedicated space for your craft can elevate your business and client experience. From choosing the perfect location to stocking up on must-have supplies like Premium Lash Extensions, this guide will walk you through every step to create a lash studio that’s both functional and fabulous.
Let’s face it, the lash industry is booming, and clients are looking for a professional, Instagram-worthy experience. Your studio isn’t just a place to apply lashes—it’s a reflection of your brand and expertise. So, grab a cup of coffee (or a glass of wine, no judgment here), and let’s dive into the ultimate step-by-step guide to setting up your dream lash studio.
Step 1: Find the Perfect Location
Location, location, location! Whether you’re renting a small suite or carving out a corner in your home, your studio’s location sets the tone for your business. Look for a space that’s easily accessible, well-lit, and has enough room for a Portable Massage Table or lash bed. Bonus points if it’s in a high-traffic area like a shopping center or near other beauty services.
Step 2: Invest in Quality Furniture
Your lash studio needs to be as comfortable for you as it is for your clients. Start with a sturdy lash bed or table—think Top Quality Massage Tables for maximum comfort. Add a cozy blanket and pillow for your clients, because who doesn’t love a little extra pampering? Don’t forget storage solutions like carts or shelves to keep your tools organized and within reach.
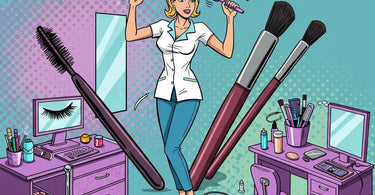
Step 3: Stock Up on Lash Supplies
No lash studio is complete without the essentials. From Premium Lash Extensions to adhesives, tweezers, and Professional Cleaners, make sure you’re fully stocked. Pro tip: Keep a variety of lash styles and lengths on hand to cater to different client preferences. And don’t forget the Protective Gloves & Masks for a hygienic experience.
Step 4: Create a Relaxing Ambiance
Your studio’s vibe is everything. Soft lighting, calming music, and a touch of aromatherapy can transform your space into a relaxation haven. Consider adding a Aromatherapy Diffuser with lavender or eucalyptus oil to help clients unwind. A small water feature or some greenery can also add a spa-like feel.
Step 5: Market Your Studio
Once your studio is ready, it’s time to spread the word! Use social media to showcase your space, share before-and-after photos, and promote special offers. Partner with local businesses or influencers to boost your visibility. And don’t forget to create a loyalty program to keep your clients coming back for more.
Step 6: Stay Organized and Professional
Running a lash studio isn’t just about applying lashes—it’s about managing appointments, tracking inventory, and keeping your space spotless. Invest in a booking system to streamline scheduling and use Hygienic Table Paper to maintain cleanliness. A little organization goes a long way in keeping your studio running smoothly.
Step 7: Keep Learning and Growing
The beauty industry is always evolving, and so should you. Attend workshops, follow industry trends, and experiment with new techniques to keep your skills sharp. Your clients will appreciate your dedication to staying at the top of your game.
Setting up a lash studio is an exciting journey that combines creativity, business savvy, and a passion for beauty. With the right tools, supplies, and mindset, you’ll create a space that not only attracts clients but also keeps them coming back for more. Ready to get started? Check out our Lash & Brow Service Supplies to stock up on everything you need!