Boost revenue with this staple service secret that turns first-time clients into lifelong regulars. Let's be honest, in the world of nail art, glitter, and chrome powders, the humble cuticle doesn't get the spotlight it deserves. But as a pro, you know the truth: that stunning crystal-encrusted design or that flawless chrome fade is only as good as the canvas it's painted on. Nail prep is the foundation of any good manicure. You can apply the best products from top brands like CND or OPI, but if the nail isn't properly prepped, it simply won't last. This isn't just a step; it's your secret weapon for client retention, flawless reviews, and a bulging appointment book. Master this, and you're not just doing nails—you're building a reputation.
Think of it this way: a client doesn't come back because her pink was pretty. She comes back because three weeks later, that pink is still on her nails without a chip, lift, or peel in sight. That miracle of longevity? It's 90% prep work. Good prep ensures better adhesion, a smoother finish, and prevents the holy trinity of client complaints: lifting, chipping, and peeling. It's the difference between a service that lasts a week and one that lasts a month. So, let's ditch the notion that prep is the boring part. It's the most profitable part of your entire service.
Cuticle 101: What Are We Actually Working On?
Before we get our tools out, let's clarify a major point of confusion—even among some pros! The term "cuticle" is often used as a catch-all, but we're typically dealing with two distinct things. First, there's the eponychium, the living skin that rims the base of your nail plate. This is live tissue—do not cut this! Then, there's the true cuticle (or proximal nail fold), which is the dead, translucent tissue that grows out from the eponychium and sticks to the nail plate. This is what we aim to remove. Why? Because if you apply polish, gel, or an enhancement over this loose, dead tissue, you're creating a perfect pocket for lifting to begin. Removing it exposes more of the actual nail plate, creating a clean, strong surface for product to adhere to. It's the single biggest factor in extending the life of a gel or acrylic set.
The Professional's Arsenal: Essential Cuticle Prep Tools
You can't win a battle without the right weapons. Stocking your station with high-quality, professional-grade tools is non-negotiable for both results and safety. Here's what you need in your kit, all available at Pure Spa Direct:
- Cuticle Pusher: Your first line of defense. Look for a stainless-steel pusher with a comfortable grip. The goal is to gently push back and almost lift the cuticle from the nail bed. A great pusher should do the work with minimal pressure. For a premium option, consider a glass manicure stick, which is hygienic, sterilizable, and incredibly gentle.
- Cuticle Nippers: Perhaps the most important tool in your kit. Sharpness is safety. A dull nipper will tear and crush skin, leading to potential damage and infection. A sharp, high-quality nipper from brands like Fromm International allows for a clean, precise cut of only the dead tissue. Remember, you are a sculptor, not a butcher.
- Nail Files & Buffers: This is not the place to skimp. You need a new file and buffer very frequently. A worn-out file or buffer is useless and can damage the nail. Keep a stock of fine-grit files (180/240 grit for natural nails) and fresh buffers for gently abrading the nail plate after cuticle removal. Shop our full selection of Nail Files & Buffers.
- Prep & Cleanse: After all that filing and nipping, you must remove all debris and natural oils. This is where nail cleanser or high-percentage isopropyl alcohol (over 80%) and lint-free wipes come in. They dehydrate the nail plate, ensuring your base coat bonds directly to the nail, not to dust or oil.
- The Power of Oil: Your service doesn't end with top coat. A luxurious application of cuticle oil is the final, pampering touch that clients remember. It rehydrates after the drying prep process, promotes healthy nail growth, and keeps cuticles soft between visits. Consider retailing it—it's an easy add-on!
Mastering the Method: The Dry Manicure Prep Technique
Forget the old-school soak. The "dry manicure" or "Russian manicure" technique is the gold standard for professionals seeking the longest-lasting results. The core principle is simple: keep everything dry. Why? Because water causes the nail plate to expand. When it later dries and contracts under your polish, it creates micro-movement that leads to early chipping. A dry prep keeps the nail stable. Here's a step-by-step breakdown:
- Remove Old Product: Start with a clean slate using a professional nail polish remover or acetone.
- Push and Lift: Using your cuticle pusher, gently push back the eponychium and lift the true cuticle tissue from the nail plate. The dry environment makes it easier to see what's dead and ready to be removed.
- Buff Away Cuticle: Use a fresh buffer to gently abrade the nail plate, focusing on the cuticle area. This safely removes the thin layer of dead cuticle that's stuck on. You should see a fine, white dust—that's the cuticle coming off.
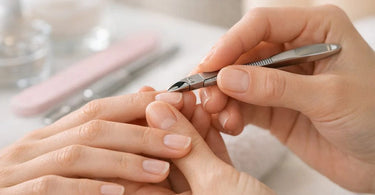
- Nip with Precision: Now, with your sharp nippers, carefully trim only the dead, dry, and lifted skin tags around the nail. If it hurts, you're cutting live skin. STOP. The dry method makes it very clear what is dead (tough, white, lifted) and what is alive (pink, pliable, attached).
- Final Cleanse: Brush away all dust with a clean brush, then swipe each nail with alcohol or nail cleanser on a lint-free wipe. Do not touch the nail plate after this step! Your canvas is now pristine.
This method is especially critical for gel manicures and acrylic systems, where any barrier between product and natural nail is a failure point.
The Supporting Cast: Don't Neglect the Rest of the Hand
A five-star manicure treats the whole hand, not just the nail. This is where you elevate the experience from a simple paint job to a luxurious spa treatment. After your detailed cuticle work, incorporate these steps:
- Exfoliation: Use a gentle sugar scrub or salt scrub to slough away dead skin on the hands. It instantly makes skin feel softer and more receptive to moisture.
- Massage & Moisture: This is the moment of zen. Use a rich, luxurious hand cream or lotion and give a thorough hand and lower arm massage. It promotes relaxation, improves circulation, and locks in hydration. For the ultimate touch, offer a warm towel wipe-down using a towel steamer.
- Sanitation is Paramount: Every step of your service must be wrapped in impeccable hygiene. All metal tools must be sterilized between clients. Use professional disinfectants and always have hand sanitizer available. This protects your clients and your business's reputation.
Building Your Business on a Foundation of Great Prep
Exceptional cuticle work isn't just a technique; it's a business strategy. When clients see and feel the difference—the cleaner nail bed, the extended wear, the overall health of their nails—they become loyal. They'll book their next appointment before they leave and refer their friends. To support this level of service, ensure your entire salon setup is professional. Invest in a comfortable, functional manicure station, a high-quality LED lamp for curing, and efficient dust collection.
Your commitment to the foundation is what sets you apart. It tells your client, "I care about the health of your nails as much as the beauty." And in today's market, that's a message that resonates deeply and builds a thriving, sustainable business. Now, go prep those nails like the artist and professional you are!