Results you can be proud of... and skin so smooth it could rival a baby's bottom! A chemical peel is one of the most powerful tools in your skincare arsenal, offering dramatic results for everything from acne scars to sun damage. But here's the kicker: applying it wrong is like using a flamethrower to light a candle—effective but terrifyingly risky. Don't worry, we've got your back (and face) with this foolproof step-by-step guide that'll have you applying peels like a pro.
Whether you're a seasoned esthetician or just starting out, mastering the art of chemical peels can take your services from "meh" to "magical." So grab your gloves, channel your inner skincare wizard, and let's dive into the nitty-gritty of peel perfection.
Pre-Peel Prep: Setting the Stage for Success
Before you even think about cracking open that peel solution, prep work is crucial. This isn't just skincare—it's a full-blown theatrical production where your client's face is the star. Start with a thorough consultation to assess skin type and concerns. Pro tip: if your client mentions using retinoids recently, hit the pause button—peels and retinoids are like oil and water (except when they're not, which is when things get messy).
Cleanse the skin with a gentle but effective facial cleanser to remove surface oils and debris. Follow up with a pre-peel solution to degrease the skin—this ensures even penetration of the peel. For extra credit (and extra exfoliation), consider using a microdermabrasion treatment beforehand.
Choosing Your Potion: Selecting the Right Peel
Not all peels are created equal—some are gentle enough for sensitive skin, while others could make a dragon blush. The three main types are:
1. Superficial peels (AHAs like glycolic or lactic acid) - The "my first chemical peel" option
2. Medium peels (TCA) - For when you mean business
3. Deep peels (phenol) - Basically skincare's equivalent of a phoenix rising from ashes
For most salon applications, you'll likely be working with glycolic acid peels or TCA peels. Always have neutralizer on hand—because "oops" isn't an acceptable outcome in professional skincare.
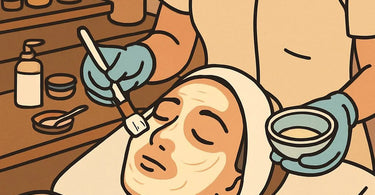
The Main Event: Application Technique
Now for the moment of truth! Using a fan brush or gauze, apply the peel in smooth, even strokes. Start with the forehead (the least sensitive area), then move to cheeks, nose, and finally the delicate chin area. Avoid the eye area like it's your ex at a party—this skin is too thin for peel shenanigans.
Watch for frosting (that white, frosted appearance)—it's your visual cue that the peel is working. For light peels, you might not see frosting; for medium peels, light frosting is normal. If your client starts looking like a powdered donut, you've probably gone too far (and should neutralize immediately).
The Grand Finale: Neutralization and Aftercare
Timing is everything—leave the peel on too long and you're in redness territory, not long enough and it's money down the drain. When time's up (usually 3-10 minutes depending on peel strength), neutralize with cool water or a neutralizing solution.
Post-peel, slather on a soothing serum and SPF (non-negotiable!). Send your client home with strict instructions: no picking, no scrubbing, and definitely no sunbathing unless they want to resemble a lobster.
Pro Tips for Peel Perfection
- Always do a patch test 24-48 hours before the full treatment
- Keep a disinfectant spray handy for your tools
- Stock up on gloves—peel solution on your hands is a one-way ticket to irritation city
- Consider pairing with LED light therapy for enhanced results
Remember, with great peeling power comes great responsibility. Master these steps, and you'll be turning out glowing, radiant complexions that'll have clients coming back for more. Now go forth and peel responsibly!