Clients rave about this... a flawless gel pedicure that lasts weeks without chipping, peeling, or losing its shine. But let’s be honest—getting it right takes more than slapping on some polish and hoping for the best. Whether you’re a seasoned nail tech or just adding gel services to your menu, mastering the pedicure protocol is key to keeping clients coming back for those Instagram-worthy toes. Here’s your foolproof, step-by-step guide to a gel pedicure that’s equal parts pampering and perfection.
Before we dive in, let’s address the elephant in the room: yes, gel pedicures are *magic*, but only if you avoid shortcuts. Skipping steps? That’s how you end up with polish that lasts as long as a New Year’s resolution. So grab your pedicure chair, cue the relaxing spa music, and let’s get those feet summer-ready!
Step 1: The Pre-Game – Sanitation & Setup
First things first: sanitize everything. Your client’s feet, your tools, the bowl—even the air they’re breathing (kidding… mostly). Start by disinfecting their feet with a gentle cleanser, and don’t forget to line the pedicure bowl with a fresh liner. Pro tip: A warm foot soak with a sugar scrub isn’t just luxurious; it softens calluses for easier removal later.
Step 2: The Great Exfoliation
Time to slough off winter’s sins. Use a salt scrub or a foot file to buff away dead skin, paying extra attention to heels and balls of the feet. For next-level smoothness, follow up with a paraffin wax treatment—clients will literally melt into their chair.
Step 3: Cuticle Care (No Cutting Allowed!)
Push back cuticles gently with a cuticle pusher, then hydrate with cuticle oil. Remember: cutting cuticles is a big no-no unless you enjoy explaining angry red skin to clients later.
Step 4: Shape & Buff
Trim and shape nails with a quality nail file, then lightly buff the surface to remove shine. This helps the gel adhere better—because nobody wants polish that peels off like a bad sticker.
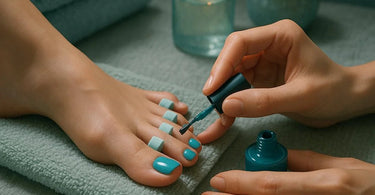
Step 5: The Gel Magic Begins
Apply a thin layer of gel base coat and cure under a LED lamp. Repeat with two coats of color, curing between each. Finish with a top coat for that *chef’s kiss* gloss. Bonus points if you add rhinestones for extra flair!
Step 6: The Grand Finale – Moisturize & Massage
Lock in hydration with a rich foot cream and a mini massage. Pro tip: Use a warm towel to wipe off excess cream—it’s the spa equivalent of a mic drop.
And there you have it! A gel pedicure that’s as durable as it is dazzling. Now go forth and make those feet fabulous—one chip-free toe at a time.
)