Solutions built for professionals like you...because let's face it, nobody has time for gel polish that peels faster than a sunburnt client after a beach vacation. If you've ever had a client return with chipped nails (and that *look*), you know the struggle is real. But fear not! This foolproof, step-by-step guide to gel polish application will have your clients raving—and returning—for more. Plus, we've got all the pro tools you need, from long-lasting gel polishes to LED lamps that cure like a dream.
Ready to banish lifting, smudging, and premature chipping? Let's dive into the nitty-gritty of a flawless gel polish service. Your clients (and your reputation) will thank you.
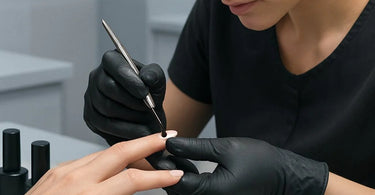
Step 1: Prep Like a Pro (Because Skipping This is Like Building a House on Sand)
First things first: nail prep is non-negotiable. Start by removing any old polish with a gentle, acetone-free remover (we love lint-free wipes for this). Next, shape the nails with a high-grit file—avoid sawing back and forth like a lumberjack, or you'll weaken the nail. Gently push back cuticles with a cuticle pusher, then lightly buff the nail surface to remove shine. This isn't a WWE match; gentle pressure is key!
Pro Tip: Swipe nails with cuticle oil after filing to hydrate, but wipe it off with alcohol before applying polish. Oily nails = lifting city.
Step 2: Base Coat—Your Secret Weapon Against Lifting
A good gel base coat is like Spanx for nails: it smooths, adheres, and prevents disasters. Apply a thin, even layer, making sure to cap the free edge (yes, every single time). Cure under your LED lamp according to the manufacturer's instructions—usually 30–60 seconds. No cheating! Under-curing is the #1 cause of gel polish failure.
Step 3: Color with Confidence (Thin Layers Win the Race)
Here's where clients get impatient, but remind them: thin layers last longer. Apply your gel color in smooth strokes, avoiding the cuticles like they're your ex at a party. Too thick? You'll get wrinkles, bubbles, and a cure that's as effective as a screen door on a submarine. Cure each layer fully before adding another—usually 2 coats does the trick.
Pro Tip: Use a detail brush dipped in cleanser to tidy up any mistakes before curing. Perfection is a process!
Step 4: Seal the Deal with a Top Coat
A high-quality gel top coat is the difference between "meh" and "WOW." Apply a thin layer, capping the edges again, and cure. For extra shine, skip wiping the sticky layer until after you've filed/shaped any imperfections. Then, cleanse nails with gel polish cleanser to remove residue and reveal a mirror-like finish.
Step 5: Hydrate & Celebrate (Because Happy Nails = Happy Clients)
Finish with a drop of cuticle oil massaged into each nail. Not only does this add a luxe touch, but it also keeps nails flexible and less prone to chipping. Bonus: Clients love the mini hand massage—it's like a cherry on top of their manicure sundae.
Shop the Must-Haves for Flawless Gel Services
Upgrade your gel polish game with these salon essentials:
- Gel Polish Kits (Because variety is the spice of nail life)
- Professional LED Lamps (No more "why isn't this curing?" moments)
- High-Grit Buffers & Files (Prep is everything!)
- Sanitizing Wipes (Clean tools = happy clients)
There you have it—the gel polish protocol that'll keep your clients coming back. Now go forth and create chip-free masterpieces!
)