Stay ahead, stock this...game-changing ItalWax hard wax that'll have your clients singing your praises (instead of cursing your name). Let's face it – waxing isn't exactly anyone's idea of a good time, but with the right technique, you can turn those “oh God, here we go again” faces into “wait, that's it?” expressions of pure shock. This isn't just hair removal; it's a magic trick where the rabbit is unwanted fuzz and the hat is your skilled hands. Ready to become a waxing wizard? Grab your wax spatula and let's dive in.
Whether you're a seasoned esthetician or new to the waxing game, mastering hard wax application is like learning the secret handshake of the hair removal world. Unlike its strip wax cousin, hard wax grips hairs without sticking to skin, making it perfect for those sensitive areas where clients would rather not lose a layer of epidermis. From Brazilian to brow, this is your backstage pass to professional waxing perfection.
Pre-Wax Prep: Setting the Stage for Success
Before you even think about melting that wax, let's talk prep work. A proper canvas makes all the difference – you wouldn't paint a masterpiece on a dirty wall, would you? Start by ensuring your client's skin is clean and dry. A quick wipe with pre-wax cleanser removes oils and bacteria that could interfere with wax adhesion.
Pro tip: If your client walks in fresh from the gym, offer them a refreshing compressed sponge and a moment to cool down. Sweat is wax's mortal enemy, and nobody wants a wax mustache that slides right off.
Temperature Matters: Finding the Wax Sweet Spot
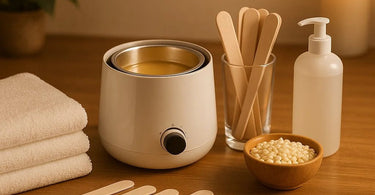
Melting your hard wax is like making Goldilocks' porridge – too hot and you'll have a screaming client, too cold and it won't spread properly. Most hard waxes melt at a comfortable 55-65°C (130-150°F). Invest in a quality wax warmer with precise temperature control to avoid playing guessing games.
Test the wax on your inner wrist before application. It should feel warm but not scalding, with a honey-like consistency that's easy to spread. If it's stringy or clumpy, give it more time to melt. Remember: patience is a virtue, especially when dealing with someone else's nether regions.
The Art of Application: Spatula Skills 101
Now for the main event! Dip your wax spatula into the melted wax at a 45-degree angle, loading up about 1-2 inches of product. Apply in the direction of hair growth using smooth, even strokes. For larger areas like legs, go with the grain in sections about 3 inches wide and 6 inches long. For delicate areas (we're looking at you, bikini zone), smaller applications are your friend.
The thickness of your application is crucial – aim for about 1/8 inch. Too thin and it won't grip hairs properly; too thick and it'll be a nightmare to remove. Think of it like spreading peanut butter on toast – you want full coverage without drowning the bread.
The Waiting Game: Letting the Wax Work Its Magic
Here's where many newbies panic – how long do you let the wax set? Typically 30-60 seconds, but the real test is the touch check. Gently press a finger on the edge of the wax. If it's tacky but doesn't stick to your finger, it's showtime. If it's still gooey, give it a few more seconds. The wax should feel flexible but firm, like a slightly set gelatin dessert.
While you wait, distract your client with some salon small talk. “So, any big plans this weekend?” works wonders to take their mind off what's about to happen. Just maybe avoid this question during a Brazilian unless you want some truly memorable answers.
The Big Reveal: Removal Technique
This is the moment of truth! Hold the skin taut with one hand (this reduces discomfort and gives you better control). With the other hand, grip the edge of the wax where you didn't apply the end tab. Pull quickly and firmly against the direction of hair growth, keeping the pull parallel to the skin rather than upwards.
Here's a pro secret: the closer you keep the wax to the skin during removal, the less it hurts. Imagine you're peeling a sticker off a surface rather than yanking a bandage. Your client will thank you, possibly with actual tears of gratitude.
Aftercare: Because the Job Isn't Done Until the Paperwork Is Filed
Once you've cleared the area, apply gentle pressure with your hand to soothe the skin. Follow up with a post-wax treatment to calm inflammation and prevent ingrown hairs. Our personal favorite? A product with tea tree oil or aloe vera to cool and disinfect.
Educate your client on proper aftercare: no hot baths, sun exposure, or tight clothing for 24-48 hours. Hand them a bottle of ingrown hair treatment and instructions like they're the holy grail of smooth skin maintenance. Because let's be honest – they kind of are.
Troubleshooting Common Waxing Woes
Even pros encounter hiccups. Wax won't stick? The skin might be too oily – give it another cleanse. Wax breaking during removal? It might be too thin or cooled too much. Hairs left behind? They might be too short – recommend waiting a few more days before retrying.
For particularly stubborn areas, try applying a second thin layer of wax over the first before removal. It's like giving Mother Nature a second chance to let go of those clingy hairs.
Pro Tips to Elevate Your Wax Game
1. Keep a warm towel handy to open pores before waxing and soothe skin after.
2. For sensitive areas, apply a light dusting of talc-free powder to absorb moisture.
3. Always do a patch test with new clients to check for allergic reactions.
4. Invest in a magnifying lamp for precision work on brows and other small areas.
5. Keep your waxing station impeccably clean – nothing kills the vibe like used wax sticks everywhere.
Building Your Waxing Arsenal
Your tools make all the difference. Stock up on:
- Professional wax warmers with precise temperature control
- Various sizes of wax applicators for different areas
- High-quality hard wax beads in formulas for different hair types
- Pre and post-wax treatments to complete the service
- Disposable table paper for quick cleanups between clients
Remember, perfecting your hard wax technique takes practice, but the results are worth it – smooth skin, happy clients, and a booking schedule that stays full. Now go forth and wax poetic about your new skills!