Deliver excellence, every time... especially when your clients are lying face-down on your massage table, trusting you to melt their stress away. Shiatsu pressure point massage isn’t just another rub-down—it’s an ancient Japanese art that combines rhythmic pressure, stretches, and energy flow to release tension, improve circulation, and restore balance. And let’s be honest, who doesn’t want to be the therapist clients rave about for "magic fingers"? Here’s your step-by-step guide to mastering Shiatsu like a pro (and maybe earning a few extra tips for your trouble).
Before we dive in, make sure you’ve got the right tools. A sturdy portable massage table, some friction-reducing lotion, and a zen-like demeanor (or at least the ability to fake one) are essential. Now, let’s get to work!
Step 1: Set the Mood (No, Not Like That)
First, ambiance matters. Dim the lights, cue the soothing sounds of a babbling brook (or Enya, if you’re feeling nostalgic), and maybe even break out the essential oil diffuser. Your client should feel like they’ve stepped into a tranquil oasis, not a backroom at a flea market. Pro tip: If your space smells like last night’s garlic fries, no amount of pressure points will save you.
Step 2: Start with the Back—The Tension HQ
Begin with your client prone (face-down) on the table. Using your palms and thumbs, apply firm, steady pressure along the bladder meridian (the parallel lines running alongside the spine). Start at the shoulders and work down to the lower back, using your body weight—not just your arms—to avoid burnout. Think of it as a "press and hold" technique, not a "poke and pray." If you hit a knot, pause and gently knead it like you’re unraveling a stubborn skein of yarn.
Step 3: Attack the Shoulders (With Kindness)
Ah, the shoulders—where stress goes to throw a rave. Focus on the trapezius muscles, using your thumbs to press into the acupressure points at the base of the neck (GB21, or "Shoulder Well"). Hold each pressure point for 5–7 seconds, then release. If your client makes a noise that’s half-sigh, half-sob, you’re doing it right. For extra credit, incorporate gentle stretches by lifting the arm and rotating the shoulder joint.
Step 4: The Arms & Hands—Don’t Skip the Money Makers
Move down to the arms, targeting the LI4 point ("Union Valley") between the thumb and index finger—a powerhouse for relieving headaches and tension. Squeeze the forearm muscles like you’re kneading dough, and finish with a wrist stretch. Warning: If your client starts murmuring, "I love you," just nod and keep going.
Step 5: The Legs & Feet—Where All Emotions Hide
Flip your client supine (face-up) and work the legs, pressing into the SP6 point ("Three Yin Intersection") above the ankle for fatigue relief. For the feet, focus on the KI1 point ("Bubbling Spring") on the sole—it’s like a reset button for energy. Use your thumbs to press deeply, but if your client kicks you in the face, dial it back a notch.
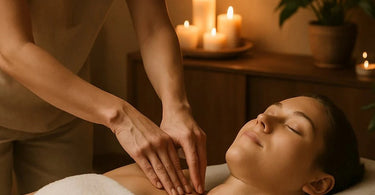
Step 6: The Grand Finale—Scalp & Face
Finish with scalp and facial pressure points. Use circular motions on the temples (GB3, "Great Rushing") and gentle pressure between the eyebrows (Yintang, the "Third Eye"). If your client starts snoring, congratulations—you’ve achieved nirvana.
Pro Tips for Shiatsu Success
- Breathe, dummy. Your client will mirror your calm, steady breathing.
- Hydrate them. Offer water afterward to flush out toxins (and maybe a sugar scrub sample to seal the deal).
- Upsell wisely. "You know what pairs great with Shiatsu? A hot stone upgrade."
Now go forth and heal! And if anyone asks, you didn’t learn this from a blog—you were "born with the gift."