Do your best work, every time... especially when that work involves turning your treatment room into a zen den of vibrational bliss! If you haven’t added sound healing vibration massage to your service menu yet, prepare to become your clients’ new favorite therapist. This ancient-meets-modern treatment combines the power of touch with the profound relaxation of sound therapy – and today, we’re spilling all the secrets to performing it like a pro. Bonus: Your hands will thank you for mixing up your massage routine!
Picture this: Your client is melting into your massage table as Tibetan singing bowls hum around them, their muscles unwinding like overcooked spaghetti. That’s the magic of sound healing vibration massage – it’s like giving someone a tropical vacation for their nervous system. And the best part? You don’t need to be a musical prodigy to master it (though if you can carry a tune in the shower, that’s a nice bonus).
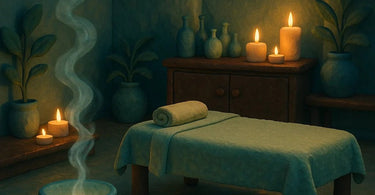
Step 1: Set the Stage for Sonic Serenity
Before you strike that first note, create an environment worthy of this transcendent experience. Dim the lights (we’re going for “cozy cave,” not “romantic dinner”), drape your table with luxurious spa linens, and consider adding a subtle essential oil blend to engage all the senses. Pro tip: Keep your massage oil warmer nearby – nothing kills the vibe like cold hands on warm skin!
Step 2: The Great Instrument Selection
Not all sound tools are created equal! While Tibetan singing bowls are the Beyoncé of sound therapy (iconic, versatile, always delivers), don’t sleep on these options:
- Tuning forks for precision vibration
- Gongs for deep, resonant waves
- Crystal bowls for ethereal high notes
- Koshi chimes for gentle, nature-inspired tones
Start with one or two instruments and expand your collection as you find your sound therapy signature style.
Step 3: The Opening Act – Grounding Your Client
Begin with your client face-up on your massage table, fully draped. Place a singing bowl on their solar plexus (over the drape, please – we’re professionals here) and strike it gently. Watch their eyes widen as the vibrations travel through their entire body! This isn’t just showmanship – it helps synchronize their breath and awareness to the treatment.
Step 4: The Main Event – Combining Touch & Tone
Now the real magic begins! Follow this sequence:
- Apply warmed massage oil using broad, grounding strokes
- Place a small singing bowl on tense areas (shoulders, we’re looking at you) and strike gently
- Use tuning forks along meridians – the vibration amplifies your work
- Alternate between manual massage and sound applications
Remember: The sound isn’t background music – it’s an active participant in the treatment. Time your strikes with your strokes for maximum impact.
Step 5: The Grand Finale – Sound Bath Relaxation
After your hands have worked their magic, transition to pure sound therapy. Arrange bowls around your client (hips, shoulders, crown) and play them in sequence, creating a “vibration waterfall” from head to toe. This is when clients typically achieve that glorious “I’ve melted into the table” state – the holy grail of spa treatments!
Pro Tips for Sound Healing Success
- Keep sessions to 60-75 minutes max – deep relaxation can be intense!
- Offer a warm sugar scrub or heated stones to enhance the experience
- Use weighted eye pillows to deepen relaxation
- Always end with grounding – have clients sit up slowly and drink water
There you have it – your ticket to becoming the sound healing guru of your spa! Want to stock up on everything you need? Explore our complete wellness collection and get ready to make some beautiful noise (and beautiful profits while you’re at it).
)