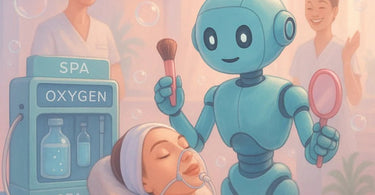
Do more with less effort... especially when it comes to giving your clients that coveted 'lit-from-within' glow. An Oxygen Infusion Facial is like a tall glass of water for parched skin—except it’s delivered via a fancy machine that makes everyone feel like they’re in a sci-fi movie. Perfect for dull, dehydrated, or sensitive skin, this treatment pumps pure oxygen and nutrient-rich serums deep into the epidermis, leaving skin plump, radiant, and begging for a selfie. Ready to master this game-changing facial? Let’s break it down step by step (no spaceship required).
Before we dive in, make sure you’ve got the right tools. You’ll need an oxygen infusion machine, a high-quality serum (hyaluronic acid or vitamin C are fan favorites), a facial steamer, and your usual facial setup (cleanser, exfoliant, etc.). Pro tip: Skip the caffeine before this one—your client will be so relaxed, they might nap.
Step 1: Cleanse Like You Mean It
Start with a double cleanse to remove makeup, dirt, and the remnants of your client’s chaotic day. Use a gentle but effective cleanser—nothing harsh, since we’re prepping for serious hydration. Follow with a warm towel (bonus points if it’s from a towel steamer) to open pores and set the mood for 'ahhh.'
Step 2: Exfoliate (But Keep It Gentle)
Slough off dead skin cells with a mild sugar scrub or enzyme peel. Avoid anything too abrasive—this isn’t the time for 'no pain, no gain.' The goal is to create a smooth canvas so the oxygen and serum can penetrate like overeager skincare nerds.
Step 3: Steam Things Up
Break out the facial steamer for a 5-10 minute pore-opening session. This softens the skin and primes it for extraction (if needed). Cue the zen music and maybe offer a neck massage—your client will think you’re a wizard.
Step 4: Extractions (Optional but Satisfying)
If your client’s pores are throwing a block party, now’s the time for extractions. Use sterile tools and light pressure—no squeezing like you’re juicing a grapefruit. Follow up with a soothing toner to calm any redness.
Step 5: Serum Application
Apply a nutrient-packed serum tailored to your client’s skin needs. Hyaluronic acid for dehydration? Vitamin C for brightness? Tuel Skincare has options that’ll make you look like a skincare sommelier. Gently massage it in using upward strokes.
Step 6: Bring in the Big Gun—Oxygen Infusion
Time for the main event! Fire up your oxygen machine and adjust the pressure (start low for sensitive skin). Hold the nozzle 2-3 inches from the face and move it in slow, circular motions, letting the oxygen blast serum deeper into the skin. Watch as your client’s face plumps up like a happy grape.
Step 7: Mask & Chill
Lock in the goodness with a hydrating mask. While it sets, treat your client to a hand massage or scalp massage—because why not? This is a *luxury* experience, not a drive-thru.
Step 8: Moisturize & Protect
Remove the mask, apply a lightweight moisturizer, and finish with SPF (daytime) or a nourishing night cream (evening). Educate your client on post-facial care: no heavy makeup or aggressive workouts for 24 hours. Their skin just had a workout of its own!
Why This Facial Rocks
Clients leave with instant radiance, improved hydration, and zero downtime—perfect for pre-event glow-ups or just battling the 'why-do-I-look-tired?’ blues. Plus, it’s customizable: pair it with dermaplaning for extra smoothness or microdermabrasion for texture buffing.
So there you have it: the oxygen infusion facial, decoded. Now go forth and pump up that glow (literally). Your clients—and their Instagram followers—will thank you.