
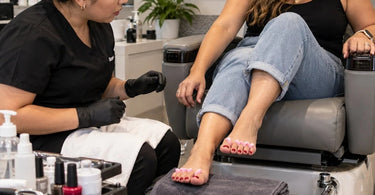
Upgrade treatments with this pro secret... a gorgeous pedicure is only as good as the client's ability to leave the chair without turning that flawless polish into abstract art. You have carefully shaped every nail, perfected the cuticles, applied a beautiful color, and finished with a glossy top coat that deserves its own standing ovation. Then your client reaches for her purse, adjusts her foot, or accidentally bumps the chair, and suddenly one perfect toenail looks like it lost a fight with a shopping cart. If this sounds familiar, you are definitely not alone. Understanding why clients smudge their pedicure before they even leave the chair can help nail professionals improve application techniques, refine their finishing routine, and prevent those frustrating last-minute polish repairs.
For busy nail technicians, smudged pedicures are more than a cosmetic inconvenience. They interrupt appointment schedules, consume additional products, create unnecessary cleanup, and can leave clients questioning the quality of their service. Fortunately, most immediate pedicure smudges have identifiable causes. The solution often involves a combination of proper nail preparation, controlled polish application, realistic drying expectations, smart workstation organization, and a little client communication before the grand reveal.
Why Does a Fresh Pedicure Smudge So Easily?
The most common reason freshly painted toenails smudge is surprisingly simple: the polish looks dry before it is sufficiently hardened to withstand contact or pressure. Traditional nail lacquer dries as solvents evaporate from the applied coating. The surface may become touch-dry while the layers underneath remain soft enough to dent, wrinkle, or shift.
That distinction matters because toenails face unusual challenges during a pedicure. Clients reposition their feet, rest against foot supports, move their legs, reach toward personal belongings, and eventually slide into footwear. Every movement creates another opportunity for accidental contact.
Even a beautifully applied manicure or pedicure can become vulnerable when the polish layers are too thick, the nail plate contains residue, or the client moves before the finishing products have had enough time to perform as intended.
Professional-grade nail polish, appropriate finishing products, and a thoughtful service routine can make a meaningful difference. However, even excellent products cannot completely eliminate the effects of heavy application, insufficient drying time, or a handbag making an unexpected appearance in the pedicure zone.
1. Thick Polish Layers Are Secret Smudge Magnets
If one coat looks beautiful, surely a thicker coat will look even better, right? Unfortunately, nail lacquer does not work like extra frosting on a cupcake.
Applying polish too heavily can cause the surface to begin drying while the material beneath remains soft. This creates a coating that appears finished but is easily disturbed by light pressure or accidental contact.
Thick layers may also produce uneven coverage, extended drying times, bubbling, and impressions from footwear. Deeply pigmented colors can be especially tempting to apply generously when technicians want complete opacity without additional passes.
The professional solution is to apply controlled, thin coats according to the manufacturer's directions. Load the brush with enough product to glide smoothly without flooding the nail, and allow the recommended interval between layers.
When a shade requires additional coverage, another thin coat is generally preferable to one excessively thick coat. The objective is consistent color distribution without creating unnecessary product buildup.
Keep a well-organized selection of longwear nail polish and traditional professional lacquer so technicians can choose formulas suited to the service and the client's expectations.
2. The Nail Plate Was Not Completely Clean Before Application
Pedicure services frequently involve moisturizing products, cuticle treatments, exfoliating scrubs, foot creams, and massage lotions. These products can be wonderful for the skin, but residual oils and creams on the nail plate may interfere with polish adhesion and create application problems.
Imagine preparing a beautifully polished surface and then discovering that an invisible layer of lotion has been sitting underneath the entire time. Not exactly the surprise anyone ordered.
Before applying traditional lacquer, technicians should remove product residue from the nail surface using an appropriate nail preparation product and follow the polish system's directions. Pay particular attention to the sidewalls and cuticle area, where lotion and cuticle products can collect.
A suitable lint-free wipe can help avoid leaving stray fibers behind. Browse professional cotton, sponges, and wipes for supplies that support an organized nail preparation routine.
For services involving cuticle oil, consider the application sequence carefully. Oil should not contaminate the nail surface before lacquer application, and any finishing oil should be used in accordance with the selected polish system.
3. Clients Start Moving Before the Polish Is Ready
One of the most common pedicure disasters happens when a client assumes the service is finished because the final brushstroke has been completed.
She reaches for her phone. She adjusts her handbag. She crosses one leg over the other. She tries to retrieve her sunglasses from the bottom of a purse that apparently contains seventeen years of miscellaneous belongings.
And there goes the big toenail.
Clients are not always familiar with the difference between polish application time and drying time. A technician may understand that freshly applied lacquer remains vulnerable, but a client may interpret the words all done as permission to resume normal movement immediately.
Make drying expectations part of the service conversation before the final coat is applied. Explain that traditional lacquer can remain susceptible to pressure even after the surface feels dry, and that drying times vary by formula, coat thickness, temperature, and other conditions.
Encourage clients to collect their belongings, silence their phones if desired, and position their shoes before the polishing stage begins. This simple preparation reduces unnecessary movements after application.
4. The Pedicure Chair Setup Is Working Against You
A comfortable pedicure chair should make the treatment easier, not turn freshly painted toenails into accidental bumper cars.
Footrest height, leg positioning, chair movement, and technician accessibility all influence how easily clients can keep their feet stable during polish application and drying.
If clients must repeatedly shift their feet to remain comfortable, they may accidentally touch a neighboring toe, the footrest, or the edge of the pedicure basin.
Evaluate the positioning of your pedicure chairs and spas to ensure the foot support allows comfortable, stable placement during polishing. Technicians should be able to reach each toenail without requiring excessive repositioning.
For clients with limited mobility, stiffness, or difficulty maintaining a particular position, adjust the service setup before applying color. A comfortable client is generally less likely to make sudden movements simply to relieve discomfort.
Before beginning the finishing stage, check that the chair is stationary, the footrest is secure, and the client can maintain the chosen position comfortably.
5. Toe Separators Are Missing, Uncomfortable, or Removed Too Soon
Toe separators may not be the most glamorous items in the pedicure room, but they perform an incredibly useful job. They help prevent neighboring toes from contacting one another while polish is being applied and while traditional lacquer remains vulnerable.
Without sufficient separation, a client's natural toe position can cause one nail to brush against adjacent skin or another nail. A small movement may transfer color or leave a noticeable mark.
Choose separators that fit comfortably without forcing the toes into an awkward position. Foam separators, individual toe spacers, and other professional designs offer different options for varying foot shapes.
Explore toe separators to find options appropriate for your pedicure workflow.
Separators should remain in place for the appropriate portion of the drying process without creating unnecessary pressure or discomfort. Remove them carefully, avoiding contact with freshly coated nails.
For professional hygiene, follow the product's intended use and applicable salon sanitation requirements. Single-use items should not be reused between clients.
6. The Top Coat Is Not Matched to the Service
A quality top coat is one of the most valuable finishing tools in a traditional pedicure. Depending on its formulation, it may help improve shine, protect the color layer, and support the intended drying process.
However, not every top coat is designed to do the same job. Some emphasize fast surface drying, others focus on durability or gloss, and some are formulated specifically for particular polish systems.
A fast-drying top coat can be helpful, but it should not be treated as an instant guarantee that every underlying layer has hardened completely.
Applying an excessively thick layer of top coat can also create its own problems. Follow the manufacturer's application instructions, maintain even coverage, and avoid unnecessary flooding around the cuticle and sidewalls.
Keep suitable nail top coats readily available at each pedicure station so technicians are not tempted to substitute products that are poorly matched to the service.
Professional collections from OPI, Essie, and Seche provide useful starting points when comparing nail color and finishing options. Always verify compatibility and product instructions rather than assuming that every formula behaves identically.
7. The Client's Shoes Are a Smudge Waiting to Happen
Few things inspire panic at a pedicure station quite like watching a client reach for a pair of snug sneakers immediately after a traditional polish service.
Closed-toe shoes can place direct pressure on freshly polished nails. Even when the lacquer feels dry to a gentle touch, the pressure and friction created by footwear may leave dents or disturb softer layers underneath.
Socks can create similar problems, especially when clients pull them tightly over their toes.
One of the simplest solutions is to discuss footwear before the appointment begins. Encourage clients selecting traditional lacquer to bring appropriate open-toe sandals that minimize contact with the nails.
Disposable pedicure slippers may be useful in some salon settings, but they should be evaluated for fit, stability, and the possibility of contacting the polished nails. Not every disposable slipper design provides adequate clearance.
Search for pedicure slippers and other practical finishing accessories that fit your salon's service style.
Most importantly, never promise that a specific number of minutes makes traditional lacquer universally safe for tight, closed-toe footwear. Product formulas and application conditions vary, and pressure resistance may take considerably longer to develop than surface dryness.
8. Quick-Dry Products Are Being Used Incorrectly
Quick-dry drops and sprays can be useful additions to a professional nail service, particularly when clients need assistance minimizing surface smudging during the early drying stage.
But they are not magic potions. Unfortunately, the beauty industry has not yet invented a product that can guarantee freshly painted toenails will survive an immediate encounter with hiking boots.
Different quick-dry products work through different formulations and mechanisms. Some help support surface drying, while others are designed to reduce friction or protect the finish during the initial drying period.
Technicians should follow the manufacturer's directions for application timing, quantity, and compatibility with the chosen lacquer and top coat.
Using more than recommended does not necessarily improve the result and may leave unwanted residue or affect the finished appearance.
Explore nail polish drying drops and nail drying products to compare professional options.
Remember that these products should complement proper application and realistic drying expectations rather than replace them.
9. Gel Pedicures Have a Completely Different Smudging Problem
Traditional nail lacquer and gel polish do not harden in the same way. Conventional lacquer relies primarily on solvent evaporation, while light-cured gel systems undergo a chemical curing reaction when exposed to compatible light energy.
When a correctly applied gel system is fully cured according to the manufacturer's instructions, it should not behave like freshly applied traditional lacquer.
If a gel pedicure smears, wrinkles, or remains unusually soft after the prescribed curing process, technicians should investigate rather than assuming the client simply moved too soon.
Potential causes include coats that are too thick, incompatible curing equipment, insufficient exposure, incorrect foot placement, product deterioration, or failure to follow the gel manufacturer's instructions.
A sticky inhibition layer is normal for certain gel products, but a coating that remains soft or mobile underneath is not the same thing as an intended tacky surface.
Do not attempt to disguise suspected under-cured gel by covering it with additional product. Follow the manufacturer's troubleshooting and removal directions, verify the lamp and gel compatibility, and correct the underlying issue before completing the service. Inadequately cured gel can increase the risk of exposure to uncured ingredients and subsequent sensitization.
Professional gel polish should always be paired with the curing equipment and procedures specified for that system.
10. The Drying Area Is Not Actually Helping
Some salons have beautiful pedicure stations but no practical plan for what happens during the final drying period.
Clients finish polishing and are immediately expected to stand up, collect their belongings, navigate nearby furniture, and make their way toward the reception desk. That is a lot of choreography for ten freshly painted toenails.
A better approach is to create a calm, organized finishing process. Make sure the client's belongings are accessible without reaching across the nails, keep walkways clear, and avoid rushing the transition from the chair.
Where appropriate, a professional nail drying device may support the finishing routine for compatible traditional lacquer systems. However, ordinary fans are not substitutes for the specified curing lamps required by gel products.
Even when using a drying device, maintain realistic expectations about the difference between surface dryness and resistance to pressure.
Consider whether the salon has enough space for clients to remain comfortably seated during the initial drying stage without disrupting the next appointment.
How to Create a Smudge-Resistant Professional Pedicure Routine
The easiest way to reduce immediate smudging is to address the entire service sequence instead of concentrating exclusively on the final top coat.
Step 1: Prepare the client before polishing. Confirm footwear, position belongings within easy reach, and explain the expected drying process for the selected nail system.
Step 2: Complete skin treatments before final nail preparation. Schedule scrubs, lotions, and massage portions so that the nail surface can be properly prepared immediately before polish application.
Step 3: Clean and prepare the nail plate. Remove residue and perform the preparation steps specified by the product manufacturer. Keep tools, brushes, and wipes organized to minimize unnecessary handling.
Step 4: Establish comfortable foot positioning. Adjust the footrest and place suitable toe separators before beginning color application.
Step 5: Apply controlled coats. Use compatible base coat, color, and top coat products according to the manufacturer's directions. Avoid excessive thickness and allow appropriate intervals between traditional lacquer layers.
Step 6: Finish with the correct drying or curing procedure. For traditional lacquer, use compatible finishing aids where appropriate and explain that deeper hardening takes additional time. For gel, follow the complete manufacturer-specified curing process with compatible equipment.
Step 7: Inspect before the client leaves the chair. Look for streaking, bubbles, dents, wrinkling, or disturbed edges. Address visible problems before transitioning to checkout.
Step 8: Guide the client through the exit. Help minimize contact with the nails when removing separators, lowering the footrest, and putting on appropriate footwear.
These steps can become part of a standard operating procedure that supports consistency across multiple technicians and locations.
What Should a Nail Technician Do When a Fresh Pedicure Smudges?
Even the most carefully organized pedicure service occasionally encounters an enthusiastic client movement or an unexpected brush against the footrest.
The best repair depends on the severity of the damage and the type of nail coating involved.
For a small defect in traditional lacquer, evaluate whether a limited correction is possible using products and techniques appropriate for the specific formula. Some minor marks may be correctable while the finish is still workable, but deeper dents or disturbed color layers generally require a more complete repair.
If the polish has visibly shifted, wrinkled, or developed a substantial impression, removing the affected coating and reapplying the necessary layers usually creates a more reliable result than repeatedly adding top coat.
Keep nail polish remover, suitable wipes, and essential nail brushes and tools available for efficient correction.
For gel, never treat a soft or improperly cured coating as an ordinary cosmetic smudge. Assess the curing problem and follow appropriate product-specific removal and reapplication procedures.
Most importantly, maintain a calm, professional attitude. The client already knows her nail looks like it tried to escape. She does not need a dramatic reenactment.
How to Choose Pedicure Supplies That Support Better Results
A smudge-resistant pedicure workflow depends on more than the polish bottle. Salon owners and nail technicians should evaluate the supplies, furnishings, and finishing products used throughout the appointment.
Start with reliable essentials from the Pedicure Supplies collection, including practical service accessories and professional foot-care products.
For color services, compare formulas within Professional Nail Care Collections and select base coats, colors, and finishing products that work together as intended.
Brands such as CND, Cuccio, and Gelish offer different professional nail care options worth evaluating according to service requirements and product instructions.
Do not overlook the equipment surrounding the treatment. Appropriate foot support, comfortable positioning, accessible tools, and dependable lighting can improve application control and reduce unnecessary movement.
Salon owners may also want to review their inventory of toe separators, disposable finishing accessories, lint-free wipes, appropriate nail prep products, and cleaning supplies.
Pure Spa Direct supplies professional spas and salons with products from a variety of manufacturers, making it easier to compare options for different service styles. As a distributor rather than a manufacturer, Pure Spa Direct provides access to professional supply selections while the individual product manufacturers establish their specific application, drying, and curing instructions.
How to Explain Pedicure Drying Time Without Making Clients Nervous
Client education works best when it is friendly, practical, and easy to understand.
Instead of issuing a long list of warnings after the final coat, introduce the topic naturally before applying color.
For example, a technician might explain that traditional polish begins drying at the surface first and can remain vulnerable to dents from shoes or pressure even after it looks finished. A quick reminder to keep feet separated and avoid tight footwear helps set realistic expectations.
For clients with busy schedules, discuss the difference between traditional polish and properly cured gel services during the consultation. This gives them an opportunity to select a service suited to their needs, nail condition, and available time.
Never describe gel as completely risk-free or promise that traditional polish will be fully hardened after a universal drying interval. Clear explanations build confidence precisely because they reflect how the products actually work.
A little communication can prevent a lot of last-minute polishing emergencies.
Frequently Asked Questions About Pedicure Smudging
Why does my client's toenail polish smudge even when it feels dry?
Traditional nail lacquer can become dry to the touch before its underlying layers have hardened enough to resist pressure. Thick coats, insufficient drying time, and contact with footwear or salon equipment can all contribute to smudging.
Will a quick-dry top coat completely prevent pedicure smudges?
No. A compatible quick-dry top coat may improve the early drying experience, but it cannot guarantee immediate resistance to pressure. The underlying color layers, application thickness, and product formulation still matter.
Should clients wear flip-flops after a traditional pedicure?
Appropriate open-toe footwear is generally preferable to tight closed-toe shoes because it reduces contact with freshly polished nails. Footwear should fit securely, allow safe walking, and avoid rubbing against the nail surface.
Can nail technicians use a fan to dry gel polish?
No. Gel polish requires a compatible curing system that delivers the light energy specified by its manufacturer. A conventional fan does not initiate the chemical curing reaction required for light-cured gel products.
Why does gel polish wrinkle or smear after being placed under a lamp?
Possible causes include excessive product thickness, an incompatible or poorly functioning curing lamp, insufficient light exposure, or incorrect curing technique. Technicians should investigate suspected under-curing rather than applying additional finishing product over the problem.
Are toe separators necessary for every pedicure?
Not necessarily. Their usefulness depends on the client's toe positioning, comfort, selected nail system, and service technique. They are particularly helpful when adjacent toes are likely to contact freshly applied traditional lacquer.
How can a busy salon reduce pedicure touch-ups?
Standardize nail preparation, control application thickness, organize tools and belongings before polishing, provide clear drying instructions, and establish a consistent final inspection. Tracking recurring smudge problems can reveal where workflow improvements are needed.
The Real Secret to a Perfect Pedicure Finish
A beautiful pedicure should remain beautiful for more than the three seconds between the final brushstroke and the client's next movement. Preventing immediate smudges starts with understanding how different nail products dry or cure, applying them correctly, and creating a comfortable finishing process that protects the fresh result.
Thin, even coats, properly prepared nails, suitable top coats, comfortable toe separation, stable chair positioning, and realistic client instructions can all help reduce unnecessary corrections.
For salon owners, these improvements are about more than avoiding a few damaged toenails. They support efficient appointments, more consistent services, reduced product waste, and a professional experience clients can appreciate.
With thoughtful techniques and the right professional pedicure supplies, nail technicians can spend less time repairing polish and more time delivering beautiful results.
Because the only thing your client should be leaving in the pedicure chair is her stress, not half of her freshly painted big toenail.
