
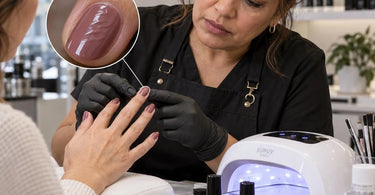
Pros choose this for stunning results... but stunning results can quickly turn into a manicure mystery when perfectly smooth professional gel polish emerges from the curing lamp looking like a tiny, freshly made raisin. The lamp turned on, the timer finished, and everything appeared perfectly normal. Yet somehow, that beautiful color developed wrinkles, ripples, or a strange crinkled texture that nobody ordered. Before accusing the lamp of secretly plotting against your manicure schedule, it helps to understand that gel polish curing involves much more than simply putting painted nails under a glowing light.
For professional nail technicians, wrinkling is especially frustrating because it can happen even when the lamp appears to be working correctly. The problem might involve application thickness, pigment concentration, curing chemistry, hand positioning, or a mismatch between the gel formula and the curing equipment. Sometimes several small issues combine to produce one very noticeable manicure disaster.
The good news? Understanding the science behind gel polish wrinkles makes troubleshooting much easier. Whether you are managing a busy nail salon, training new technicians, or refining your gel manicure services, learning to recognize the causes can help you produce smoother finishes, reduce unnecessary rework, and protect your clients from improperly cured products.
What Actually Causes Gel Polish to Wrinkle During Curing?
Gel polish does not dry through ordinary evaporation like traditional nail lacquer. Instead, it undergoes a chemical process called photopolymerization. Specialized ingredients called photoinitiators absorb suitable ultraviolet light and initiate reactions that transform the liquid gel into a hardened polymer network.
For this process to work properly, the gel must receive sufficient light at wavelengths appropriate for its particular formulation. The light also needs to penetrate the applied layer effectively enough to achieve the required degree of curing throughout the product.
Wrinkling often occurs when the surface and underlying material cure unevenly. The upper portion may develop structure while deeper material remains insufficiently cured. As the gel contracts and changes during polymerization, the surface can buckle or form visible ripples.
Think of it as a beautifully ironed tablecloth sitting over a pile of laundry. The surface might initially look smooth, but what is happening underneath eventually becomes everybody's problem.
Importantly, a wrinkled gel coating is not merely a cosmetic inconvenience. It can indicate incomplete polymerization, meaning the product may contain more residual reactive ingredients than intended. Proper troubleshooting should therefore focus on correcting the curing problem rather than simply hiding the wrinkles beneath another coat.
1. Your Gel Polish Layers Are Thicker Than You Think
One of the most common causes of gel polish wrinkling is excessive product thickness. This is particularly easy to encounter with highly pigmented colors, self-leveling formulas, and products that provide substantial coverage with very little effort.
A generous brushful might seem efficient, especially when a salon appointment is running behind schedule. Unfortunately, applying more gel does not necessarily produce better coverage or faster service.
As the coating becomes thicker, light has a harder time reaching the deeper portions. Pigments and other ingredients can absorb or scatter incoming light, leaving the bottom of the coating with less effective curing energy than the surface receives.
The result may be a wrinkled exterior, soft material beneath the surface, or an uneven finish that becomes apparent immediately after curing.
Professional fix: Remove the affected product according to the manufacturer's instructions and reapply the color in thin, controlled coats. Wipe excess gel from the brush before approaching the nail. Allow the brush to glide rather than pressing a large bead of product across the nail plate.
Two or three appropriately thin layers may produce more consistent results than one heavy application. Follow the specific product instructions because required thickness and coating procedures vary among gel systems.
High-quality nail brushes and tools can help technicians control product placement, particularly around sidewalls and cuticles.
2. Dark and Highly Pigmented Gel Colors Can Be More Difficult to Cure
Ever notice that a pale pink shade cures beautifully while a dramatic black or deep burgundy suddenly develops the texture of crumpled tissue paper?
Highly pigmented formulas can present greater curing challenges because pigment particles interact with the light required for polymerization. Depending on the formulation, those pigments may reduce how much usable light penetrates the entire coating.
This can become especially noticeable with black, navy, deep red, dark purple, dense white, and certain heavily pigmented specialty gels.
Dense white products deserve particular attention because their pigments can scatter light significantly. Dark products may absorb substantial amounts of light. Both effects can interfere with effective curing when application thickness or lamp compatibility is not appropriate.
Professional fix: Follow the color manufacturer's application and curing instructions, paying particular attention to recommended coat thickness. Keep dense pigments evenly distributed using only the mixing or rolling method permitted by the manufacturer.
Do not assume that a shade needs a thicker coat simply because it appears streaky at first. Build coverage gradually with the number of thin coats permitted for the product.
When evaluating professional gel polish colors, consider coverage, viscosity, recommended curing equipment, and application requirements rather than judging performance by pigmentation alone.
3. The Lamp Turns On, but That Does Not Prove It Is Compatible
Here is the biggest surprise for many nail professionals: a curing lamp can appear to work perfectly while delivering unsuitable curing conditions for a particular gel.
The lights illuminate. The timer counts down. The client can see the familiar glow. Everything seems fine.
However, successful gel curing depends on more than whether the equipment produces visible light.
Gel formulations contain photoinitiators that respond to particular ultraviolet wavelengths. Some formulations are designed to respond effectively to light around 365 nanometers, while others are optimized for wavelengths closer to 395 to 405 nanometers or a combination of wavelengths.
A lamp that produces insufficient output within the wavelengths required by the gel may leave the product inadequately cured, even when the lamp is functioning as designed.
This is why a lamp advertised as powerful or universal is not automatically appropriate for every gel product.
Professional fix: Check the gel manufacturer's approved curing lamp recommendations. Confirm the required wavelengths, compatible lamp models or specifications, and curing procedure.
Whenever possible, use a curing system validated by the gel manufacturer. If the product and lamp manufacturers cannot confirm compatibility, do not assume that adding more curing time will compensate for the mismatch.
Professional salon equipment should be selected according to documented performance and compatibility rather than wattage claims alone.
4. Lamp Wattage Is Not the Same as Effective Curing Performance
A high-wattage label can look impressive, but wattage alone does not tell a technician whether a lamp delivers the correct ultraviolet exposure to every nail.
Electrical wattage describes power consumption or a rated electrical characteristic, depending on how the manufacturer specifies it. It is not a direct measurement of the useful curing light received by the gel.
Other important factors include wavelength distribution, irradiance at the nail surface, light placement, optical design, and the exposure delivered during the recommended curing cycle.
Two lamps advertising similar wattage may perform differently with the same gel formula.
Even a lamp designed for professional use can develop problems through damaged components, electrical issues, contamination, or deterioration over time.
Professional fix: Use the lamp manufacturer's inspection and maintenance procedures. Verify that the correct power supply is connected and that the lamp operates normally throughout its curing cycle.
Inspect the interior for product buildup, obvious damage, malfunctioning light sources, or other conditions identified in the equipment manual.
If the manufacturer's service guidance indicates that performance is compromised, repair or replace the equipment as directed rather than experimenting on clients.
5. Hand Positioning Can Create Uneven Curing
Sometimes the gel and lamp are entirely compatible, but the client's hand placement creates an avoidable curing problem.
Proper curing requires each coated nail to receive the intended light exposure. Nails positioned outside the effective illumination area may receive less energy than nails centered correctly inside the lamp.
Thumbs can be especially tricky because they naturally sit at a different angle from the other fingers. A client who rests her hand awkwardly may inadvertently position the thumbnail too far from the intended curing area.
Long nails, pronounced nail curvature, and certain extensions can introduce additional positioning challenges.
Professional fix: Demonstrate proper hand placement before curing. Ask clients to keep their fingers positioned according to the lamp manufacturer's instructions rather than lifting, curling, or shifting them during exposure.
If the curing system requires the thumbs to be cured separately, build that step into your service routine.
Check whether the lamp is designed for the length and shape of nails being serviced. Do not improvise curing angles or extra exposure cycles without confirming the approved method.
A few seconds spent positioning a hand correctly can save significantly more time than having to remove and redo a wrinkled manicure.
6. Applying Gel Over an Improperly Prepared Surface
Although wrinkling most directly points toward curing behavior, improper preparation can create additional appearance and adhesion problems that complicate diagnosis.
Residual oil, moisture, dust, lotion, or incompatible products can interfere with how gel spreads and adheres to the nail surface.
An uneven underlying layer can also affect the appearance of subsequent color coats. Product pooling around the cuticle or sidewalls may create localized areas that are thicker than intended.
In some cases, what looks like wrinkling may actually be lifting, separation, brush marks, or an irregular base layer becoming more visible after curing.
Professional fix: Follow the gel system's complete preparation sequence, including cuticle work, cleaning, surface preparation, and application of compatible base products.
Use appropriate manicure essentials and nail files and buffers without unnecessarily thinning or damaging the natural nail.
Keep application products off surrounding skin and follow the manufacturer's requirements for preparing each layer.
Good preparation does not compensate for an incompatible curing lamp, but it helps eliminate other variables that can make troubleshooting more difficult.
7. Mixing Gel Systems Can Introduce Compatibility Problems
Every nail professional has experienced the temptation to combine a favorite base coat, an amazing color from another line, and that top coat that produces an almost suspiciously perfect shine.
The trouble is that gel systems are formulated with particular curing characteristics, adhesion properties, and product interactions in mind.
Products from different manufacturers may use different photoinitiator packages, viscosity modifiers, and recommended curing procedures.
Combining formulas does not automatically guarantee failure, but it can introduce variables that have not been validated by the manufacturers.
When wrinkles repeatedly appear after switching products, especially when the previous combination performed consistently, system compatibility deserves investigation.
Professional fix: Use complete, manufacturer-approved systems whenever possible. Confirm that the base coat, color, top coat, and curing lamp are appropriate for the intended service.
Brands available through professional distributors, including CND, OPI, and Gelish, have their own product specifications and curing instructions. Check the requirements for the specific product rather than assuming all formulas within a brand or across brands behave identically.
8. Product Age, Storage, and Contamination Can Affect Application
Gel polish is formulated to remain stable under specified storage conditions. Excessive heat, direct sunlight, unintended ultraviolet exposure, contamination, and improper handling can change how a product behaves.
For example, leaving an open bottle near an active curing lamp or a bright window may expose the gel to light that initiates unwanted changes.
A product that becomes unusually thick, stringy, grainy, or difficult to level may no longer behave as expected during application.
Not every change in viscosity means the gel has become unusable, since temperature and formulation also influence consistency. However, unexpected changes should prompt a review of storage conditions and the manufacturer's guidance.
Professional fix: Store gel products in accordance with the manufacturer's instructions. Keep containers closed when not in use, avoid unnecessary light exposure, and use clean application tools.
Check product dating and manufacturer guidance when evaluating older inventory. Do not attempt to restore questionable gel by adding unapproved solvents, mixing unrelated products, or heating containers without explicit manufacturer instructions.
Organized storage at professional nail tables and manicure stations can make proper product handling easier during busy appointments.
How to Tell the Difference Between Wrinkled Gel and a Normal Sticky Layer
One common source of confusion is the tacky surface that some properly cured gel products intentionally retain.
This is often called the inhibition layer. Oxygen at the surface can interfere with part of the polymerization reaction, leaving a thin, sticky residue even when the product has otherwise cured according to its specifications.
A normal inhibition layer does not automatically indicate defective curing.
Wrinkling, however, involves visible physical distortion of the coating. You may notice ridges, folds, ripples, or areas where the surface appears to have buckled.
Other concerning signs can include unusually soft material, persistent deformation, or product movement inconsistent with the manufacturer's description of a properly cured coating.
Do not attempt to determine curing completeness simply by pressing the gel with a finger or wiping the surface. Those methods cannot reliably establish the degree of polymerization and may expose skin to uncured ingredients.
Instead, follow the manufacturer's curing specifications and investigate any abnormal result before continuing the service.
What to Do When Gel Polish Has Already Wrinkled
Discovering wrinkles after curing is disappointing, particularly when your appointment book is already packed. However, covering the problem with another layer is not a safe or reliable solution.
If the coating has wrinkled because of incomplete curing, applying additional gel or top coat can trap improperly polymerized material beneath the surface.
That can compromise the manicure and increase the possibility of unwanted skin exposure to residual reactive ingredients.
Use this professional recovery procedure:
- Stop the application. Do not apply additional gel over visibly wrinkled or potentially undercured material.
- Avoid direct skin contact. Follow appropriate product-handling precautions and use suitable protective measures as directed by the manufacturer.
- Remove the affected product safely. Follow the manufacturer's removal process, taking care not to aggressively scrape or damage the natural nail.
- Identify the likely cause. Review product thickness, pigment concentration, curing instructions, lamp compatibility, and hand position.
- Correct the underlying issue. Use approved application thickness, a compatible curing system, and properly functioning equipment.
- Reapply only when proper curing can be established. If the cause cannot be resolved, postpone the gel application or choose another appropriate service rather than risking continued exposure.
Helpful professional supplies may include gel polish remover, lint-free nail wipes, and appropriate nail preparation products.
Never peel or force gel from the natural nail to save a few minutes. Corrective work should protect nail integrity as well as the final appearance.
Why Adding More Curing Time Is Not Always the Answer
It is easy to assume that an extra minute under the lamp will solve every curing problem. Unfortunately, curing chemistry is not quite that cooperative.
When the lamp emits insufficient light at the wavelengths required by the formula, more exposure time may not produce the intended result.
Similarly, excessive product thickness and dense pigmentation can restrict light penetration in ways that additional time does not reliably correct.
Unapproved curing adjustments may also increase ultraviolet exposure or heat without establishing whether the product has cured adequately.
The goal is not simply to leave the client's hand under the lamp longer. The goal is to deliver the validated curing conditions required by the gel manufacturer.
Professional rule: Follow the specified curing schedule. If a product repeatedly wrinkles under those conditions, investigate compatibility and application rather than inventing a new curing routine.
Could Wrinkled Gel Polish Increase the Risk of Allergic Reactions?
This is one reason professional technicians should take curing problems seriously.
Gel nail products may contain reactive acrylate or methacrylate ingredients. Repeated skin exposure to certain uncured ingredients can contribute to allergic contact dermatitis or sensitization in susceptible individuals.
Insufficient polymerization can leave more reactive material in the coating than intended, making proper curing an important part of safe professional application.
Technicians should minimize skin contact with uncured gel, follow safety documentation, and avoid handling improperly cured product without suitable precautions.
Clients experiencing itching, redness, swelling, blistering, or persistent irritation around the nails should not receive additional gel applications until the issue has been appropriately evaluated. Refer them to a qualified healthcare professional when an allergic reaction is suspected.
Remember, a product described as HEMA-free is not necessarily free from all potential sensitizers. Ingredient selection, exposure prevention, and correct curing remain important across gel systems.
A Practical Gel Polish Wrinkling Troubleshooting Checklist
When a client asks why her beautiful new manicure resembles a miniature mountain range, a consistent troubleshooting process is much more useful than blaming the lamp immediately.
Start by asking these questions:
- Is the gel coat too thick? Check whether product accumulated in the center, along the sidewalls, or near the cuticle.
- Is the color heavily pigmented? Review the manufacturer's recommendations for dense or specialty shades.
- Is the curing lamp approved for the gel? Confirm the necessary wavelengths and curing specifications.
- Is the lamp functioning correctly? Inspect the equipment and follow its maintenance guidance.
- Were the nails positioned properly? Pay particular attention to thumbs and nails near the lamp's edges.
- Were compatible products used? Review the base, color, and top coat combination.
- Was the product stored correctly? Look for abnormal viscosity, contamination, or signs of unintended light exposure.
- Was the specified curing procedure followed? Confirm each coat received the exposure required by the manufacturer.
Documenting recurring issues can help a salon identify patterns. If problems occur only with one shade, review that shade's formulation and application requirements. If multiple established products begin failing at once, inspect the curing equipment and service procedures.
Do not use clients as test subjects for uncertain curing combinations. Product compatibility testing should follow manufacturer guidance and appropriate professional procedures.
How Nail Salons Can Prevent Gel Wrinkling Before It Happens
Preventing wrinkling starts long before the client places her hand inside the curing lamp.
Professional salons benefit from standardized application procedures, compatible product systems, routine equipment inspections, and staff training.
Keep manufacturer instructions accessible at manicure stations. Train technicians to apply controlled layers, recognize unusual product behavior, and verify curing requirements before introducing unfamiliar formulas.
Maintaining a consistent inventory of professional nail care products can also simplify training and troubleshooting. When everyone understands the products being used, there are fewer surprises during appointments.
Consider maintaining a simple service reference that records each gel system, approved lamp, recommended curing procedure, and any special application notes for heavily pigmented colors.
Inspect equipment according to manufacturer recommendations and remove damaged or unreliable devices from service.
Professional organization does not need to be complicated. A well-maintained workstation, clearly identified products, and consistent procedures can make a meaningful difference in service quality.
Choosing Professional Gel Polish and Nail Supplies for Reliable Services
For salon owners and professional nail technicians, purchasing decisions should consider more than the latest trending color or the prettiest bottle on the shelf.
Evaluate gel products based on application requirements, documented curing compatibility, consistency, removal procedures, manufacturer education, and suitability for your existing service menu.
Pure Spa Direct supplies professional beauty businesses with access to nail care products, equipment, and everyday salon essentials. As a distributor rather than a gel polish manufacturer, Pure Spa Direct offers products from multiple brands, allowing professionals to explore options while following each manufacturer's specific instructions.
Whether you are restocking gel polish, researching UV/LED nail lamps, replacing nail application tools, or adding finishing touches such as cuticle oil, choosing appropriate professional supplies helps support consistent salon services.
Remember that accessories such as nail art products can introduce their own curing considerations. When using nail art supplies, verify that any decorative material, pigment, or added layer is compatible with the manufacturer's approved application process.
Frequently Asked Questions About Gel Polish Wrinkling
Why does my gel polish wrinkle even after a full curing cycle?
A completed timer does not guarantee successful polymerization. Thick layers, heavy pigmentation, inadequate light exposure, incorrect positioning, or lamp incompatibility may prevent the gel from curing properly. Check the manufacturer's instructions and correct the underlying cause before reapplying.
Can gel polish wrinkle even with a brand-new LED lamp?
Yes. A new lamp can function correctly yet still be unsuitable for a particular gel formula. Confirm approved compatibility rather than assuming new equipment automatically cures every product.
Why does black gel polish wrinkle more than lighter colors?
Highly pigmented black gel can absorb a substantial amount of incoming light. If the layer is too thick or the curing system is unsuitable, the material underneath may not receive sufficient effective exposure. Apply according to the product's thickness and curing instructions.
Can I fix wrinkled gel polish by applying top coat?
No. Top coat may disguise some surface irregularities, but it cannot establish that an underlying layer has cured correctly. Remove visibly wrinkled or potentially undercured material according to the manufacturer's instructions and resolve the original issue.
Does a sticky layer mean my gel polish is undercured?
Not necessarily. Some gel products develop an expected oxygen inhibition layer. However, unusual softness, visible wrinkling, or deformation may indicate an application or curing problem. Follow the specific manufacturer's guidance rather than relying on touch alone.
Can curing gel polish for longer prevent wrinkles?
Not reliably. Longer exposure cannot be assumed to correct incompatible wavelengths, inadequate light penetration, or excessively thick application. Use the manufacturer's validated curing procedure instead.
Should nail technicians replace the lamp whenever gel polish wrinkles?
No. First investigate coat thickness, product compatibility, pigmentation, positioning, and the required curing procedure. Replace or service the lamp when inspection or manufacturer guidance identifies an equipment problem.
The Bottom Line: Smooth Gel Manicures Start With Understanding the Cure
Gel polish wrinkling after curing can make even an experienced nail technician question everything from brush technique to the laws of physics. Fortunately, the problem usually becomes easier to investigate when you focus on the relationship between gel thickness, pigmentation, curing chemistry, equipment compatibility, and light exposure.
A lamp that lights up is not necessarily delivering the correct curing conditions. A beautifully pigmented polish is not necessarily suited to thick application. And an extra curing cycle is not a substitute for following the manufacturer's instructions.
The most reliable approach is to use compatible professional systems, apply product at the recommended thickness, position nails correctly, maintain equipment, and remove improperly cured material rather than trying to cover it up.
For nail salons looking to deliver beautiful, consistent services, the right products and a little technical know-how make an excellent combination. Explore the professional nail care options available through Pure Spa Direct, keep those application layers under control, and save the wrinkles for the laundry basket. Your clients came for glossy nails, not accidental abstract art.
