
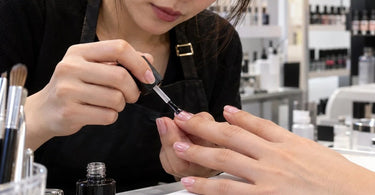
Elevate every service with a finishing routine that treats dust and lint like the tiny manicure villains they truly are. A beautiful glossy top coat can make color look richer, nail art look sharper, and a professional manicure look wonderfully finished, but that mirrorlike shine also has a talent for putting every stray fiber, filing speck, and fuzzy little intruder under a spotlight. For nail professionals, the difference between "gorgeous" and "why is there a sweater fiber living in that thumbnail?" often comes down to what happens during the final few minutes of the service, which is why keeping the station stocked with lint-free wipes, clean tools, and dependable finishing products matters so much.
Glossy finishes are visually unforgiving because smooth, reflective surfaces emphasize changes in texture. A speck of filing dust that might disappear visually against an unfinished or softly textured surface can become surprisingly noticeable once it is sealed beneath a high-shine layer. Lint can be even more dramatic. One tiny fiber trapped beneath clear top coat can create a bump, line, shadow, or interruption in the reflection that suddenly becomes the only thing anyone can see.
For busy nail professionals, the goal is not to become paranoid about every molecule floating through the salon. The goal is to build a clean, repeatable finishing routine that reduces contamination before the top coat ever touches the nail.
Gloss Turns Tiny Imperfections Into Main Characters
High-gloss top coat creates a smooth reflective surface, and smooth reflective surfaces love consistency. When that surface is interrupted by a particle, fiber, bubble, ridge, or uneven area, reflected light changes around the imperfection. That difference can make something microscopic look much larger than it actually is.
This is particularly noticeable over dark shades, sheer neutrals, chrome effects, detailed nail art, and very smooth solid colors. A piece of pale lint trapped over black gel polish can practically wave hello. Dark filing dust on a sheer pink manicure is not exactly shy either.
That is one reason a technically successful manicure can still look less polished after the final coat. The color may be even, the shape may be beautiful, and the cuticle area may be crisp, yet one speck beneath the glossy surface can interrupt the entire visual effect.
The Final Clean Is More Important Than It Looks
Filing and buffing naturally create fine dust, and that dust has an impressive ability to relocate itself. It can settle on nails, gloves, brushes, sleeves, towels, manicure tables, containers, and nearby surfaces. A quick glance at the nail is not always enough because extremely fine particles can blend into the color layer until top coat magnifies their presence.
Before applying the finishing layer, inspect each nail carefully and follow the cleansing procedure appropriate for the system being used. Professional Professional Cotton, Sponges, and Wipes for Salons & Spas can help nail technicians keep suitable disposable supplies readily available, while purpose-designed low-lint options are especially useful when working immediately before a glossy finish.
Regular cotton products can release visible fibers, so grabbing whatever happens to be nearby is not always the best choice for precision gel work. There is nothing quite like removing one speck of dust and replacing it with three fluffy cotton fibers. That is not cleaning. That is a tiny textile exchange program.
Keep Filing Dust Away From the Finishing Zone
A manicure station frequently serves multiple purposes during one appointment. It is the filing station, shaping station, prep area, polish area, art table, finishing station, and occasionally the place where someone's phone decides it absolutely must be checked right now.
Creating a simple workflow helps prevent earlier service debris from following the manicure into the finishing stage. After shaping or refining enhancements, clear away visible filing debris before opening or applying finishing products. Clean the immediate work surface according to salon procedures, manage dust before proceeding, and avoid resting freshly cleaned nails on dusty towels or surfaces.
A well-organized Nail Table or Manicure Station can make this easier because tools and disposables can have designated locations rather than joining a countertop free-for-all. Keeping clean finishing supplies separated from used files, dusty implements, and debris reduces unnecessary opportunities for contamination.
Watch Brushes, Bottles, and Bottle Necks
Sometimes the nail itself is perfectly clean and the unwanted particle arrives with the top coat brush. Inspect professional finishing products periodically for visible debris and keep bottle necks tidy according to the manufacturer's handling instructions.
A brush should not be wiped on a towel, tissue, clothing, or another potentially lint-producing surface between nails. If contamination gets introduced into the bottle, the problem can potentially follow the technician into future services. Nobody ordered the limited-edition Dust Confetti Top Coat.
Keeping products upright, closed when not in use, and away from active filing areas is a simple habit that can make the finishing workflow more controlled. Nail professionals can browse top coat options along with broader Manicure Essentials to maintain a workstation suited to their preferred service system.
Clean Tools Matter During Detail Work Too
Dust and fibers are not limited to basic manicures. Detailed designs can involve several brushes, implements, palettes, embellishments, and intermediate steps, each creating another opportunity for something unwanted to land on the nail.
Professionals offering advanced designs may benefit from keeping their Nail Brushes & Tools organized and protected between uses. The same principle applies to Nail Art Supplies: orderly storage helps technicians find what they need without rummaging around the station after the nail surface has already been prepared for finishing.
When rhinestones, foils, glitter, stamping, or other decorative elements are involved, inspect around embellishments carefully before sealing. A stray fiber can hide beside a decorative element and become much more obvious after the glossy layer flows around it.
Lighting Can Catch Trouble Before Top Coat Does
Good task lighting is not merely convenient. It can help technicians spot particles, uneven edges, missed color, and surface irregularities before those issues are preserved under the final coat.
Rotate the client's finger slightly and inspect the nail from more than one angle. Side lighting can reveal texture that is difficult to see when looking straight down. A bright LED Bright Lamp or suitable professional task light can make that quick inspection substantially easier.
This step takes seconds and can save considerably more time than discovering debris after curing and having to correct the finish. Think of it as the manicure equivalent of checking your teeth before leaving the house. Quick inspection, potentially heroic consequences.
Apply Top Coat Without Chasing Every Speck Mid-Stroke
Once a clean nail is ready, controlled application matters. Apply the chosen top coat according to the product manufacturer's directions, including recommended layer thickness and curing requirements for gel systems.
If you notice visible debris before curing, stop and address it appropriately rather than hoping the shine will somehow camouflage it. Gloss is many wonderful things. Camouflage is not one of them.
Avoid excessive brushing in an attempt to force an uneven top coat into submission. Overworking product can introduce its own application issues. A well-loaded brush, deliberate strokes, correct product quantity, and appropriate curing practices generally make the service more predictable.
Professionals working across traditional lacquer and gel services can explore both Premium Nail Polish and Professional Gel Polish according to the systems and services offered in their salons.
Do Not Forget the Client's Hands
Even after the nail surface is spotless, the client can unintentionally reintroduce lint or oils by touching clothing, hair, a handbag, a phone, or another surface before the service is complete. A freshly prepared nail plate and a fuzzy sweater sleeve are not ideal networking partners.
Clear communication helps. Let clients know when you need them to keep their hands positioned at the station or avoid touching surrounding objects for a moment. This is especially useful during services with multiple finishing steps.
The technician's own clothing and workstation textiles deserve attention as well. Loose fibers from towels, sleeves, or other materials near the active service area can become airborne or transfer through contact. Keep the immediate finishing area as controlled as reasonably possible.
Choose Salon Supplies With the Entire Workflow in Mind
Preventing lint and dust is not about one magical product. It is a workflow involving prep supplies, files, buffers, wipes, tools, lighting, organization, and finishing products working together.
Keeping frequently used professional supplies within reach can reduce unnecessary movement during the service. The Professional Nail Care Collections category can help salons organize purchasing around the nail services they actually perform, while Nail Files & Buffers support the shaping and surface-preparation stages that come before the final cleanup.
For salons managing multiple technicians, standardizing station setup can also improve consistency. Decide where clean wipes are stored, where used disposables go, how filing debris is cleared, and which supplies should be replaced or replenished between clients. A routine makes it less likely that the last stage of the manicure becomes an improvised scavenger hunt.
What If You Spot Lint After the Finish?
The appropriate correction depends on the nail system, where the contamination is located, and whether the product has already been cured or dried. Follow the manufacturer's directions for the specific products in use rather than attempting to pick, peel, or dig through a finished enhancement.
If a visible particle has been permanently sealed into a cured layer, correcting the affected finish may require properly refining and reapplying product. It is inconvenient, but a careful correction is preferable to sending a client out with an obvious fiber preserved beneath the shine like a prehistoric mosquito in amber.
More importantly, repeated contamination is a workflow clue. If lint appears frequently, look at the materials being used during cleansing. If filing dust keeps showing up, examine how thoroughly the workstation is being cleared between shaping and finishing. If debris seems to originate from product brushes, review product handling and storage practices.
A Tiny Detail With a Big Professional Payoff
Glossy top coat does not create dust and lint. It simply exposes them with the enthusiasm of extremely unforgiving lighting. That can actually be useful because it encourages a level of finishing discipline that supports consistently polished professional services.
A clean station, suitable low-lint disposables, thoughtful dust control, good task lighting, organized Nail Salon Furniture Essentials, and a final visual inspection can make the difference between an ordinary shine and that smooth, glassy finish clients immediately notice.
Pure Spa Direct distributes professional nail, salon, spa, and beauty supplies for working professionals, making it easier to build a service setup around the products and tools your team uses every day. Because when the final top coat goes on, the goal is simple: let the shine get all the attention and leave the lint out of the appointment entirely.
