
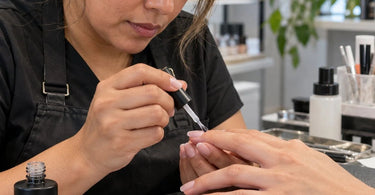
Work better, live easier... and stop letting matte top coat expose every tiny mistake in your manicure! A beautiful matte finish can transform an ordinary nail color into something sophisticated, velvety, and seriously Instagram-worthy. But here is the catch: matte top coat has a remarkable talent for revealing bumps, scratches, uneven layers, and little application mistakes that seemed completely invisible under a glossy finish. For professional nail technicians, understanding why matte top coat makes surface imperfections easier to see is the secret to delivering consistently beautiful results without turning every appointment into an unexpected troubleshooting adventure.
Matte nails are popular for everything from minimalist nude manicures to dramatic black nail designs. They offer a soft, contemporary appearance that feels different from traditional glossy polish. However, achieving that smooth velvet effect requires more attention to surface preparation, product application, and finishing technique than many nail professionals initially expect.
The good news? Matte top coat is not deliberately trying to embarrass your manicure skills. Its appearance comes down to how light interacts with the nail surface. Once you understand that relationship, you can make smarter product choices, refine your application process, and avoid the most common problems before your client notices them.
Why Does Matte Top Coat Reveal Imperfections More Easily?
The difference between glossy and matte nail finishes begins with light reflection.
A glossy top coat creates a relatively smooth surface that reflects light in a more organized, mirror-like pattern. Those bright reflections can visually distract from minor variations in the underlying polish. A sufficiently leveling glossy coating may also soften the appearance of shallow texture.
Matte top coat behaves differently. Specialized matting ingredients create microscopic surface irregularities that scatter incoming light in multiple directions instead of producing a strong, continuous reflection. This scattered light creates the familiar soft, non-shiny appearance.
Because there is no strong glossy highlight to distract the eye, differences in surface texture and application can become more noticeable. A small ridge may create a subtle change in shading. A scratch may interrupt the uniform finish. An uneven layer of color may appear as a visible patch rather than disappearing into a shiny reflection.
Think of matte top coat as the nail world's equivalent of putting on your glasses and suddenly noticing every speck of dust on the bathroom mirror. The imperfections may have been there all along. The finish simply changes how easily you see them.
One important distinction: matte top coat does not always magnify every imperfection. Certain scratches or uneven areas can actually become less obvious when reflective glare disappears. The final appearance depends on the depth of the defect, the color underneath, the formulation, and the lighting. However, matte finishes are particularly unforgiving when the goal is a perfectly uniform, velvety surface.
The Most Common Nail Imperfections That Show Through Matte Top Coat
Professional nail technicians often encounter several specific issues when switching a manicure from glossy to matte.
1. Natural Nail Ridges
Longitudinal ridges and other natural variations in the nail plate can influence the appearance of the finished manicure. If the base coat and color layers do not adequately level those variations, matte top coat may leave them more noticeable.
A suitable ridge-filling base coat can help create a more uniform foundation for compatible traditional polish systems. It is generally preferable to compensate with an appropriate coating rather than aggressively buffing away natural nail thickness.
2. Filing and Buffing Scratches
Surface scratches are particularly frustrating because they may look insignificant until the final coat is applied.
Uneven refinement of acrylic, builder gel, or other enhancements can leave directional scratch marks. Under matte top coat, those marks may become visible as lines or changes in texture.
Using the appropriate progression of Nail Files & Buffers helps create a consistent surface before the finishing product is applied. Choose abrasives according to the nail material and manufacturer's recommendations. A grit suitable for refining an enhancement is not automatically appropriate for a natural nail.
3. Uneven Gel Polish Application
Color application matters just as much as surface preparation.
If one side of the nail has a thicker color layer, the final shape may look unbalanced. Brush marks, uneven pigment distribution, and poorly leveled edges can also become more apparent once the glossy reflection disappears.
With Professional Gel Polish, consistent product placement, controlled application, and proper curing help create a smooth base for the finishing coat.
4. Dust, Lint, and Tiny Debris
Nothing ruins a beautiful matte manicure faster than discovering a tiny piece of lint trapped beneath the final layer.
Dust particles can create raised spots that interrupt the smooth visual appearance. Even a small piece of debris may become noticeable against a solid matte color.
Thorough cleaning between appropriate preparation steps is essential. Use compatible nail cleansers, clean implements, and suitable lint-free materials. Keep loose filing dust away from open bottles and freshly coated nails.
5. Uneven Matte Top Coat Coverage
Sometimes the underlying manicure is perfectly smooth, but the matte product itself creates the problem.
Applying an excessively thin layer may produce uneven coverage, while applying too much can lead to pooling, thick edges, or inconsistent curing in compatible gel systems. Areas that receive different amounts of product may dry or cure with slightly different appearances.
The goal is a controlled, even layer applied according to the manufacturer's directions rather than simply adding more product and hoping for the best.
Why Matte Nails Can Look Patchy Even When the Surface Feels Smooth
One of the most confusing problems for nail technicians occurs when a manicure feels smooth to the touch but looks streaky or patchy.
The explanation is often a difference in the optical finish rather than a large physical bump.
Matte top coats depend on relatively uniform distribution of their matting ingredients. Inconsistent coating thickness, inadequate mixing when the manufacturer requires it, contamination, or incompatible underlying products can cause variations in the finished appearance.
Some areas may look soft and velvety, while others appear slightly shiny. The result can resemble cloudy patches, brush streaks, or uneven color saturation.
For professional nail technicians, the solution begins with identifying whether the problem comes from the product, the application, or the coating underneath.
Check that the matte top coat is compatible with the chosen polish system. Follow the manufacturer's instructions for product preparation and application. Avoid improvising with solvents or mixing products from different systems unless compatibility is established.
Most importantly, remember that a patchy matte appearance does not necessarily mean the nail surface needs additional filing. Sometimes the correct solution is a properly applied replacement finishing layer after addressing the cause.
How to Prepare Nails for a Smooth Matte Finish
A successful matte manicure begins before the matte top coat bottle is even opened.
Building a consistent preparation routine helps reduce the number of imperfections that reach the final stage.
Step 1: Evaluate the Natural Nail
Examine the nail plate for ridges, peeling, splitting, uneven edges, and other visible conditions.
Not every nail requires the same preparation. Thin, damaged, or compromised natural nails should not be aggressively buffed in pursuit of a perfectly flat surface. If the nail or surrounding skin shows signs of infection or another condition that makes service inappropriate, defer the service and recommend suitable professional evaluation.
For healthy nails, focus on gentle preparation consistent with the selected product system.
Step 2: Shape and Refine Carefully
Create the desired nail shape before applying color. Check the free edge, sidewalls, and overall symmetry.
For enhancements, use suitable professional abrasives to refine the structure without leaving obvious scratches or uneven transitions.
Explore Manicure Essentials and Nail Brushes & Tools to support a consistent professional preparation routine.
Step 3: Remove Dust and Residue
After appropriate surface refinement, remove filing dust and other debris thoroughly.
Pay attention to the sidewalls, cuticle area, and free edge, where particles can collect unnoticed.
Use products and cleaning procedures that are compatible with the nail coating system. Avoid touching the prepared nail surface unnecessarily after cleaning.
Step 4: Apply a Suitable Base Coat
Choose a base coat designed for the client's nail condition and the polish system being used.
A compatible leveling or ridge-filling base may improve the appearance of an uneven natural nail surface. However, products should be used only as intended, and excessive coating thickness should be avoided.
For gel services, follow the specific manufacturer's application and curing instructions.
Step 5: Build Smooth Color Layers
Apply color in controlled layers rather than one heavy coat.
Allow traditional lacquer to dry as directed between applications. For gel products, cure each layer using the compatible lamp, exposure time, and other parameters specified by the manufacturer.
Inspect the finish before applying matte top coat. If there is a noticeable lump, ridge, or uneven buildup, correct it using a procedure appropriate for that nail system instead of expecting the matte layer to conceal it.
Step 6: Apply Matte Top Coat Evenly
Load the brush with a controlled amount of product and distribute it evenly across the nail.
Use smooth strokes, maintain appropriate clearance from surrounding skin, and seal the free edge when instructed by the product manufacturer.
For gel matte top coats, use the specified compatible curing lamp and follow the complete curing procedure. For air-dry matte lacquers, allow adequate drying time and avoid premature contact with the surface.
Do not assume that a matte gel top coat and a traditional matte lacquer can be applied or cured interchangeably.
Does Nail Color Affect How Visible Imperfections Become?
Absolutely. The color underneath a matte top coat can influence how noticeable certain imperfections appear.
Dark shades such as black, navy, burgundy, and deep green create dramatic matte finishes. However, they can also make inconsistent texture, pale dust particles, and changes in surface sheen easier to notice.
Light shades introduce different challenges. Milky white, pale pink, beige, and pastel colors may reveal streaky application, uneven opacity, or small contaminants.
Highly pigmented colors require careful application regardless of their shade. Matte top coat changes the way those colors reflect light, so a color that looks rich and uniform under gloss may appear softer, slightly muted, or visually different once finished.
Before introducing a new matte combination into salon services, test it on a sample tip. This helps establish how the top coat behaves over the intended color and whether the combination creates the desired appearance.
Professionals can explore Premium Nail Polish and Longwear Nail Polish for different service options, while checking individual product compatibility.
Matte Top Coat vs. Glossy Top Coat: Which Is More Forgiving?
Glossy and matte top coats create different visual results, and neither finish is automatically superior.
A glossy top coat can produce a reflective appearance that makes some small irregularities less distracting. Certain glossy formulations also provide leveling that helps soften shallow surface variation.
Matte top coat creates a diffuse, velvety appearance that emphasizes the overall uniformity of the nail. Inconsistent thickness, scratches, or different levels of sheen can become more apparent because the surface lacks a continuous reflective highlight.
However, glossy finishes have their own challenges. Deep scratches, dents, bubbles, and poorly structured enhancements can still be extremely obvious under direct reflected light.
The best choice depends on the desired design and the condition of the finished nail surface.
For nail technicians, this means treating matte and glossy finishes as two separate techniques rather than simply swapping the bottle during the final minute of the appointment.
Can You Put Glossy Top Coat Under Matte Top Coat?
In some compatible nail systems, technicians use a glossy finishing layer before applying matte top coat to achieve a smoother underlying surface.
The idea is straightforward: a properly applied and fully processed glossy coating may help create a more uniform foundation before the matte finish is added.
However, this approach is not universally appropriate.
Some top coats are formulated as final layers and may not provide suitable adhesion for an additional coating. Others require specific preparation before another product can be applied. Mixing traditional lacquer and gel systems also introduces compatibility concerns.
Always check manufacturer instructions before layering different finishing products. A second top coat should never be used as a substitute for proper curing, adhesion, or correction of structural defects.
If the product system supports the technique, test the combination on a sample tip before using it in a client service.
How to Fix Matte Nail Imperfections Without Starting Over
Discovering a flaw after applying matte top coat does not always require removing the entire manicure.
The appropriate correction depends on the type of problem and the products used.
If the Finish Looks Patchy
First confirm that the product was applied and processed correctly. For a compatible system, applying a fresh, properly prepared finishing layer may help even out the appearance. Follow the manufacturer's directions for recoating and surface preparation.
If There Is a Visible Bump
Determine whether the bump is trapped debris, excessive product buildup, or an irregularity in the underlying enhancement.
Where the nail system permits, a technician may be able to remove or refine the affected coating safely before restoring the finish. Do not file aggressively into the natural nail or assume that every coating can be repaired with the same method.
If Brush Strokes Are Visible
Review coating thickness, brush pressure, product condition, and application speed. If recoating is appropriate, use a controlled technique and avoid repeatedly brushing over product that has begun setting or drying.
If the Matte Finish Has Shiny Spots
Uneven application, contact with skin oils, premature handling, wear, or product incompatibility can all affect the appearance.
Clean the surface only as recommended for that system. If the finish remains inconsistent, follow the manufacturer's approved procedure for refreshing or replacing the coating.
A little patience during troubleshooting usually beats the classic salon strategy of applying another thick layer and hoping the problem decides to move out.
Why Nail Lighting Matters for Matte Manicures
Professional lighting can make a major difference when evaluating nail surface quality.
Matte coatings scatter light, but the direction and intensity of illumination still influence which defects are visible.
Under soft overhead lighting, a manicure may look smooth and consistent. When the hand is tilted toward a more directional light source, uneven contours and scratch patterns can become apparent.
Using an adjustable LED Bright Lamp at the nail station can make it easier to inspect the surface from several angles.
Before completing the appointment, examine the nails with the client's hand positioned naturally. Rotate the hand gently to check the sidewalls, nail apex, free edges, and overall uniformity.
Good lighting is not just about seeing the design while applying polish. It also supports consistent quality control.
Choosing the Right Matte Top Coat for Professional Salon Services
Not every matte top coat delivers the same application experience.
When evaluating professional matte top coats, consider several practical factors.
Finish consistency: Look for a product that creates a uniform matte appearance without obvious streaking or unwanted shiny areas when applied correctly.
Application control: Brush design and viscosity affect how easily a technician can distribute product around the cuticle area and sidewalls.
System compatibility: Confirm that the product is intended for the selected lacquer, gel, or enhancement system.
Drying or curing requirements: Know whether the product air-dries or requires a specified curing lamp and exposure procedure.
Wear characteristics: Matte finishes can show skin oils, handling marks, and other changes during wear. Evaluate how easily the product can be maintained and whether its appearance meets client expectations.
Removal procedure: Consider how the product fits into the salon's normal removal workflow, including the manufacturer's required methods and timing.
Professional salons benefit from testing new products before introducing them into regular services. A sample set can reveal how a matte top coat behaves over different shades and whether the finish remains consistent after normal handling.
Pure Spa Direct supplies professional nail care products and salon essentials from a variety of manufacturers. Nail technicians can explore Professional Nail Care Collections, including product options for preparation, application, and finishing.
Matte Nail Designs That Make the Extra Preparation Worthwhile
Despite the additional attention required, matte finishes offer beautiful creative possibilities for professional nail services.
Minimalist nude nails: Soft beige, blush, and neutral shades create an elegant, understated appearance that works well for clients who prefer subtle manicures.
Velvet black manicures: Matte black delivers a dramatic finish that looks especially striking on carefully shaped nails.
Matte and glossy contrast: Combining compatible matte and glossy finishes within one design creates a dimensional effect without relying on complicated artwork.
Textured accent nails: A matte background can help selected decorative details stand out. Explore Nail Art Supplies and Nail Art Rhinestones for creative service possibilities.
Seasonal color collections: Muted autumn shades, winter neutrals, and sophisticated jewel tones can take on a completely different personality with a matte finish.
The design possibilities are substantial, but the foundation remains the same: smooth preparation, even color application, and a uniform finishing layer.
How to Explain Matte Nail Maintenance to Clients
Client education is especially important with matte manicures because their appearance may change differently from glossy finishes during normal wear.
Hand creams, natural skin oils, cosmetics, cleaning products, and repeated surface contact can affect the visual appearance of matte nails. Some finishes may gradually develop shiny areas or show marks that were not visible immediately after the appointment.
Explain that these changes are related to the finish and daily use, not necessarily an indication that the manicure was applied incorrectly.
Encourage clients to follow appropriate hand and nail care recommendations, avoid using their nails as tools, and wear suitable gloves when handling household cleaning products.
For healthy-looking surrounding skin, salons can offer compatible aftercare items such as Cuticle Oil. Clients should apply care products as recommended while understanding that oils may temporarily change the visible sheen of the matte coating.
Clear expectations help clients appreciate the distinctive look of a matte manicure without expecting the surface to remain completely unchanged through everyday activities.
Building a More Efficient Matte Manicure Workflow
For busy nail salons, consistent matte results are not just about appearance. They also influence service efficiency.
Every correction requires additional technician time. Repeated troubleshooting can interrupt appointment schedules and increase product consumption.
A standardized workflow helps reduce avoidable mistakes. Begin with a reliable nail assessment, choose appropriate preparation products, maintain consistent application thickness, and inspect the surface before adding the final coating.
Keep frequently used products organized at the workstation so technicians do not need to interrupt services searching for a buffer, brush, cleanser, or top coat.
Comfortable, organized Nail Tables and Manicure Stations can support efficient product handling and better visibility during detailed nail services.
Salons training multiple technicians may also benefit from developing simple internal application standards for each product system. Consistency in preparation, coating thickness, curing procedures, and final inspections makes service quality easier to maintain.
And of course, conducting a final inspection before the client leaves is much easier than discovering an obvious ridge in a close-up photo posted later that evening.
Frequently Asked Questions About Matte Top Coat and Nail Imperfections
Does Matte Top Coat Make Nail Ridges More Noticeable?
It can. Matte finishes scatter light rather than creating a strong glossy reflection, and this can make certain underlying surface variations more apparent. Proper preparation and compatible leveling products can help improve the finished appearance without excessive natural nail buffing.
Why Does My Matte Top Coat Look Streaky?
Streaking may result from uneven application, inconsistent coating thickness, product condition, contamination, or compatibility issues. Follow the manufacturer's instructions and test the product over the intended nail color to identify the cause.
Can Matte Top Coat Hide Scratches?
Sometimes matte top coat can reduce the visibility of certain reflective scratches, but it should not be relied upon to conceal physical surface defects. Deeper scratches or uneven refinement may remain visible. Correcting the underlying surface before finishing generally produces more predictable results.
Should You Buff Nails Before Applying Matte Top Coat?
Buffing depends on the nail system and the condition of the surface. Enhancement products may require appropriate refinement, while natural nails should be prepared gently according to the selected manufacturer's instructions. Avoid unnecessary buffing that could thin or damage the nail plate.
Why Does Matte Gel Polish Develop Shiny Spots?
Shiny spots may develop because of uneven application, contact with oils, repeated friction, or normal wear. Product-specific maintenance and recoating procedures should be followed when a refresh is needed.
Is Matte Top Coat Harder to Apply Than Glossy Top Coat?
Not necessarily, but matte finishes can make variations in coating thickness and underlying texture easier to notice. Nail technicians may need to pay closer attention to preparation, even brush coverage, and final inspection to achieve the desired uniform appearance.
The Secret to Beautiful Matte Nails Is Everything Underneath
Matte top coat creates a sophisticated finish by changing how light reflects from the nail surface. That beautiful velvet appearance also means certain scratches, ridges, bumps, and uneven layers may become easier to see.
For professional nail technicians, the solution is not simply choosing a thicker top coat or spending extra time brushing over the finished nail. It is building a consistent process that starts with appropriate nail preparation and continues through smooth color application, compatible products, correct drying or curing, and careful inspection.
With the right technique and professional supplies, matte manicures can become a reliable, beautiful addition to a salon's service menu rather than a last-minute surprise.
Explore Professional Nail Care Collections, Nail Files & Buffers, and Matte Top Coat options at Pure Spa Direct to find supplies that support your preferred manicure systems and finishing techniques.
Because a flawless matte manicure should look effortlessly chic, even when you know exactly how much professional skill went into making it that way.
