
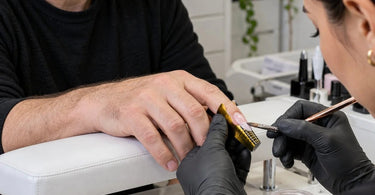
Make every service count... especially when you are creating gorgeous sculpted nail extensions and your nail forms decide to abandon the sidewalls halfway through the appointment. One minute, everything looks perfectly aligned. The next, a tiny gap appears, the form starts peeling away, and suddenly your beautiful extension has more architectural challenges than a reality television renovation project. Sound familiar? If you have ever wondered why nail forms lift away from the sidewalls during sculpting, you are definitely not alone. This frustrating little problem can affect extension shape, product placement, symmetry, and the amount of corrective filing required after curing or setting. Fortunately, most form lifting problems have identifiable causes, and a few smart adjustments can make your sculpting services noticeably smoother.
For professional nail technicians, understanding why forms lose contact with the natural nail is an important part of producing consistent enhancements. Whether you work with acrylic, hard gel, or a compatible builder gel system, your form provides the temporary foundation for the extension. If that foundation shifts, lifts, or separates at the sides, the finished enhancement may require extra work to achieve the intended shape. Let us explore what causes this problem, how to recognize it before applying product, and the professional techniques that help forms stay exactly where you need them.
Why Nail Forms Lift Away From the Sidewalls During Sculpting
The most common reason nail forms lift away from the sidewalls is that the form opening does not match the natural nail's shape. Every client brings a different combination of nail width, free-edge curvature, sidewall depth, and finger anatomy to your manicure table. Unfortunately, a standard adhesive nail form is not automatically designed to accommodate every one of those combinations.
When a form cannot sit comfortably beneath the natural free edge, the material may bend or pull away at the sides. The center might appear securely positioned while small gaps develop near one or both lateral edges. Those gaps can become more noticeable as the technician closes the form tabs, adjusts the extension angle, or begins applying enhancement product.
Other contributing factors include weak adhesive, excessive handling, incorrect tab closure, poor form alignment, and movement during application. The important distinction is that a form lifting away from the sidewalls during placement is not the same problem as an artificial nail enhancement lifting from the natural nail after application. One involves temporary form support; the other can involve preparation, product adhesion, structural balance, or service wear.
The Natural Nail Shape May Not Match the Form Opening
One of the biggest sculpting mistakes is treating every natural nail as though it has the same underside shape. Some clients have deep C-curves, while others have relatively flat nail plates. Some nails feature pronounced lateral edges, and others have short, irregular, or asymmetrical free edges.
A form that fits one nail beautifully may sit awkwardly under the next finger. If the opening is too narrow, it can catch against the sides of the natural nail rather than sliding into position. If it is too wide, gaps may remain beneath the free edge. Either situation can prevent the form from supporting the intended extension properly.
Before removing the adhesive backing or sealing the tabs, assess the natural nail from above and from the front. Look at the curvature, the free-edge width, and the point where the nail separates from the fingertip. These details help determine whether the form can be used as supplied or needs careful customization.
A useful professional habit is to test the form's fit before committing to placement. Those few additional seconds can prevent several minutes of filing, reshaping, and wondering why one side of the extension looks suspiciously enthusiastic about becoming a wing.
Why Improper Form Trimming Creates Sidewall Gaps
Customizing nail forms is a valuable skill, but cutting them incorrectly can create the very problem you are trying to prevent. Technicians sometimes make relief cuts that are too deep, too wide, or positioned incorrectly for the client's anatomy.
When too much material is removed near the sidewall area, the form loses some of its ability to support the extension's lower edges. Instead of sitting close to the natural nail, the trimmed section may pull away and leave an opening where enhancement product can collect.
The solution is controlled trimming. Test the form beneath the nail, identify the exact points where the material encounters resistance, and make small adjustments using appropriate Nail Brushes & Tools. Reposition the form after each adjustment rather than making one dramatic cut and hoping for the best.
Keep in mind that the left and right sides of a natural nail are not always identical. A slightly different adjustment on each side may be appropriate when the nail anatomy requires it. The goal is balanced support and proper alignment, not automatically identical cuts.
How the Natural C-Curve Affects Nail Form Placement
The natural nail's C-curve plays a major role in how a sculpting form fits. This curve describes the transverse arch visible when looking toward the fingertip. A pronounced C-curve can require a different form opening or shaping technique than a flatter nail.
With deeply curved nails, a form that is too flat may resist wrapping around the underside correctly. Its lateral sections can spring outward or create gaps. On flatter nails, a form that has been rolled into an excessively narrow tunnel may squeeze against the sides or distort the intended extension shape.
Professionals can gently pre-shape a suitable disposable form before applying it. The objective is to create a curve that supports the planned extension without forcing the natural nail into an uncomfortable position.
Look at the form from the front after positioning it. The tunnel should appear centered and appropriate for the desired enhancement. If the form immediately springs open when released, reconsider the fit, adhesive security, or form style rather than relying on pressure alone.
Weak Adhesive Can Make Forms Pop Open
Sometimes the nail shape is not the primary problem. The form itself simply refuses to stay closed. Adhesive strength can vary between form designs and manufacturers, and certain products may be less suitable for particular sculpting techniques.
Repeatedly repositioning a disposable form can reduce the effectiveness of its adhesive. Dust, oils, lotions, or moisture transferred to the adhesive area can also interfere with secure closure. Forms stored in unsuitable conditions may develop problems with curling or adhesive performance.
Choose quality professional forms with dependable adhesion and enough rigidity to maintain their intended structure. Browse Professional Nail Care Collections when reviewing supplies for your enhancement services.
Once you have selected a form, limit unnecessary contact with its adhesive surfaces. Position the opening correctly first, then close the tabs deliberately. If the adhesive has become unreliable, replacing the disposable form is usually more practical than repeatedly pressing it back into place.
Remember that adhesive tabs should secure the form around the finger comfortably. They are not supposed to squeeze the fingertip into submission. Your client booked a nail appointment, not a tiny finger corset fitting.
Why Closing the Tabs in the Wrong Order Causes Lifting
Tab closure affects the form's shape more than many technicians realize. If the lower sections are sealed before the opening is properly seated, the form can become locked into an incorrect position.
For example, closing the underside tightly may narrow the form tunnel and pull its lateral edges away from a wider natural nail. Uneven closure may also rotate the form or cause one side to sit higher than the other.
A more reliable technique begins by placing the form beneath the free edge and checking the fit before completing the closure. Depending on the form design, gently secure the relevant tabs while maintaining the correct centerline and tunnel shape. Then confirm that the remaining sections close without dragging the opening away from the nail.
Different form designs may require different closure sequences, so follow the manufacturer's guidance while prioritizing a secure, comfortable, gap-free fit.
After closure, release your supporting fingers briefly and observe the form. If it moves, twists, or opens immediately, something needs adjustment before product application.
Incorrect Form Angles Can Pull the Sidewalls Apart
Form alignment is not just about making an extension look straight from above. The angle of the form also influences how the material contacts the natural nail and maintains support along the sides.
If a form is positioned too far downward, it may create an unwanted hooked extension. If it is tilted excessively upward, the finished nail may develop an unnatural ski-jump appearance. Both incorrect positions can affect contact at the natural free edge and complicate sidewall construction.
Check the form from three important perspectives: above, from the side, and directly toward the fingertip. From above, examine the centerline and intended sidewall direction. From the side, verify the planned lower line and extension angle. From the front, confirm that the tunnel is centered and the form has not twisted.
Do not automatically align the extension to a finger that naturally rotates or bends. Consider the nail's visual axis, growth direction, and the finished shape the client wants. Proper sculpting sometimes requires an intentional correction rather than blindly following the finger's direction.
Short or Uneven Free Edges Make Form Placement Harder
Clients with very short nails can present additional fitting challenges because there may be limited free edge beneath which to seat the form. This is particularly common with clients who bite their nails or have naturally short nail beds.
In these situations, the form may contact surrounding skin before it reaches the correct position. Forcing it into place can create discomfort, distort the opening, and cause the sidewalls to separate.
Uneven free edges present similar challenges. One side may offer adequate support while the other has very little natural edge for the form to follow.
Assess whether the nail provides enough suitable structure for the intended extension technique. When appropriate, carefully customize the opening and adjust the planned length to suit the nail. Never push the form into sensitive tissue or use adhesive closure to create pressure against the hyponychium.
For extremely short or compromised nails, a different professional extension method or a more conservative service may be appropriate. Healthy nail and skin conditions should always take priority over achieving a particular length.
How Product Application Can Disturb a Perfectly Fitted Form
Even an expertly placed form can move once sculpting begins. Excessive brush pressure, repeated product manipulation, or accidental contact with the form can disturb its position.
With acrylic enhancements, aggressive pushing or patting near the junction between the natural nail and the form may flex the support. With sculpting gels, repeatedly dragging product into position can affect a form that has not been secured properly.
Using too much product at once may also increase the challenge of maintaining clean sidewall geometry. Material can spread toward an existing gap and make it harder to preserve the intended underside shape.
Use controlled product amounts and brushes suited to your enhancement system. Explore professional Acrylic Nail Supplies and appropriate builder gels when selecting materials for sculpting services.
Apply and manipulate products according to their manufacturer instructions. Use light, deliberate movements around the free-edge transition and avoid relying on an unsupported form to carry excessive material.
For light-cured enhancement products, use the compatible lamp and specified curing procedure. A brief initial cure may help stabilize certain compatible systems when the manufacturer permits it, but it does not replace proper form placement or full curing.
A Step-by-Step Routine to Prevent Sidewall Lifting
Consistent results often come from a repeatable process rather than a collection of last-minute rescue techniques. Incorporate the following sequence into your professional sculpting appointments.
Step 1: Examine the natural nail. Identify the free-edge shape, nail width, C-curve, lateral folds, and natural growth direction. Note any asymmetry before selecting a form.
Step 2: Select the appropriate form. Choose a disposable form with a suitable opening, adequate support, and reliable adhesive. A form that works beautifully for long almond extensions may not be your favorite option for a very short, wide nail.
Step 3: Test the opening. Position the form beneath the free edge without forcing it against living tissue. Check whether the central and lateral areas sit close to the natural nail.
Step 4: Customize carefully. If the form encounters resistance, mark the contact points and make minimal trimming adjustments. Refit the form after each cut.
Step 5: Shape the tunnel. Gently adjust the form's curve to suit the nail and desired extension. Avoid over-pinching or creating uncomfortable lateral pressure.
Step 6: Secure the tabs. Close the form according to its design while preserving the intended centerline. Make sure the closure does not pull the form away from either sidewall.
Step 7: Inspect from multiple angles. View the finger from above, the side, and the front. Confirm that the form stays secure when you release your grip.
Step 8: Apply enhancement product with control. Work carefully at the natural free-edge transition, establish the planned extension, and build the structure according to the product system.
Step 9: Remove the form appropriately. Wait until the enhancement is sufficiently set or fully cured as required by the manufacturer. Release the form gently without twisting or stressing the extension.
This routine may add a little attention to the beginning of a service, but it can reduce the filing and correction required at the end.
How to Fix a Form That Starts Lifting During Sculpting
If you notice a sidewall gap before applying enhancement product, stop and correct it immediately. Remove or reopen the form as appropriate, examine the fit, and determine whether the opening, closure, adhesive, or angle caused the problem.
If product application has already begun, your options depend on the enhancement system and its current state. With uncured gel, for example, you may need to remove the unstable material and refit the form before rebuilding. With acrylic, the material's setting stage and condition will influence whether correction is possible without compromising the structure.
Do not trap loose form material beneath an extension, cure over a significant gap, or assume that extra product will compensate for missing support. A visibly distorted or unsupported structure is better corrected properly than hidden beneath additional layers.
Once the extension has been created and the form removed, inspect the lower sidewalls and underside before finishing. Look for uneven thickness, product seepage, missing structure, or asymmetry. Use suitable Nail Files & Buffers to refine properly supported areas, but remember that filing cannot restore structural material that was never placed correctly.
When a defect compromises the enhancement's integrity, rebuilding the affected extension is the professional solution.
Choosing Better Nail Forms for Different Sculpting Services
Not every form performs equally well for every nail shape or enhancement style. Professional nail technicians often benefit from keeping more than one form design available.
Some forms provide greater rigidity for maintaining longer extensions. Others are easier to shape around flatter or more curved nails. Differences in opening size, tab design, adhesive placement, and printed guides can influence how efficiently a form fits.
When evaluating professional nail forms, consider how frequently you need to customize the opening, whether the material maintains its tunnel shape, and how securely the tabs close without distorting the nail's alignment.
Reviewing your preferred forms alongside your enhancement products can also improve workstation efficiency. Keeping compatible nail brushes and tools, sculpting products, and finishing supplies conveniently arranged reduces the need to interrupt application while searching for equipment.
A well-organized nail table or manicure station can make it easier to inspect forms from different angles while maintaining control over your application process.
Does Sidewall Form Lifting Cause the Finished Enhancement to Lift?
This is an important distinction for nail professionals. A form that separates from the sidewalls during sculpting does not automatically mean the finished enhancement will later lift from the natural nail.
However, poor form support can create structural problems that affect service quality. Gaps can allow product to seep beneath the free edge, while incorrect positioning can lead to uneven lower arches, thin lateral areas, or distorted extension geometry.
If the enhancement is built with inadequate support around its stress-bearing areas, it may be more vulnerable to cracks, breaks, or other mechanical problems during wear.
Actual enhancement lifting at the natural nail is influenced by additional factors, including appropriate preparation, compatible products, correct application, avoidance of skin contact, and proper curing or polymerization.
Maintaining clean sidewalls is therefore part of good enhancement construction, but it should be considered alongside the entire service process rather than treated as the single explanation for every lifting complaint.
Training Your Nail Team to Spot Sidewall Problems Early
For busy salon owners, nail form troubleshooting is also a valuable team training opportunity. Inconsistent form placement can lead to variation between technicians, longer service appointments, unnecessary product waste, and more corrective filing.
Consider incorporating short form-fitting exercises into continuing education sessions. Have technicians practice positioning forms on different natural nail shapes without applying enhancement products. Compare the fit from multiple angles and discuss which adjustments were necessary.
Encourage newer professionals to recognize three warning signs: visible gaps beneath the natural free edge, lateral form sections that spring away when released, and a centerline that changes when the tabs are closed.
Photographing properly fitted forms from the front and side can create useful internal training examples. A small collection of real-world nail shapes often teaches more than repeatedly practicing on identical training tips.
When evaluating salon supplies, include form performance in your discussions. A professional form should support the technician's technique, not require an elaborate rescue mission on every other finger.
Build a More Reliable Professional Nail Sculpting Setup
Reliable sculpting begins with sound technique, but accessible professional supplies make consistent services easier to deliver. Nail technicians should have appropriate forms, enhancement systems, precision tools, finishing products, and proper workstation lighting available before beginning an appointment.
Pure Spa Direct supplies professional beauty businesses with a broad range of products from established manufacturers. As a wholesale distributor rather than a manufacturer, Pure Spa Direct helps salon owners and nail technicians shop for the tools and materials that support their preferred services.
Explore Professional Nail Care Collections, Acrylic Nail Supplies, and Manicure Essentials to review options for your nail department. You can also browse manufacturers such as CND and OPI when exploring professional nail care products and service essentials.
Choose products based on your training, system compatibility, manufacturer directions, and the services your salon actually provides. The most useful setup is not necessarily the one with the most bottles and gadgets. It is the one that helps your team deliver dependable results efficiently.
Frequently Asked Questions About Nail Form Sidewall Lifting
Why does my nail form fit in the center but leave gaps at the sides?
The opening may not match the natural nail's curvature or width. The form may also be positioned at an incorrect angle or compressed unevenly by its tabs. Test the fit and make small adjustments before applying product.
Should nail forms touch the natural nail at the sidewalls?
The form should support the underside of the natural free edge with no problematic gaps while following the planned extension shape. It should not press painfully against the skin or force the natural nail into an unnatural position.
Can I use the same nail form style for every client?
One form style may work for many clients, but different nail widths, curvatures, and free-edge shapes can require different openings or form designs. Keeping alternative styles available can make difficult fittings easier.
Why does the form open after I finish closing the tabs?
Possible causes include weak adhesive, excessive tension, incompatible tunnel shaping, or a form opening that is being forced around the natural nail. Reevaluate the fit instead of simply pressing harder.
Can I apply extra builder gel to fill a sidewall gap?
No. Extra product does not replace proper temporary support and can create unwanted bulk or seepage. Refit the form before building the extension, and follow the gel manufacturer's application and curing instructions.
Do acrylic and gel extensions need different nail form techniques?
Both require accurate form placement, proper alignment, and adequate support. Their product handling, working times, and curing or setting methods differ, so application techniques must follow the specific enhancement system.
When should I replace a nail form instead of adjusting it?
Replace a disposable form if the adhesive is no longer secure, the material has become distorted, or excessive trimming has removed necessary support. Disposable forms should never be reused between clients.
Better Form Fit, Beautifully Sculpted Results
Understanding why nail forms lift away from the sidewalls during sculpting comes down to recognizing the relationship between the natural nail, the form opening, the adhesive closure, and the intended extension structure. Small errors in any of those areas can create gaps that complicate an otherwise straightforward service.
By checking the natural C-curve, customizing forms conservatively, securing the tabs without distortion, and inspecting alignment before applying product, professional nail technicians can improve both their sculpting accuracy and their service efficiency.
Keep your nail department equipped with reliable nail sculpting supplies and the professional essentials your team uses every day. Pure Spa Direct makes it convenient to explore wholesale salon supplies for creating beautiful, well-structured enhancements.
Because the only thing that should be lifting during your next sculpting appointment is your client's mood when she sees those fabulous finished nails!
