
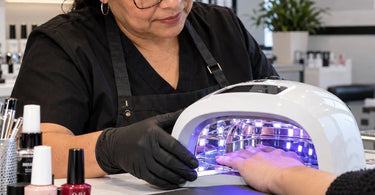
Elevate every service with beautifully cured gel nails, consistent results, and one surprisingly overlooked detail hiding inside your nail lamp: its reflective surfaces. You can have gorgeous gel colors, flawless application techniques, and a client who sits perfectly still, but uneven light distribution can still sabotage your masterpiece. Those shiny interior panels are not simply there to make your lamp look fancy. They can help redirect curing light toward areas of the nail that might otherwise receive less exposure. Understanding why nail lamp reflective surfaces matter for even curing can help professional nail technicians troubleshoot stubborn lifting, improve service consistency, and make smarter equipment decisions. After all, nobody wants to create a stunning manicure only to discover that one rebellious thumb apparently missed the curing appointment.
For busy nail salons, spas, and independent nail technicians, reliable curing is essential to service quality. A professional UV/LED nail lamp needs more than impressive wattage and an attractive exterior. Its internal design, LED positioning, compatible light wavelengths, and reflective surfaces all contribute to how effectively curing energy reaches the gel. Let's explore the science, practical benefits, and maintenance habits that make reflective lamp interiors worth your attention.
What Do Reflective Surfaces Actually Do Inside a Nail Lamp?
Open a professional nail curing lamp and you may notice a polished, metallic-looking interior or a reflective removable base plate. These surfaces can serve an important optical purpose by redirecting some of the light emitted by the lamp's UV or LED sources.
Light travels outward from each emitter. Depending on the lamp's construction, some light reaches the nail directly while other light strikes the interior walls or base. Reflective materials can redirect a portion of that light toward the hand, helping improve illumination in areas that receive less direct exposure.
Think of the difference between trying to illuminate a room with one flashlight and using carefully positioned lighting alongside reflective surfaces. The arrangement of the light sources and surrounding materials changes where the light travels.
In nail lamps, this matters because fingernails are curved rather than completely flat. The center of a nail may face an overhead LED directly, while its sidewalls are oriented at different angles. A thoughtfully designed reflective interior can help distribute light more effectively across these curved surfaces.
However, reflection alone cannot guarantee a complete cure. The lamp still needs adequate output at the wavelengths required by the gel formulation, appropriate exposure time, and effective LED placement. A shiny interior is a supporting feature, not a substitute for sound curing technology.
Why Even Light Distribution Matters for Gel Curing
Professional gel polish cures through a chemical process called photopolymerization. Light-sensitive ingredients known as photoinitiators absorb suitable wavelengths of light and trigger reactions that transform the liquid gel formulation into a hardened polymer network.
The process depends on receiving sufficient appropriate light energy throughout the applied product. When some areas receive inadequate exposure, the gel may not cure as intended.
Uneven curing can contribute to several frustrating service problems:
- Premature lifting around the sidewalls or free edge.
- Soft or poorly cured areas beneath an apparently hardened surface.
- Inconsistent durability between different fingernails.
- Premature peeling or product breakdown.
- Additional exposure to uncured gel ingredients that may increase the risk of skin sensitization.
One particularly important point is that a gel surface can appear firm or shiny without proving that the entire applied layer has cured sufficiently. Appearance alone is not a reliable test of complete polymerization.
That is why professional nail technicians should use the curing lamp and exposure instructions recommended by the gel manufacturer rather than relying exclusively on visual inspection or guesswork.
The Connection Between Reflective Interiors and Nail Sidewalls
Nail sidewalls are among the trickier areas to illuminate consistently because of their curved geometry and position relative to the lamp's emitters.
Imagine a client placing her hand inside a lamp with most LEDs concentrated overhead. The centers of the nails may receive strong direct illumination, but the curved edges may receive light at less favorable angles.
Reflective interior walls can redirect some otherwise unused light toward these peripheral areas. In well-engineered lamps, this feature works together with strategically positioned LEDs to improve the overall distribution of curing energy.
This becomes especially relevant when applying Professional Gel Polish close to the nail's lateral edges.
Still, proper product application is just as important. Gel should be applied in the thickness specified by its manufacturer, kept away from surrounding skin, and cured under a compatible lamp.
A beautifully reflective lamp cannot correct product that is applied too thickly or pooled into the sidewalls. Even the fanciest piece of salon equipment cannot negotiate with a mountain of gel.
Why Thumbnails Deserve Special Attention
Ah, the thumbnail. The independent thinker of the manicure world.
Thumbs naturally sit at a different angle from the other fingers. When a client places all five fingers inside a curing lamp, the thumbnails may tilt away from the main direction of the light or sit too close to the edge of the illuminated area.
Reflective surfaces may help improve exposure around the sides, but they cannot fully compensate for poor thumb positioning.
For consistent curing, instruct clients to place their hands flat and centered inside the lamp according to the manufacturer's directions. If the lamp or gel system recommends curing thumbs separately, follow that protocol.
Curing thumbs individually can allow technicians to position each nail more directly within the lamp's intended curing zone. This is especially helpful when the hand cannot fit comfortably without tilting.
Pay attention to whether clients instinctively curl their fingers, rest their thumbs against the lamp wall, or pull their hands partially outside the opening. These seemingly minor habits can change the amount of light reaching the nails.
Excellent curing requires teamwork between the equipment, the product, and the person attached to the fingers.
Reflective Surfaces Versus LED Placement: Which Matters More?
Both matter, but they perform different functions.
LED placement determines where curing light originates. Reflective surfaces influence how some of that light travels after reaching the lamp's interior.
A lamp with LEDs positioned across the top and sides may provide more direct illumination across curved nail surfaces than a design with poorly distributed emitters. Reflective walls and base plates can complement that arrangement by redirecting additional light.
However, an extremely shiny lamp with inadequate or poorly positioned LEDs may still produce uneven curing.
Likewise, a lamp with excellent LED distribution may provide effective curing without relying heavily on reflections.
When evaluating professional nail lamps, look beyond the appearance of the interior. Consider the manufacturer's compatibility recommendations, LED arrangement, curing zone, available wavelengths, exposure specifications, and overall construction.
The most attractive lamp is not necessarily the most effective one. Glittery marketing deserves a little healthy skepticism, especially when the health of your client's nails and skin is involved.
Why Wattage Alone Cannot Tell the Whole Story
Shopping for nail lamps can sometimes feel like comparing numbers on a race car dashboard. Higher wattage sounds more powerful, so it must mean better curing, right?
Not necessarily.
The wattage advertised for a lamp generally describes electrical power consumption or a manufacturer-defined power rating. It does not independently establish how much useful curing light reaches each nail.
Two lamps with similar electrical ratings can deliver different results because of differences in LED efficiency, wavelength output, optical design, emitter placement, and the size of their curing chambers.
Reflective surfaces may improve how available light is used, but their performance depends on their material, geometry, condition, and the specific lamp design.
For professional purchasing decisions, prioritize documented compatibility and reliable curing performance over impressive-looking wattage claims.
A lamp that properly cures the products used in your salon is far more valuable than one with an enormous number printed on its packaging.
Understanding UV and LED Wavelength Compatibility
Even the best reflective interior cannot make an incompatible curing wavelength work.
Different gel formulations contain photoinitiators designed to respond to particular wavelengths of light. Many modern professional LED curing systems use wavelengths around 365 nanometers, 405 nanometers, or combinations of suitable outputs.
However, a lamp emitting both wavelengths is not automatically compatible with every gel formulation. The intensity of the output, exposure time, photoinitiator chemistry, and product thickness still matter.
For technicians using multiple professional gel brands, compatibility deserves special attention.
Before introducing a new gel system, check its manufacturer's recommendations for the appropriate curing lamp and exposure schedule.
If you regularly work with CND, OPI, or Gelish systems, verify the specific requirements for the products you use rather than assuming all formulas have identical curing needs.
Never reduce manufacturer-recommended curing times simply because a lamp advertises powerful LEDs or reflective technology.
How Dirty Reflective Surfaces Can Affect Curing Performance
Now for the salon maintenance topic nobody gets excited about until something goes wrong.
Reflective surfaces cannot redirect light as effectively when they are obscured by debris, residue, or damaged coatings.
Over time, the interior of a nail lamp may accumulate dust, cured gel droplets, product smudges, and other contaminants. Some residues can block or scatter light rather than reflect it as the manufacturer intended.
This does not mean every tiny fingerprint will ruin a manicure. It means keeping the lamp clean is an important part of maintaining its designed performance.
Inspect the interior regularly for:
- Gel residue on reflective panels or the removable base.
- Dust collecting around the lamp opening.
- Damaged or peeling reflective coatings.
- Cracks, corrosion, or discoloration.
- Obstructions around LED emitters.
- Loose or damaged removable components.
Follow the equipment manufacturer's cleaning instructions and any applicable infection-control requirements. Use only approved cleaning products and methods suitable for the lamp's materials.
Never pour liquid into the lamp or spray directly onto its electrical components. Do not scrape reflective surfaces with sharp implements or use abrasive products unless expressly authorized by the manufacturer.
And please resist the urge to solve every stubborn spot with acetone. Some plastics and surface coatings will absolutely remember that decision.
Can You Restore a Damaged Reflective Lamp Interior?
If a reflective surface becomes scratched, discolored, or damaged, the appropriate solution depends on the lamp's construction and the manufacturer's service recommendations.
Some professional lamps have removable base plates that can be cleaned or replaced. Others have integrated reflective components that are not intended for independent servicing.
Avoid improvised repairs such as lining the interior with aluminum foil, applying metallic tape, or adding adhesive mirrors.
These modifications can alter the lamp's optical characteristics, interfere with ventilation or electrical components, and create unpredictable exposure patterns.
More reflection is not automatically better. Curing lamps are designed around particular relationships between light sources, surfaces, and hand positioning.
If a component is damaged, consult the manufacturer about approved replacement parts or equipment servicing. Explore appropriate Bulbs & Replacement Parts for Spa and Salon Equipment when compatible replacement components are available.
Why Dark Gel Colors and Builder Gels Need Extra Care
Reflective lamp interiors can support better light distribution, but certain gel applications still require particular attention.
Highly pigmented colors can absorb or scatter curing light within the product, potentially reducing the amount reaching deeper portions of the layer. Thick applications can present similar challenges.
This is why technicians should follow the application thickness and curing instructions supplied for each formulation.
When working with opaque black, deep burgundy, rich navy, or other heavily pigmented shades, apply controlled layers rather than trying to achieve full coverage with one excessively thick coat.
The same principle applies when using builder gel and other thicker enhancement systems.
Use appropriate application techniques, recommended curing schedules, and compatible equipment. Do not assume a reflective lamp allows you to exceed the manufacturer's maximum recommended product thickness.
For intricate designs, professional Nail Brushes & Tools can help technicians apply product with greater control.
A gorgeous finish begins long before the final top coat. It starts with precise application and a curing process that matches the chemistry of the product.
How to Spot Potential Nail Lamp Curing Problems
Not every lifting problem is caused by a curing lamp. Nail preparation, product contamination, application technique, client habits, and incompatibility between products can all affect results.
However, recurring patterns may justify investigating lamp performance.
Watch for repeated problems such as the same fingers experiencing premature lifting, particular products consistently failing to cure properly, or noticeably different outcomes between otherwise similar manicure stations.
If a specific lamp appears associated with recurring problems, stop using it for questionable applications until its compatibility and operating condition have been evaluated.
Compare the observed problems with the gel manufacturer's troubleshooting information. Check that the correct equipment and recommended exposure schedule are being used.
Inspect the interior for damaged reflective surfaces, malfunctioning LEDs, and obvious maintenance issues.
Do not rely on pressing a fingernail into the cured product or checking whether its surface feels hard as proof of complete curing.
When uncertainty remains, contact the gel or lamp manufacturer for technical guidance. Guessing at additional curing time is not a substitute for verifying the system.
A Practical Nail Lamp Maintenance Routine for Busy Salons
A simple maintenance process can help keep equipment dependable throughout a packed appointment schedule.
Before the first appointment: Inspect the lamp for visible damage, loose components, and debris. Confirm that the equipment appears to function normally and that the appropriate lamp is available for the gel system being used.
Between clients: Clean and disinfect applicable contact surfaces according to the equipment manufacturer's instructions and relevant salon regulations. Remove product residue using approved methods.
At the end of the day: Check the reflective base and interior walls for buildup, scratches, or discoloration. Ensure that vents and accessible surfaces remain unobstructed.
During routine equipment reviews: Check cables, controls, sensors, and light emitters for signs of malfunction. Review maintenance guidance and replacement recommendations.
Keep appropriate Professional Cleaners & Disinfectants for Salons and Spas available for approved cleaning procedures.
Document repeated equipment issues so the team can recognize patterns before they become a series of unhappy service callbacks.
A quick inspection is considerably easier to fit into the workday than explaining why a client's beautifully polished thumb decided to retire early.
What to Look for When Buying a Professional Nail Curing Lamp
Whether outfitting a new nail salon or upgrading equipment at an established spa, a thoughtful purchasing checklist can help prevent future headaches.
Manufacturer-confirmed gel compatibility: Choose a lamp appropriate for the actual products used in your services.
Well-designed light distribution: Consider how LEDs are positioned and whether the lamp's intended curing area accommodates different hand sizes and nail shapes.
Appropriate reflective construction: Look for durable interior surfaces that are easy to maintain, while remembering that appearance alone does not establish performance.
Suitable curing controls: Check whether the available settings align with the exposure requirements of your professional gel products.
Comfortable hand positioning: A generously sized interior may help clients position their hands correctly without bending or crowding their fingers.
Practical maintenance: Evaluate how easily accessible surfaces can be cleaned and whether approved replacement components are available.
Reliable technical documentation: Clear operating instructions, maintenance guidance, and manufacturer support are especially valuable in commercial settings.
When planning a complete manicure workspace, remember that suitable Nail Tables and Manicure Stations also contribute to efficient equipment placement and comfortable service positioning.
A curing lamp should fit naturally into the technician's workflow without encouraging awkward hand positions or rushed application techniques.
Small Equipment Details Can Make a Big Professional Difference
Salon owners know that exceptional services are built from dozens of small decisions. Product selection, workstation organization, sanitation routines, staff training, and equipment maintenance all contribute to the client experience.
Reflective nail lamp surfaces belong in that conversation because they are part of the equipment's optical design.
They may not be the glamorous feature that sells a lamp on social media, but they can help support more uniform light distribution when properly engineered.
For a busy professional, even curing is about more than obtaining a beautiful shine. It is about following a dependable process that supports product performance, reduces preventable service issues, and respects the importance of safe handling of professional gel systems.
For multi-technician salons, standardize compatible lamps and curing procedures wherever practical. Train staff to position hands correctly, recognize equipment problems, and maintain lamp interiors according to manufacturer guidance.
These habits can make troubleshooting easier and help deliver more consistent services across different workstations.
Build a Better Gel Manicure Workflow With Pure Spa Direct
At Pure Spa Direct, we understand that nail professionals need dependable supplies, thoughtfully selected equipment, and products that support real salon workflows.
As a professional wholesale distributor, Pure Spa Direct helps salons, spas, and independent technicians shop across a wide range of beauty supplies without pretending that one magical gadget can solve every service challenge.
Whether you are reviewing Professional Nail Care Collections, updating your curing equipment, exploring Manicure Essentials, or stocking up on Nail Files & Buffers, choosing appropriate tools is an investment in service consistency.
And if your salon offers detailed embellishments, consider how enhancements from the Nail Art Supplies collection fit into the relevant product manufacturer's application and curing instructions. Decorative materials should never be allowed to interfere with proper curing of the underlying gel.
The goal is a manicure process that combines creative artistry with sensible equipment practices.
The Bottom Line: Don't Overlook What's Inside the Lamp
Why nail lamp reflective surfaces matter for even curing comes down to a simple concept: the direction and distribution of curing light can influence how effectively gel products receive the energy they require.
Reflective surfaces can help redirect light toward areas that receive less direct illumination, especially around curved nail surfaces. Their contribution depends on the complete lamp design, including LED placement, wavelength compatibility, optical output, and the condition of the interior.
They do not replace correct gel application, proper hand positioning, manufacturer-recommended curing times, or compatible equipment.
For professional nail technicians, the smartest approach is to treat reflective surfaces as one important part of a complete curing system. Maintain them carefully, avoid unauthorized modifications, and investigate recurring curing problems rather than automatically blaming the gel polish.
Because your clients deserve manicures that look beautiful and are created with proper professional techniques. And your thumbnails deserve the same attention as every other nail, even if they insist on being the divas of the hand.
Explore professional nail supplies and equipment at Pure Spa Direct and give every service the attention to detail it deserves, from the first brushstroke to the final cure.
