Efficiency and luxury combine in this definitive guide to mastering one of the salon world’s most transformative—and slightly intimidating—services: Japanese Hair Straightening. Also known as Thermal Reconditioning, this treatment is the holy grail for clients battling unruly curls, waves, or frizz, promising bone-straight, glossy, low-maintenance hair that laughs in the face of humidity. It’s not just a service; it’s a life-changer for your client and a significant revenue booster for your book. But let’s be real, the chemical process involved has more steps than a spa stepladder (okay, maybe not that many, but it’s detailed). Fear not! We’re breaking it down, step-by-step, so you can execute with the confidence of a sushi chef preparing a perfect omakase. Your salon supplies are ready, so let’s get this hair show on the road.
Before we grab the mixing bowl, a crucial disclaimer: This is a professional-only treatment requiring extensive knowledge of hair chemistry. Always perform a thorough consultation and strand test. This guide assumes you are a licensed professional. Got it? Great. Now, let’s talk about why clients are obsessed. Unlike traditional relaxers or temporary smoothing treatments, Japanese Straightening permanently alters the hair’s internal bonds. It breaks the disulfide bonds, straightens the hair, and then rebuilds them in a new, straight position. The result? Hair that is straight from root to tip, even after washing, with incredible shine. It’s perfect for clients who want to drastically reduce their styling time.
Phase 1: The Critical Pre-Game & Consultation
This isn’t a “wing it” kind of service. Preparation is everything. Your consultation is where you earn trust and avoid disasters.
Step 1: The Deep-Dive Consultation. This is non-negotiable. You need the full history: previous color (especially box dye!), chemical treatments (perms, old relaxers, lash lifts are fine, but hair history matters), current condition, and hair goals. Examine the scalp for any cuts or irritation. Manage expectations—this treatment works best on virgin hair or hair with minimal previous color. Color-treated hair requires extreme caution and may not be suitable. Explain the commitment: they cannot color their hair for several weeks after, and new growth will be curly, requiring touch-ups.
Step 2: The Strand Test. Don’t even think about skipping this. Take a small, discreet section, apply the straightening solution, process, neutralize, and dry. This tests for both the final result and hair integrity. It’s your crystal ball.
Step 3: Gather Your Arsenal. You’ll need a dedicated station. Assemble your kit: Japanese straightening solution (cream or liquid), neutralizing shampoo, a timer, several applicator brushes, clips, a fine-tooth comb, a professional hair dryer, a high-quality flat iron (ceramic or tourmaline plates are best), and protective gear for you and your client (gloves, apron, cape). Ensure your shears are sharp for any necessary pre-trim. A towel steamer is a lovely touch for a luxurious pre-service shampoo, but not required.
Phase 2: The Treatment Process - The Main Event
Block out 3-5 hours. Get comfortable. Put on some chill music. You’re about to perform hair alchemy.
Step 4: The Initial Wash & Sectioning. Shampoo the hair with a clarifying shampoo to remove any product buildup. Do NOT condition. Towel-dry hair until it’s about 70-80% dry (dripping wet will dilute the solution; too dry will cause uneven application). Section the hair into four quadrants (nape, left, right, crown), and then subsection each quadrant into thin, horizontal partings (no more than 1/4 inch thick). Precision here is key for even saturation. Use those applicators and clips!
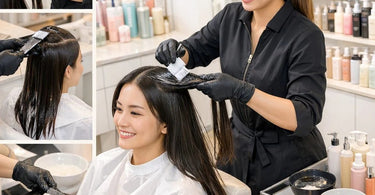
Step 5: Application of the Straightening Solution. Put on your gloves! Starting in the nape area (the most resistant), take your first subsection. Apply the solution from about 1/4 inch from the scalp to the ends. Avoid the scalp! Then, gently apply to the root area. Use your fine-tooth comb to distribute the solution evenly from roots to ends. Place the treated hair on a non-metallic, non-porous surface (like a plastic clip). Repeat throughout the entire head, working methodically. The clock starts on the first application.
Step 6: Processing Time. This is dictated by the product manufacturer’s instructions and hair texture/porosity. It can range from 15-45 minutes. Check every 5 minutes by stretching a strand. When it stretches about 20-30% more than its original length and then returns, it’s ready. Do not over-process! This is the most critical stage.
Step 7: Rinsing & Drying. Once processing is complete, rinse the hair thoroughly with lukewarm water for at least 5 full minutes. All solution must be removed. Then, shampoo with the provided neutralizing shampoo. Do NOT rinse yet. Blow-dry the hair completely straight, section by section, using a paddle or round brush. The hair must be 100% dry before moving to the next step. This is a workout for your arms—consider it your salon cardio.
Step 8: The Ironing (Thermal Reconditioning). This step sets the new straight shape. Using your flat iron set to the appropriate temperature (usually between 300-450°F), iron each subsection slowly and methodically. Make 5-7 passes on each section, starting as close to the root as possible without touching the scalp. Each pass should be smooth and steady. The sizzle you hear is the neutralizer activating. This step takes time—rush it, and you ruin the service.
Step 9: Final Neutralization. After ironing the entire head, let the hair cool completely. Then, apply the neutralizing shampoo again, working it through the hair. Let it sit for 5-10 minutes as per instructions. This step “locks in” the new straight bond. Rinse thoroughly with cool water.
Step 10: The Conditioning Finale. Apply a deep conditioning treatment or mask. This is non-negotiable; the hair needs intense moisture. Let it process, then rinse with cool water to seal the cuticle. Style as desired. Voila! You’ve just created a frizz-free masterpiece.
Phase 3: Post-Treatment Care & Client Education
Your job isn’t over when they leave the chair. Proper aftercare ensures longevity and happiness.
Step 11: The Handoff. Educate your client. They must use sulfate-free, sodium-chloride-free shampoos and conditioners. Recommend a good thermal protectant for any future heat styling (though they won’t need much!). Tell them to avoid coloring, sugaring, or even tight ponytails for at least two weeks. They cannot wet their hair or put it behind their ears for 48-72 hours. Yes, they’ll look a bit funny sleeping, but it’s worth it. Sell them the right aftercare products—it protects your work and boosts your retail.
Step 12: Scheduling the Touch-Up. Discuss the plan for new growth. Touch-ups are typically needed every 4-6 months, only on the new growth. Never overlap on previously straightened hair! Book their next appointment before they leave.
Why This Service is a Salon Superstar
Mastering Japanese Straightening positions you as a true hair artist. It commands a premium price (often $300-$800+), has a high perceived value, and creates fiercely loyal clients who will return for touch-ups and other services like nail care or brow laminations. It’s a showcase of your technical skill. Plus, sourcing your professional chemicals and tools from a trusted distributor like us ensures consistency and safety. Need a new flat iron? We’ve got you. Out of neutralizing shampoo? Our must-have supplies collection is a click away.
So, embrace the process, respect the chemistry, and get ready to transform hair—and your service menu. Now go forth and straighten (professionally, and with great caution)! And remember, for all the tools of the trade, from salon furniture to the finest cleaners for your station, Pure Spa Direct is your backstage crew.