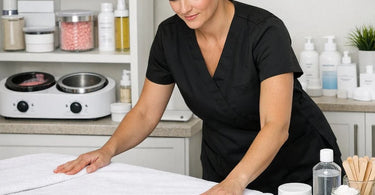
Clients notice the difference when your equipment looks and smells fresh, but let's be real: cleaning the crusty, baked-on wax residue from your wax warmer rims is about as fun as explaining to your mother-in-law why you really do need that seventh flat iron. Yet here we are, staring at the ring of shame around our trusty wax warmer, wondering if we should just buy a new one and pretend we never saw it. I've been there. I've cried over a glob of hard wax that refused to budge, and I've definitely considered using a chisel (spoiler: don't). But after years of trial, error, and a few melted spatulas, I've perfected the best way to clean wax heater rims without damaging your equipment. Grab your favorite mug of something caffeinated, put on your sassy playlist, and let's get that warmer looking so good, your clients will think you bought a brand new one.
The struggle is real, my friend. That lovely ItalWax that glides on like a dream? It hardens into a concrete-like seal of judgment when it drips down the side of the pot. And if you've ever tried to scrape it off with a metal tool, you know the horror of seeing a scratch appear on that pristine surface. Not only does it look unprofessional, but those scratches become tiny traps for bacteria and future wax, creating a never-ending cycle of gross. We're breaking that cycle today, armed with nothing but patience, the right technique, and zero power tools.
Why Your Wax Warmer Rims Are a Hot Mess (Literally)
Before we dive into the how, let's talk about the why. Your professional wax warmer is the unsung hero of your waxing services. It works hard, heating up to 130-140°F to keep that wax at the perfect honey-like consistency. But that heat is also what makes the wax so stubborn when it drips and cools on the rim. Unlike the wax inside the pot, which stays soft, the rim wax undergoes a 'bake and harden' cycle every time you turn the machine on and off. Over time, it becomes brittle, discolored, and adheres with the strength of a toddler refusing to nap.
Many technicians make the mistake of using wooden spatulas or metal tools to aggressively scrape the rims. While your intentions are pure, this is how you get micro-scratches that ruin the non-stick coating (if your warmer has one) or create grooves in the metal. Damaged rims mean more places for wax to hide, which means more bacteria, more time cleaning later, and a sad-faced esthetician. So put down the putty knife, and let's do this the smart way.
The Golden Rule: Heat Is Your Best Friend (Not Your Enemy)
The absolute best way to clean wax heater rims without damaging equipment is to use the warmer's own heat to soften the wax. I know you want to just scrape it off cold and be done with it, but trust the process. Turn that bad boy on and let it heat up fully for about 15-20 minutes. While you wait, you can organize your wax strips or finally throw away that dried-out cuticle oil pen that's been rolling around your drawer since 2019.
Once the wax inside is liquid and the metal rim is warm to the touch (be careful not to burn yourself, use a glove if you're a delicate flower like me), the dried wax on the rim will have softened slightly. It won't be liquid, but it will be more pliable. Now, here's the magic: take a clean, lint-free cotton cloth or a few cotton rounds and saturate them with a few drops of mineral oil or professional wax remover. Gently wipe the rim in circular motions. You'll see the wax start to lift off like it's surrendering. The oil breaks down the wax's adhesion without scratching the surface. It's like giving your wax warmer a little spa day.
Tools of the Trade: What You Actually Need
Forget the hard scrapers. Your new cleaning kit should include:
- Soft, lint-free cloths (old, clean t-shirts work great)
- Mineral oil or a dedicated wax remover spray
- Plastic razor blades or plastic putty knives (these exist and they are AMAZING)
- Cotton swabs for those tiny crevices around the knobs
- Rubbing alcohol (70% or higher) for the final sanitizing step
Plastic scrapers are the unsung heroes of this entire process. They're firm enough to lift softened wax but soft enough that they won't scratch metal or coated surfaces. You can find them online or at any beauty supply store that sells wax spatulas. They cost pennies and will save you hundreds of dollars in ruined equipment. I keep one tucked next to my spa equipment at all times for emergency drips.
Step-by-Step: The No-Damage Cleaning Protocol
Alright, you've got your supplies, your warmer is warm, and your favorite podcast is playing. Let's do this.
Step 1: Power Down and Safety First - Turn off the warmer and unplug it. Yes, you need the residual heat, but you do not need an electric shock or a burn. Let it cool for just 2-3 minutes so it's warm, not scorching.
Step 2: The Initial Wipe - Dip a soft cloth in mineral oil and wipe the entire rim. Don't be shy with the oil. Let it sit for 30 seconds to break down the wax. For extra stubborn spots, lay the oil-soaked cloth directly on the rim for a minute.
Step 3: Gentle Scraping - Using your plastic scraper at a 45-degree angle, gently push the softened wax toward the center of the pot or toward the edge. It should come off in satisfying little ribbons. If it's not moving, add more oil and a little more heat. Never force it.
Step 4: Detail Work - Dip a cotton swab in oil and run it along the inner lip where the lid sits and around any temperature dials or buttons. These tiny areas are where old wax loves to build up and get gross.
Step 5: The Final Sanitize - Once all visible wax is gone, wipe the rim with a clean cloth dampened with rubbing alcohol. This removes any oily residue and disinfects the surface. Do not pour alcohol into the wax pot – just use it on the rim.
Step 6: Wipe the Interior (If Needed) - If some wax residue is inside the pot, you can wipe it with an oil cloth while the remaining wax is melted, but never pour oil into your main wax supply. For a deep clean, you can transfer your wax to a temporary container, then clean the inside with oil and a soft cloth before refilling.
What Not To Do (The Horror Stories)
I've seen things. I once watched a fellow waxer use a metal nail file to scrape her warmer. The sparks didn't fly, but the scratches were deep enough to collect wax for eternity. Please avoid these common tragedies:
- DO NOT use metal razors, knives, or any metal tool. This is the number one way to ruin your professional wax warmer.
- DO NOT use aggressive chemical solvents like acetone or Goo Gone. These can react with the heating elements, create fumes, and damage the finish. Your clients breathe that air, so stick with mineral oil or professional wax removers.
- DO NOT submerge your wax warmer in water or run it under a faucet. Water + electricity + hot wax = a very bad time and a broken piece of salon equipment.
- DO NOT let the wax build up for months. Clean your rims after each use or at least weekly. A 2-minute wipe saves you a 30-minute scrape-fest later.
Prevention: The Lazy (Read: Smart) Esthetician's Guide
The very best way to clean wax heater rims is to never let them get filthy in the first place. Gasp, I know. But hear me out. A little prevention goes a long way. After every waxing session, while the warmer is still warm but turned off, take a dry paper towel and wipe any fresh drips from the rim. Fresh wax wipes off like butter. It's only the baked-on stuff that fights back.
Another pro tip: invest in a silicone wax warmer liner if your brand offers one or use adjustable wax pot liners. These liners catch the drips and can be peeled off and replaced. Brands like ItalWax and Gigi offer accessories that make your life easier. Also, be mindful when you stir your wax. Use a long-handled spatula and try not to sling wax over the sides like you're in a food fight. Your massage table will also thank you.
Why This Matters for Your Business and Your Sanity
Let's get real for a second. We're not just cleaning wax rims for fun. A clean warmer shows your clients that you care about hygiene and detail. If they see a crusty, yellowed wax pot, what do they think you're cutting corners on? Pre and post-waxing products? Sanitizing your pedicure chairs? Probably not. That crusty rim is a silent conversation you don't want to have.
Additionally, well-maintained equipment lasts longer. A high-quality wax warmer from Pure Spa Direct is an investment in your business. Treating it with respect means you won't have to replace it every six months. That's more money in your pocket for fun things like new lash and brow products, or, you know, rent.
Product Recommendations: My Personal Favorites
Since I'm basically your online work wife, let me share some of my favorite tools for keeping my waxing station spotless without losing my mind. First, a good plastic scraper set is a game-changer. I keep one dedicated to my Berodin wax warmer and another for my Starpil pot. They're color-coded because I'm fancy like that.
For cleaning solutions, you can't go wrong with mineral oil from any drugstore, but I do love the sprays from Gigi and Cirepil. They smell nice and are formulated specifically for wax equipment. And don't forget the cotton rounds – buy them in bulk because you will go through them like candy. While you're stocking up, throw in some compressed sponges for your facials and some fluffy towels because you deserve nice things.
Real Talk: When to Just Replace the Liner or Pot
Sometimes, despite our best efforts, a wax warmer has seen better days. If the rim is deeply scratched, the non-stick coating is peeling, or the heating element is starting to act up, it might be time to retire it. Pure Spa Direct has an amazing selection of professional wax warmers for salons and spas, from single pots to luxurious four-potters that make you feel like a waxing queen. And if you're loyal to a specific brand, they carry ItalWax, Waxness, Lycon, and many more.
Also, consider using roll-on wax cartridges with a compatible heater. These systems virtually eliminate rim drips because the wax is enclosed. It's like the Keurig of waxing – convenient, cleaner, and surprisingly satisfying. You can find complete waxing kits for salons and spas that include everything you need to get started with this mess-free method.
Conclusion: Go Forth and Shine, You Glorious Waxing Wizard
You've made it to the end, which means you're committed to not letting wax turn you into a grumpy goblin. Remember, the best way to clean wax heater rims without damaging equipment is patience, oil, plastic tools, and a little bit of regular maintenance. Your warmer will look brand new, your clients will silently appreciate the cleanliness, and you'll save yourself from the soul-crushing task of chipping away at a wax fossil.
Now, go give your wax warmer a little hug (metaphorically – it's still hot). And while you're at it, treat yourself to a new set of applicators or some gorgeous nail polish because you've earned it. Pure Spa Direct has literally everything you need to keep your spa treatments running smoothly, from towel steamers to hygienic table paper. Shop like a boss and clean like a pro. Your sanity (and your wax warmer) will thank you.
)