Your success, simplified... but honestly, if we have to dig through a black hole of mismatched foundation bottles one more time while a client waits, we are going to lose it. You know the drill. You are backstage, on a photo shoot, or rushing to a bridal suite. You zip open your professional makeup kit, and suddenly, that rogue lipstick has rolled under the false lashes, the setting spray is leaking onto your brand new brushes, and you cannot find the one concealer shade you need to save the day. It is a universal artist nightmare, right up there with a broken zipper on your way to a gig. As your trusty distributors at Pure Spa Direct, we see you. We feel your pain. That chaotic mess isn't just annoying; it costs you time, money, and that polished, professional aura you work so hard to project. A scattered kit screams stress, while an organized one whispers, “I am a pro. I have my life together. And yes, I know exactly where that eyebrow pencil is.” So, let’s ditch the chaos and turn that travel case into a mobile command center, shall we?
Think of your professional makeup kit as your tiny, magical suitcase of transformation. But magic is hard to perform when you are elbow-deep in a jumble of products wondering where you put that lash glue. The best artists know that organization isn't just about being neat; it is about efficiency and hygiene. When you are moving from a luxury spa to a client’s home, or a salon to a photoshoot, your gear takes a beating. You need a system that protects your investment, streamlines your flow, and maybe even makes you smile when you open it. We have gathered the absolute best ways to whip your on-location kit into shape, and we promise to make it fun (or at least less painful than stepping on a bobby pin).
Declutter or Die Trying: The Great Purge
Before you buy a single fancy organizer, you have to do the dirty work. Yes, we are talking about the kit cleanse. It is the KonMari method for makeup artists, and it hurts so good. You cannot organize what you do not need. Find a large towel, spread it on the floor, and dump your entire kit out. Every. Single. Item. Now, channel your inner diva and get ruthless. When was the last time you used that neon green eyeshadow single? Did that foundation oxidize orange three months ago? If you haven't touched it in six months, it is dead weight on your shoulders (and your back!).
Check those expiration dates. Spoiler alert: Mascara from 2022 is not “vintage”; it is a bacteria farm. Set aside dried-up liners, broken powders, and anything that looks like it survived a zombie apocalypse. This is your moment to embrace minimalism. The goal is a lean, mean, face-painting machine. An overstuffed kit is a heavy, confusing mess. A curated kit is a joy to carry. Once you have your pile of “absolutely yes” products, you can see what you are actually working with. You might be surprised how much lighter your load feels already—both physically and mentally.
The Holy Trinity of Storage: Zip, Stack, and Snap
Now, for the fun part: the containers! The vessel you choose is the foundation of your organized empire. If you are still using your mom’s old train case from 1987, it is time for an upgrade. Look for Professional Makeup Kits built for the modern road warrior. We are talking lightweight, durable, and with a layout that makes sense.
First, consider a rolling case if you carry the kitchen sink. Your spine will thank you later when you are not lugging 40 pounds of eyeshadow up three flights of stairs. For most pros, a high-quality soft-sided case with a retractable handle and wheels is the goldilocks of mobility. Inside that case, you need modular storage. Think of your bag as a condominium, and each product needs its own room. Clear, stackable trays are a total game-changer. They allow you to see colors at a glance without playing Jenga to reach the bottom layer. Get some that are customizable with adjustable dividers so you can make a deep slot for foundation bottles and a skinny one for liners.
And for the love of brushes, do not just throw them in loose! Invest in a dedicated brush holder or roll. A roll keeps the bristles protected and lets you see your entire arsenal at once. When you are working, you can unroll it and have your brushes and combs standing at attention like little beauty soldiers, ready for duty.
Zone Defense: Organize By Face Flow
Here is where the magic really happens. Stop organizing by product type (all liquids together, all powders together) and start organizing by application flow. This is the professional hack that will cut your service time in half. Think about the order you actually do makeup.
Create zones in your kit. One bag or drawer section should be the “Base Zone”—primers, foundations, concealers, and color correctors. The next zone is the “Complexion Zone”—blush, bronzer, contour, and highlighters. Then you have the “Eye Zone”—your palettes, mascaras, liners, and brow products. Finally, the “Lip Zone” and the “Finishing Zone” (setting sprays and powders).
When you work in zones, your hand naturally moves from the left side of the kit (base) to the right side (finishing). You are not hunting; you are flowing. It is like muscle memory for your storage. Using labeled pouches or smaller zip bags within each zone can further refine this. A small clear pouch for “Lips” means you just grab the pouch, pick a color, and zip it back. No loose bullets rolling around. This system is especially crucial for on-location work where space is tight and time is money.
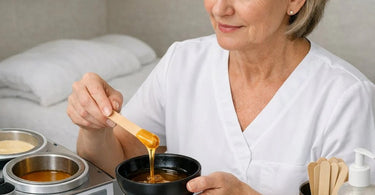
Decant, Depot, and Downsize
Are you seriously still carrying full-sized, heavy glass bottles of foundation? Bless your heart, but we need to talk about decanting. You do not need 50ml of product for a single wedding. Those heavy bottles are killing your shoulders and taking up prime real estate. Invest in a set of airless pump bottles, squeeze tubes, or small pots. Transfer your most-used foundations, primers, and moisturizers into these smaller, lightweight containers.
Label them clearly with a sharpie or a pretty label maker (trust us, you will feel very official). The same goes for depotting eyeshadows and blushes. Pop those pans out of their bulky individual packaging and place them into a large, empty magnetic palette. You can fit 20 shades in the space of two individual compacts! This saves so much weight and allows you to create custom color stories for different jobs. For weddings, you can build a soft neutral palette. For editorial, a brights palette. Decanting also helps with hygiene—you are only bringing the product you need for that day, reducing waste and keeping your master kit clean at home.
Hygiene is Queen: The Clean-Up Crew
We love a beautiful setup, but nothing ruins a reputation faster than a dirty kit. On-location work is a game of germs. You are moving from car to coffee shop to client’s kitchen table. You need a dedicated sanitation system. This should be a separate pouch that never touches your makeup. Inside, keep disposable gloves, 70% isopropyl alcohol in a small spray bottle, disposable mascara wands and lip gloss applicators, a pile of palette spatulas, and cotton rounds.
Make it a rule: Spray and wipe before you display. Every time you open your kit, give the surface a quick spritz. As you pull out a palette, spray it. This cross-contamination prevention is non-negotiable, especially when working with back-to-back clients. Also, keep a small roll of paper towels and a tiny trash bag (a repurposed grocery bag works perfectly) clipped to the outside of your kit. This allows you to immediately discard used tissues, cotton rounds, and wipes. A clean workspace looks professional, and a sanitary workspace is the law of the land for spa and wellness pros.
The Power of Categorization and Labels
Look, we know you have a great memory. But when you are on hour three of a bridal party and the mother of the bride is yelling for a touch-up, “muscle memory” fails. That is why we love clear, readable labels. You do not have to go full office-supply nerd, but a simple label maker or even a washi tape flag telling you what is inside a black pouch is a lifesaver.
Label the outside of your clear stackable trays: “Everyday Lips,” “Neutral Eyes,” “Tools.” When you are packing up at 11 PM after a 12-hour shoot, you do not want to guess where the lipsticks go. The labels tell you. This also helps if you have an assistant or a second artist helping you out. They can find the “Lash Supplies” drawer without having to ask you (which means they don't have to interrupt your flow). Categorization is the secret sauce to a kit that sets itself up and breaks itself down with minimal friction.
We also love the idea of color-coding your zones. Use red pouches for lips, blue for eyes, or green for sanitation. When your brain sees a flash of color, it knows exactly which bag to grab. It is faster than reading, and in the world of professional nail care and beauty, speed equals happy clients.
Tool Time: Protecting Your Investments
Your brushes and tools are expensive. Watching a professional shear or a high-end foundation brush get crushed by a falling setting spray bottle is a tragedy we want to prevent. Tools should have their own dedicated real estate inside the main kit. We already mentioned the brush roll, but what about your sponges, tweezers, and lash curlers?
Use magnetic strips inside a lid or on the side of a metal tray to hold metal tweezers and cuticle pushers. Use a pencil case specifically for your liners and brow pencils to keep the tips from breaking. For sponges, keep them in a breathable mesh bag so they dry out properly instead of getting musty in a sealed plastic bag. If you use a UV sterilizer at home, it is worth its weight in gold. But for on-the-go, a small metal tin to hold tools you are about to sanitize is a great habit to get into.
Keep your bolsters and larger tools separate, but ensure your daily drivers are snug. If your kit has elastic loops, use them! If it doesn’t, sewing a few elastic bands into a cheap pouch is a $5, five-minute DIY that will save you hundreds in damaged goods. The better you treat your tools, the better they treat your clients’ skin.
Test Drive Your New Setup
Okay, Picasso, you have decanted, labeled, zoned, and zipped. Now what? Do not wait until you are standing in a hotel room ten minutes before the bride wakes up to realize your new system stinks. Test drive your kit at home. Do a full face of makeup on yourself or a willing roommate using only the items in your on-location kit.
Time yourself. Did you struggle to find the primer? Did the foundation bottle not fit back into its slot once it was partially used? Is the kit too heavy to lift with one hand? Walk around the block with it. Does it feel balanced? Do the wheels squeak? Run through your cleaning routine. Is it easy to wipe down the surfaces?
This trial run is essential. It allows you to tweak your layout before the pressure is on. You might realize you need a portable light clipped to the handle, or that you forgot to pack premium skincare prep items. Fixing a problem in your living room is cheap and easy. Fixing it on location is a crisis. Once you have mastered the flow, your professional makeup kit becomes less of a burden and more of a superpower. You walk in, set up in five minutes, and look like the organized goddess we know you are.
Now that your kit is in order, it is time to restock it with the good stuff. Whether you need fresh cotton, that specific shade of gel polish, or more disinfectants, Pure Spa Direct has your back. We carry thousands of spa essentials to keep your mobile business running like a dream. From equipment to disposables, we are your wholesale partners in crime. Happy organizing, and may your zippers never jam and your foundations never spill!
)