
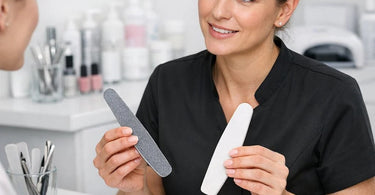
Quality you can’t ignore... especially when you're mid-service, a client is watching your every move like a hawk, and you accidentally reach for the wrong file. We've all been there. You grab what looks like a nail file, but then it either shreds a natural nail like a cheese grater or bounces off an acrylic like a foam noodle. It's awkward, it's unprofessional, and frankly, it's a buzzkill for your zen salon vibe. So let's clear up the confusion once and for all. Choosing the right file for natural versus acrylic nails isn't just about grit numbers; it's about respecting the science of the nail while keeping your clients happy, your services efficient, and your sanity intact. Let's get into the gritty (and not-so-gritty) details.
Here at Pure Spa Direct, we talk to nail techs every single day who are accidentally committing tiny little nail crimes. They're using a 100-grit file on a natural nail that's thinner than their patience on a double-booked Saturday. Or worse, they're trying to shape a fresh acrylic with a fine 240-grit file, and it's taking approximately four hundred years. Neither scenario is cute. So consider this your official intervention. We're going to break down exactly which Nail Files & Buffers belong in your professional kit for each specific job. And yes, we're going to be funny about it because nail files are serious, but life is not.
The Tale of Two Nails: Understanding the Battlefield
Before we throw grit numbers at you like confetti, we need to understand the enemy. I mean, the canvas. Natural nails are flexible, layered, and porous. They are basically the delicate little angels of the hand world. Acrylic nails, on the other hand, are hardened polymers. They are the armored tanks of the beauty industry. You wouldn't use a dental drill to carve a pumpkin, and you wouldn't use a chainsaw to perform heart surgery. Same logic applies here. Acrylic Nail Supplies require strength and aggression, while natural nails whisper softly for a gentle caress. Listen to the whispers, people.
Grit 101: Because Numbers Don't Bite (But Bad Files Do)
Let's have a quick chat about grit. In the nail world, grit refers to the coarseness of the file. The lower the number, the rougher the party. A 60-grit file is basically a brick with sandpaper on it. A 400-grit file is smoother than a pick-up line from Ryan Reynolds. For natural nails, we live in the high numbers. For acrylics, we live in the low-to-mid range. You wouldn't wear a parka in July, and you wouldn't wear a bikini in a snowstorm. Match your grit to the task. Your clients will thank you, and your stress level will drop faster than a dropped bottle of top coat.
Natural Nails: Handle With Care (And Maybe Some Chocolate)
Natural nails have feelings. I'm almost certain of it. They peel, they crack, they split if you so much as look at them wrong. That's why you need to treat them like the high-maintenance friends they are. For natural nails, you want to avoid anything under 180 grit like it's a spoiler for your favorite show. A 100-grit file on a natural nail will cause immediate splitting, peeling, and a client who will never trust you again. So what do we use? Professional Nail Care Collections are your best friend here. Stick to 240-grit files for shaping and smoothing. Use a 400-grit buffer to take away the scratches and leave a glass-like shine. And for the love of all that is holy, never saw back and forth. That's the equivalent of scrubbing a velvet couch with a steel brush. One direction, gentle pressure, and a whole lot of love.
Acrylic Nails: Bring On The Heavy Lifters
Now, let's talk about acrylics. These bad boys are tough. They can survive a door slam, a dropped handbag, and sometimes even a rogue hammer (don't test that). When you're shaping, filing, or thinning an acrylic, you need a file that actually does something. A 100-grit file is perfect for rough shaping and shortening length. It bites into the acrylic without bouncing off like a bad check. For smoothing out those rough edges and getting ready for your top coat or gel polish, step down to a 180-grit file. And if you're doing a fill or removing bulk, keep a 100-grit on standby. Just remember not to touch the natural nail with that beast. That would be career suicide. And nobody wants that on a Tuesday.
The Hybrid Disaster: Acrylic Overlay on Natural Nails
Here's where things get tricky, like trying to explain social media algorithms to your grandma. When you have an acrylic overlay on a natural nail, the only part you should be filing aggressively is the acrylic itself. Once you hit the natural nail near the cuticle or the sidewalls, switch immediately to a fine grit. I've seen techs destroy a perfectly good overlay by using a coarse file at the base and breaking the seal. Don't be that tech. Be the tech who uses a Efficient Roll-On Wax Cartridges for their waxing side hustle and also knows exactly when to switch their file grit. Be a multitasking legend.
File Materials: Glass, Emery, Metal, Oh My!
Let's not forget what the file is made of. Emery boards are cheap, disposable, and great for a single client before you toss them in the trash. But for pros? Glass files are the unsung heroes for natural nails. They seal the edge of the nail as they file, preventing peeling and splitting. Plus, they're reusable and easy to sanitize. Metal files, on the other hand, are amazing for acrylics. They don't wear down, they're easy to clean, and they provide that aggressive grit you need. But keep those metal files far, far away from natural nails unless you want to hear the sound of a thousand tiny screams. Stick to Nail Brushes & Tools for your precision work and the right file material for the job. Your ears will thank you.
Why Your Salon Needs A File Color Code System (Or You'll Go Insane)
Listen, I know you're busy. I know you have seven services backed up and a client who is demanding marigold yellow with tiny hand-painted daisies. But if you don't organize your files, you will eventually grab the wrong one. And when you do, it will be during a celebrity client's appointment. That's just the law of the universe. So here's a pro tip: use a color code. Red files for acrylics (danger, danger!). Blue files for natural nails (calm, smooth, relaxing). Green files for buffing. Or use stickers. Or different shaped handles. I don't care how you do it, just do it. And while you're reorganizing, go ahead and restock your Professional Wax Warmers for Salons & Spas because a clean workspace is a happy workspace. But also, a color-coded file system is a lifesaver.
The Top 5 Nail File Mistakes That Make Me Want To Scream
Alright, let's do a little fast-five of the biggest sins I see in the wild. One: Using a coarse file on a natural nail tip, then wondering why it peels in two days. Two: Using a fine file to shorten a long acrylic, then complaining that it takes twenty minutes per nail. Three: Sawing back and forth like you're starting a campfire. Four: Never replacing your files when they get dull (yes, even metal files wear out). Five: Not having a dedicated file for each client and mixing them up. That's how you spread nail fungus, Karen. Stop it. Get some hygiene help. And while you're at it, grab some Hygienic Table Paper for Waxing, Spa & Massage Tables to really up your sanitation game.
How To Extend The Life Of Your Files (Because Money Doesn't Grow On Trees)
I know, I know. Nail files aren't cheap, especially the good ones. So let's talk about making them last. For emery boards, use them once per client and toss them. They're not meant to be reused. For metal files and glass files, clean them with a stiff brush and disinfectant after every single client. Do not soak them, because some glues loosen. Do not drop them, because glass files are fragile. And store them in a clean, dry place. Not at the bottom of your drawer next to that old granola bar. And while you're doing inventory, make sure you have enough Nail Tables and Manicure Stations to spread out your tools. Clutter is the enemy of efficiency and the best friend of lost files.
My Personal Favorite Files For Natural Nails (I'm Very Opinionated)
If you ask me what I keep in my personal kit for natural nails, I'll tell you without hesitation. A 240-grit glass file from any reputable brand (grab one on our Spa Masters search page). A 400-grit buffer block for that post-oil shine. And a 180-grit file for those rare cases where the natural nail is tough as leather (thanks, genetics). I also keep Cuticle Oil right next to me because hydration is key. You can file all day long, but if the nail is dry, it's going to crack. Oil is the secret sauce, my friends. Don't skip it.
My Favorite Heavy Hitters For Acrylics (Tanks, Not Teaspoons)
For acrylics, I'm pulling out the big guns. A 100-grit metal file for shortening and shaping. A 150-grit file for smoothing transitions and fills. And a 180-grit file for final shaping before I move to my buffer. I also keep a Dipping Powder Systems for Salons nearby because dip is the cousin of acrylic and requires the same aggressive filing energy. Don't be gentle with acrylics. They can take it. Be rough. Be tough. Be the boss of that nail.
A Quick Note On Sanitation (Because Gross Is Not A Vibe)
Let's be real for a second. Using a dirty file is gross. Using the same file on multiple clients without disinfecting is a biohazard. You wouldn't use the same spatula for every client's wax pot, right? Right. So treat your files the same way. Metal files can be autoclaved or soaked in hospital-grade disinfectant. Glass files can be washed with soap and water then sprayed. Emery boards are single-use only. No exceptions. And while you're in sanitation mode, check out our Professional Cleaners & Disinfectants for Salons and Spas to keep your whole station sparkling. Your clients are watching. Make them feel safe.
What About Buffers? Do I Really Need Three Sides?
Yes, Janet, you need three sides. A good buffer has coarse, medium, and fine sides. You use the coarse side to remove ridges (gently!), the medium side to smooth, and the fine side to shine. On natural nails, this is the difference between a matte, sad nail and a glossy, happy nail. On acrylics, buffing removes the final scratches before you apply gel, dip, or polish. Do not skip the buffer. It's like skipping dessert. You can do it, but why would you want to? Pair your buffing routine with some Nail Treatments for Healthy Nails for that extra oomph.
Client Education: Teach Them So They Don't Destroy Your Hard Work
You just spent an hour and a half on that beautiful set of acrylics. Then your client goes home and buys a $2 drugstore metal file and butchers them. The horror. The disrespect. Before your client leaves your chair, hand them a business card and tell them exactly what file to use for maintenance. Better yet, sell them the correct file from your retail display. We have tons of Must-Have Spa Retail Products for Enhanced Client Experience that include professional-grade files. Educate them on grit. Tell them to stay away from the hardware store sandpaper files. Be the hero they need. You'll make money, and your art will survive longer than a weekend. Win-win.
The Bottom Line (Because We're All Busy People)
Here's the takeaway, and I want you to write this on your hand in Sharpie if you have to: Coarse files (80-150 grit) for acrylics only. Medium files (180-240 grit) for shaping natural nails and finishing acrylics. Fine files (240-400 grit) for buffing natural nails and removing scratches. Glass and metal for pros, emery for disposables. Don't cross the streams. Don't mix your files. And for the love of all that is holy, sanitize between clients. Now go forth and file like the professional you are. And when you inevitably run out of your favorite file, you know where to find us. We've got your back, your hands, and your sanity.
)