
Stay ahead of trends, they said. It will be fun, they said. Nobody mentioned that your Professional Gel Polish collection would turn into a collection of tiny, sealed treasure chests that refuse to open when you are already running five minutes behind. If you have ever found yourself eyeing a bottle of gel polish like it personally insulted your grandmother, you are in the right place. Every nail tech knows the drill: you reach for your favorite shade, give the cap a confident twist, and nothing happens. Then you twist harder, your knuckles turn white, and you start considering whether your client would notice if you just painted all ten nails the same boring nude instead. Let us fix that frustration once and for all.
Gel polish caps become difficult to open for one simple reason: gel got on the threads. That tiny bit of uncured or cured product acts like industrial-strength glue, bonding the cap to the bottle neck with the determination of a toddler clinging to a candy bar. The good news is that this problem is entirely preventable, and the even better news is that you do not need fancy gadgets or a degree in mechanical engineering to keep your caps twisting off like butter.
Why Gel Polish Caps Get Stuck in the First Place
Before we dive into solutions, let us understand the enemy. Gel polish is designed to cure hard. That is what makes it last two-plus weeks on your client and what makes it a nightmare when it dries in the wrong place. When you dip your brush back into the bottle, a tiny amount of product inevitably gets on the neck or the threads. If you do not wipe it away, that gel either cures under the lamp during your service or simply dries out over time. Either way, it creates a cement-like bond that makes the cap practically weld itself shut.
Some techs also make the mistake of over-tightening the cap. You want a good seal to keep the gel from thickening or evaporating, but cranking it down like you are closing a bank vault does not help anyone. A firm twist is plenty when the threads are clean.
The Five-Second Habit That Saves Your Fingers
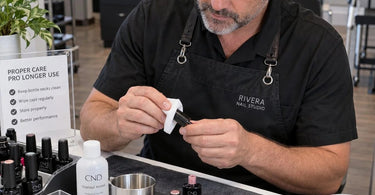
The single most effective thing you can do is also the simplest: wipe the bottle neck before you cap it. Every single time. Keep a lint-free wipe or a clean cotton pad at your station, and make it a reflex. After you finish using a gel, take two seconds to wipe the threads and the rim of the bottle clean. This removes any wet product before it has a chance to set up and turn into the aforementioned industrial adhesive.
While you are at it, wipe the inside of the cap too. Product builds up there as well, and a dirty cap is just as guilty as a dirty bottle neck. If you struggle to reach the threads inside the cap, a cotton swab dipped in a little isopropyl alcohol will do the trick without leaving fibers behind.
The Vaseline and Cuticle Oil Trick That Actually Works
Here is where things get fun. Once your threads are clean and dry, grab your Cuticle Oil or a tiny dab of Vaseline. Apply a very thin layer around the threads of the bottle neck before screwing the cap back on. This creates a protective barrier that prevents any stray gel from bonding to the cap. The next time you reach for that bottle, it will open with a satisfying twist instead of a wrestling match.
You do not need much. A little goes a long way, and too much will just make a mess. Think of it as greasing the wheels of a very tiny, very temperamental machine.
What to Do When a Cap Is Already Stuck (Do Not Panic)
Okay, so maybe you are reading this after the damage is done. The cap is stuck, your client is waiting, and you are eyeing the pliers with a dangerous glint in your eye. Put the pliers down. There are better ways.
First, try the rubber band trick. Wrap a thick rubber band around the cap to give yourself some grip, then twist. This simple addition gives you leverage without risking damage to the bottle or your hand.
If that fails, try a warm water soak. Turn the bottle upside down in a shallow dish of warm (not boiling) water for a few minutes. The heat softens the dried gel just enough to break the seal. Dry everything thoroughly before you open it, and never let water get inside the bottle.
For the truly stubborn offenders, a few drops of acetone around the cap threads can work wonders. Apply it carefully with a cotton swab and let it sit for a moment. Acetone breaks down cured gel, but be careful not to get it inside the bottle or on the label.
Storage Matters More Than You Think
How you store your gel polish affects how easily those caps open. Always store gel polish upright in a cool, dark place. Heat and light are the enemies of gel, and a hot, sunny windowsill will cause product to expand, leak into the threads, and create the very problem you are trying to avoid.
A drawer or a closed cabinet is ideal. Some techs keep their frequently used gels in a lint-free towel-lined drawer to keep them clean and protected. If you have a large collection, consider a dedicated storage box or a drawer organizer that keeps bottles upright and separated.
The Professional Products That Make Life Easier
Pure Spa Direct carries everything you need to keep your gel polish station running smoothly. Stock up on lint-free wipes, cotton swabs, and isopropyl alcohol for daily maintenance. If you are looking to upgrade your gel collection, explore our Professional Gel Polish options and pair them with Manicure Essentials to keep your station stocked and your clients happy.
For nail techs who work with a lot of gel, having the right Nail Brushes & Tools makes a difference too. A clean brush is easier to wipe on the bottle lip, which means less product where it does not belong.
Quick Recap: Your Gel Polish Cap Survival Guide
Wipe the bottle neck after every single use. Apply a thin layer of cuticle oil or Vaseline to the threads. Store bottles upright in a cool, dark place. Do not over-tighten. If a cap is stuck, try a rubber band, warm water, or a careful acetone application before you reach for the toolbox.
Your gel polish should be a source of gorgeous color and happy clients, not a source of hand cramps and muttered curses. A few seconds of maintenance after each use will save you minutes of frustration later, and your future self (and your fingers) will thank you.
)