
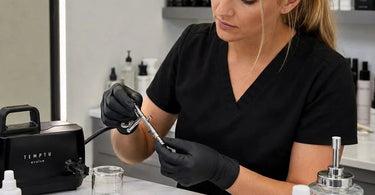
Innovation meets affordability in the world of professional beauty, but even the fanciest airbrush in your kit is just an expensive paperweight if you don't take care of it. Imagine this: you're about to create a flawless, red-carpet-worthy finish for a bride, you fire up your airbrush, and instead of a mist of perfection, you get a sad, sputtering blob of pigment that looks like your device has a cold. Or worse—you're moving from one client to the next, and while you're creating a masterpiece, you're also playing matchmaker between your previous client's bacteria and your new client's pores.
Gross, right? That's why we need to have a serious (but fun) chat about the gospel of airbrush cleanliness. As a professional, you know that your reputation is built on results and hygiene. A poorly sanitized Professional Makeup Airbrush isn't just a technical glitch; it's a walking biohazard and the fastest way to send a loyal customer running for the hills with a skin infection. At Pure Spa Direct, we're not just about selling the best gear; we're about empowering you to use it safely and effectively. So, let's dive into the nitty-gritty of keeping your spray gun spotless, because ain't nobody got time for a broken machine or a breakout.
Why Your Airbrush Needs a Spa Day (and Why It's Non-Negotiable)
Look, we get it. Cleaning your airbrush is about as fun as untangling a knot of extension cords after a long day. But skipping it is like going to bed without taking off your makeup—you might get away with it once or twice, but eventually, you're going to have a breakout. For an airbrush, that breakout looks like a clogged nozzle, a sputtering spray pattern, or a whole lot of bacteria moving in rent-free. When you don't clean your airbrush, you're basically creating a five-star resort for all sorts of germs, which can lead to a host of issues .
First and foremost, there's the health and safety of your clients to consider. Any equipment that touches a client's skin must be properly cleaned and disinfected to prevent cross-contamination . Imagine using a brush that still has a trace of the previous client's skin cells or oils—yuck. A build-up of residue provides a perfect environment for bacteria and mold to thrive, posing a serious risk of infection that could ruin a client's day and your reputation . Think of it as the beauty world's version of the common cold; we don't want to spread it!
Beyond the ick factor, there's the functionality of your favorite gadget. A clean airbrush is a happy airbrush. Old, dried-up pigment inside the nozzle is the enemy of a smooth, even finish. Residue will eventually lead to blockages that disrupt the spray pattern and cause color contamination—imagine doing a stunning rose-gold bridal look only to have flecks of last week's dark brown foundation appear because you didn't flush it out properly . Finally, and perhaps most importantly for your wallet, consistent cleaning extends the life of your machine. Pigment and other debris left to accumulate can corrode internal components, potentially leading to permanent damage. So, you can either spend ten minutes cleaning it or a couple hundred bucks replacing it. The choice is yours .
Assembling Your Airbrush Cleaning Arsenal
Before we get into the steamy action of cleaning, you need to have your tools ready. Don't go in unprepared like a contestant on a cooking show! You can't just spray it out with water and call it a day; that's like calling a wipe-down with a paper towel a 'deep clean.' To do the job right, stock up on these essentials:
- Distilled Water: This is your airbrush's favorite drink. Tap water has minerals that can build up inside the delicate mechanisms .
- 70% Isopropyl Alcohol or a Dedicated Airbrush Cleaner: The knight in shining armor against dried pigment and bacteria .
- Cotton Pads and Cotton Swabs: Your gentle yet effective scrubbing tools for reaching every nook and cranny .
- Small Cleaning Brushes: Perfect for gently scrubbing out the tiny parts, like the cup and the nozzle .
- Paper Towels or a Clean, Lint-Free Cloth: For wiping down parts and spraying out cleaner. You don't want to get lint inside your freshly cleaned airbrush .
- Disposable Gloves: While not strictly for cleaning the machine, this is a good practice for you to keep your hands clean, especially if you're prepping for a client .
The Post-Service Quick Clean (Because We're Busy People)
This is the 'daily floss' of the airbrush world. You need to do it after every single client to prevent pigment from drying and becoming a stubborn, crusty monster. It's a quick, five-minute process, but it will save you a massive headache later. Think of it as your "I'm not going to be a biohazard" routine.
First, take a cotton pad and soak up any remaining pigment from the cup. You don't want to flush a whole bunch of product down the drain. Next, fill the cup with your Distilled Water and spray it through the gun onto a paper towel until the water runs clear of any visible pigment. This is the first step to a clean system .
Now for the secret sauce: the back flush. Fill the cup with clean water, place your finger or a folded paper towel over the nozzle, and pull the trigger. Don't release it! You'll see bubbles start to form in the cup as the air pushes back through the fluid path. This is the magic that dislodges any tiny pigment particles hiding in the deep recesses of the airbrush. Do this for about 10 seconds, dump the water, and repeat until the water in the cup is completely clear .
Finally, fill the cup with your 70% isopropyl alcohol or dedicated airbrush cleaner. Spray this through the system until the cup is empty. This sanitizes the internal pathway and ensures no germs are lingering. Give the outside of the airbrush a quick wipe, clean the needle cap and nozzle cap, and you're ready for your next masterpiece .
The End-of-Day Deep Clean (The Full Monty)
This is the spa day your airbrush deserves at the end of a long, hard day. It's the thorough scrub-down that prevents wear and tear and keeps the machine in tip-top shape. You've already done the quick clean, but now it's time to take it apart (gently, like you're diffusing a bomb).
First, follow all the steps of the quick clean. Once that's done, it's time for disassembly. Carefully remove the needle cap, the nozzle cap, and the metal cup . Place these delicate parts into a small glass or dish filled with your alcohol or airbrush cleaner and let them soak for a few minutes. This will dissolve any stubborn, dried-on pigment .
While the parts are soaking, take a cotton swab dipped in alcohol and gently clean the needle. Be extra, extra careful here—the needle tip is very sharp and fragile; you don't want to bend it. Also, use a cotton swab to clean the opening of the gun where the needle and nozzle go. There is often a surprising amount of gunk hiding in there. After the parts have soaked for a bit, take them out, use a small brush or cotton swab to gently scrub away any remaining residue, and dry each piece with a paper towel .
Now, put everything back together, making sure each part is aligned and secure . To be safe, do one final flush with a small amount of cleaner or water to confirm the spray is clear and the gun is functioning correctly. You're done! It's a little more work, but your future self (and your equipment) will thank you.
Pro Tips for a Pristine Airbrush
Here are a few extra nuggets of wisdom to make sure you stay on top of your airbrush game:
- Always Use Fresh Makeup: Never mix your professional makeup with anything unless it's specially formulated for airbrushes. It can cause blockages and bad reactions .
- The Needle is Gold: Seriously, that tiny needle is the heart of your airbrush. Bend it, and the whole machine is compromised. Always handle it with care .
- Don't Forget the Outside: While you're scrubbing the internal bits, give the body of the airbrush a good wipe-down with a disinfectant. You touch it, your client's skin might brush against it—keep it clean.
- Store it Properly: Once it's clean, don't just toss it in a drawer. Store it in a clean, dry place to prevent dust from getting into the nozzle and ruining all your hard work .
Sanitizing your professional makeup airbrush isn't just a chore; it's a ritual. It's about respect for your craft, your clients, and your tools. At Pure Spa Direct, we know you're an artist, and artists take care of their brushes. We're here to support you with top-notch supplies, from Professional Cleaners & Disinfectants for Salons and Spas to a full range of Professional Salon Equipment.
Keep your airbrush clean, your clients happy, and your art flawless. Now go out there and create some beauty! Remember, a clean gun is a happy gun. You've got this, girl!
)