Take your business to the next level with the ultimate time-saving tool every nail tech needs: the Nail Polish Drying Fan. No more frantic hand-waving, no more accidental smudges—just flawless, dry nails in minutes. If you’ve ever had a client ruin their fresh manicure by reaching for their purse too soon (we’ve all been there), this little gadget is about to become your new best friend. Let’s dive into how to use it like a pro and keep those nails looking pristine.
Whether you’re a seasoned nail artist or just starting out, a nail polish drying fan is a game-changer for your salon. It’s not just about speed—it’s about delivering a flawless finish every time. Plus, your clients will love the luxury of a quick-dry service. Ready to banish smudges forever? Let’s get into the nitty-gritty.
Why Every Salon Needs a Nail Polish Drying Fan
First things first: why should you add this to your Professional Nail Care Collection? Simple. Time is money, and nothing kills the vibe of a perfect manicure like a smudged thumb. A drying fan speeds up the process, reduces errors, and keeps clients happy. Plus, it’s a great upsell—offer a "speedy dry" add-on for those on-the-go clients who can’t sit still for long.
Step-by-Step: How to Use Your Nail Polish Drying Fan Like a Pro
Using a nail polish drying fan is easy, but there are a few tricks to maximize its effectiveness. Here’s the step-by-step breakdown:
- Prep the Nails: Complete the manicure as usual—base coat, polish, top coat. Pro tip: Use a longwear nail polish for even better results.
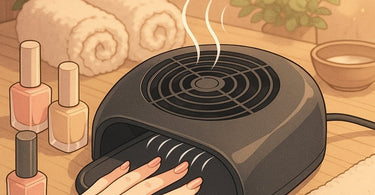
- Position the Fan: Place the fan about 6-8 inches away from the client’s hands. Too close, and you might disrupt the polish; too far, and it won’t be effective.
- Turn It On: Set the fan to a low or medium setting. High speed can cause polish to dry unevenly or create bubbles.
- Timing Is Everything: Let the fan run for 2-3 minutes per hand. For gel polish, follow up with a LED lamp to fully cure.
- Final Check: Gently tap a nail to ensure it’s dry before sending your client on their way.
Pro Tips for Maximizing Your Drying Fan’s Potential
Want to take it up a notch? Here are some insider secrets:
- Pair with a Quick-Dry Top Coat: Combine your fan with a fast-drying top coat for unbeatable results.
- Keep It Clean: Dust and polish particles can clog the fan. Wipe it down regularly with a damp cloth.
- Offer a "Luxury Dry" Service: Add a spritz of cuticle oil after drying for a premium touch.
Common Mistakes to Avoid
Even the pros make mistakes. Here’s what not to do:
- Rushing the Process: Don’t skip layers or assume the fan replaces proper drying time between coats.
- Using High Heat: Some fans have heat settings—avoid them! Heat can warp polish and cause shrinkage.
- Ignoring Client Comfort: Make sure the airflow isn’t too intense. No one likes a chilly breeze on their fresh nails.
Upgrade Your Nail Station Today
Ready to add a nail polish drying fan to your nail table setup? Your clients (and your sanity) will thank you. Say goodbye to smudges and hello to efficiency—because every minute saved is another minute you can spend perfecting those nail art designs or sipping that well-deserved iced coffee.
For more must-have tools, check out our Manicure Essentials collection. Happy drying!